
|
Page << Prev | 1 | 2 | 3 | 4 | 5 | 6 | 7 | 8 | 9 | 10 | 11 | 12 | 13 | 14 | 15 | 16 | 17 | 18 | 19 | 20 | 21 | Next >> Yurt / Ger Diarywritten by Rene K. Mueller, Copyright (c) 2005, 2006, 2007, 2008, 2009, last updated Sat, January 3, 2015 25. 11. 2006: Roof Thermal Insulation Put UpToday again an incredible warm day for November, 18°C with föhn, walking in shorts and t-shirt - ideal weather, lightly overcast sky.The bubblewrap layer I wanted to keep for protecting the new PE rain cover I ordered and got, but the föhn, a warm wind from the south, teared it my lanes I taped before apart again, so I put up the straw filled segments direct on the interior cotton, knowing dust will go through the cotton and later at the evening it was confirmed on my desk, slight dark dust. I will see if there will be more the next days, anyway. Due to heavy or strong quilting I did the width of the segments were more narrow than calculated, and so I put up all 13 segments, and still apprx. less than 1/4 uncovered, the bubble-wrap layer in lanes I patched together again and cover the remaining roof, it will function as pseudo-window, just bringing the daylight into the yurt. Since this evening is very mild, still 15°C outside and inside I can't tell how good the straw-based insulation actually is, the next weeks will tell.
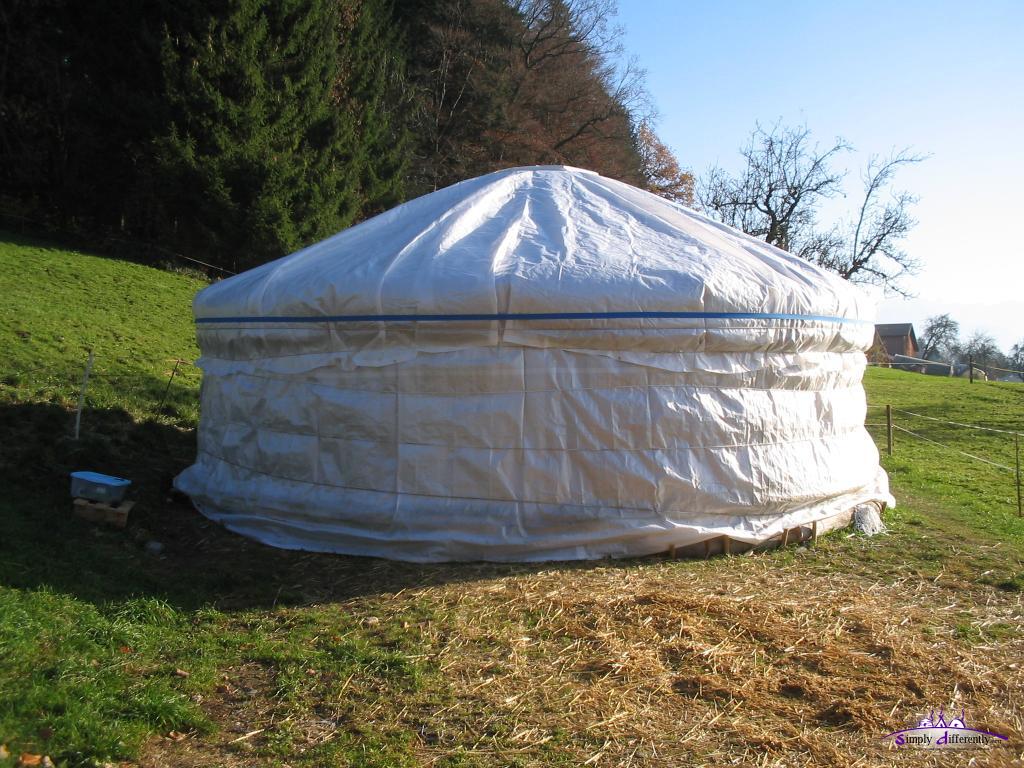
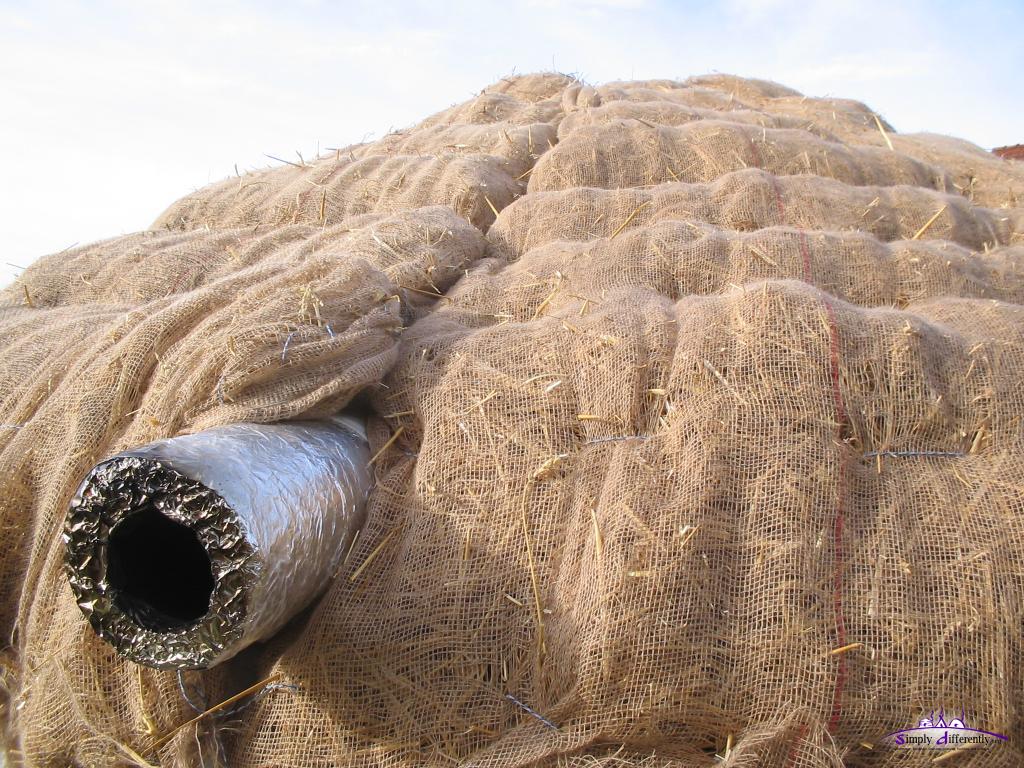 Starting around the stove pipe, wrap it around 2006/11/25 10:16 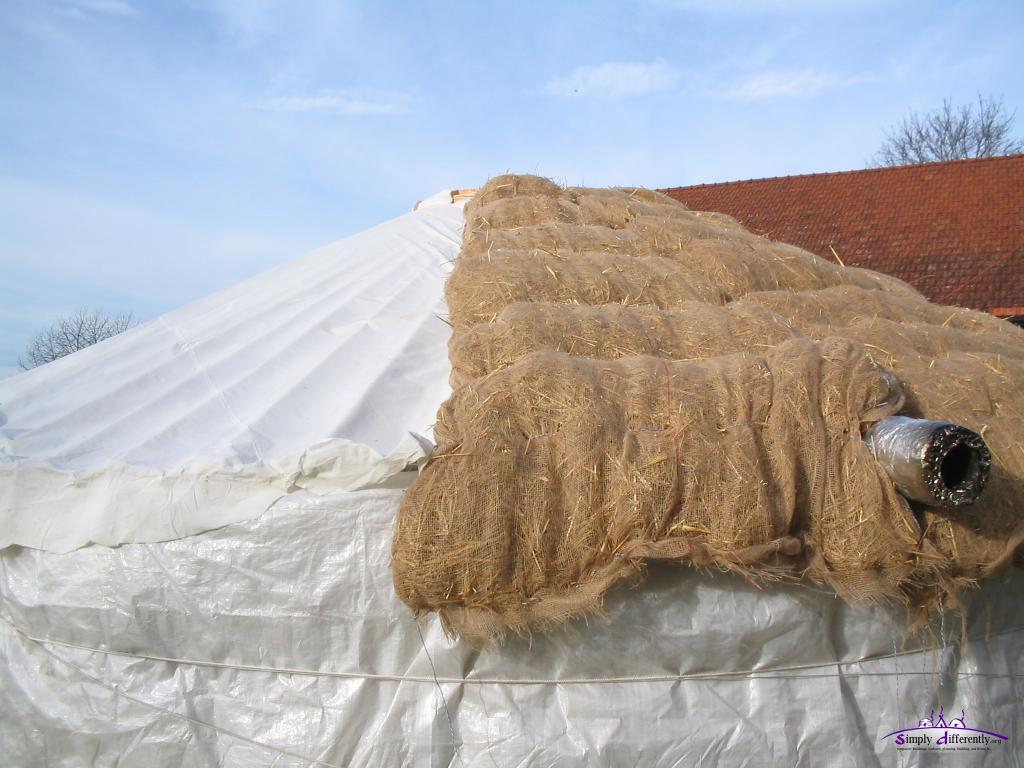 Segment for segment . . . 2006/11/25 10:16  All 13 segments put up ... 2006/11/25 11:59 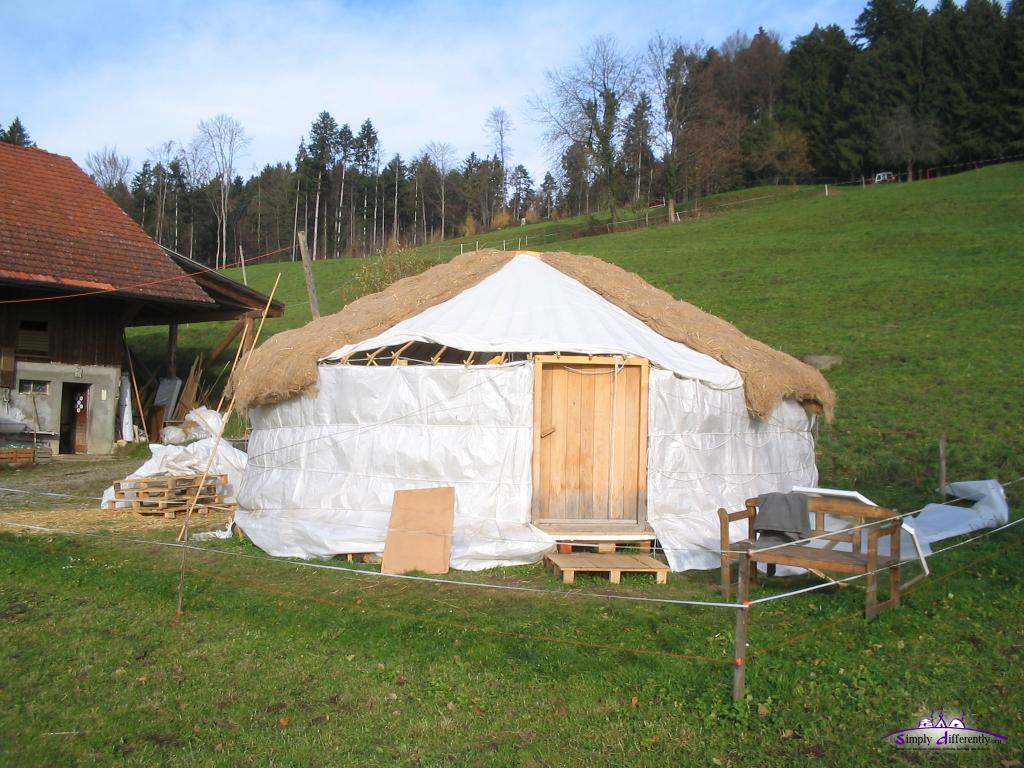 Leaving less than 1/4 of the roof for transparent bubblewrap (aprx. 8 layers) to have daylight enter 2006/11/25 12:00 Ready for the Winter
So the current roof setup is:
The PE functions as 100% water resistance (for apprx. 12 months before little holes appear due to UV and therefore porousity), also functions as 100% humidity blockage - all humidity either goes into the straw (which will eventually make the straw insulation unuseable) or leaves the yurt at the skylight or opened door. In other words, this setup requires air circulation from inside to outside and vice-versa - so far this happened by itself as the yurt isn't 100% air tight, openings are at the skylight and around door, and I will look where I make those openings air tight and make a more controlled air holes (e.g. near bed and stove). 17. - 20. 11. 2006: Mild Days in November, Finished Roof SegmentsSunny days, and temperatures up to 20°C with the support of föhn - still hand sewing the jute blankets for the roof, 12 or 13 of them. Finally finished them, took 1.5 to 2 hours per segment; for the wall I used 5 strawbales, and for the roof 7 strawbales, each strawbale 17kg, which makes apprx. 110kg just on the roof, 85kg on the wall, total 195kg. This goes away from the threshold when snow remains on the roof, which with a steeper roof shouldn't be much anymore when using PE as rain cover where snow slides very well. I haven't thought so much about the additional weight, but now it seems far more than I expected - so, I going to add more stabilization as
and then I put up the new roof insulation, and finally when the rain cover goes over it I use an additional strong ribbon outside to strengthen that part further. Since I used flexible binders for the lattice wall junction, except the top junction which I bind with cords - we will see (!!) if the lattice wall is able to carry 200kg plus some snow. Each roof segment is 8.5kg (1/2 strawbale), laying on 5 roof poles (1.71kg per pole) - or 200kg (roof + wall insulation) on 64 twin lattice wall laths, which makes 3.125kg per twins, yet the wall blankets partially distribute the weight among the lattice wall, so not full weight is pulling on the lattice wall top junctions. To sum up:
I gonna replace the PE rain cover, as it has too many tiny leaks and the bubblewrap collects underneath too much water. Once the weather allows it I will put up the roof segments and replace the rain cover as well. So the setup of the roof will look like this:
11. 11. 2006: Working on Roof Straw Filled Jute Blankets
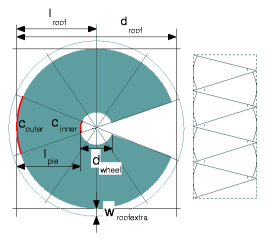
lroof - dwheel/2 = lpole = lpie = 2.88m, but I have apprx. 3-4cm extending roof pole, and the wall thermal insulation hangs a bit, so I make it 3.20m to be on the safe side. I have jute 100m x 1.8m wide again. I have to do 12 or 13 of those slices:
and
As I previously experienced, with 10cm thickness width and height require additional 20cm, so the slice has following dimension:
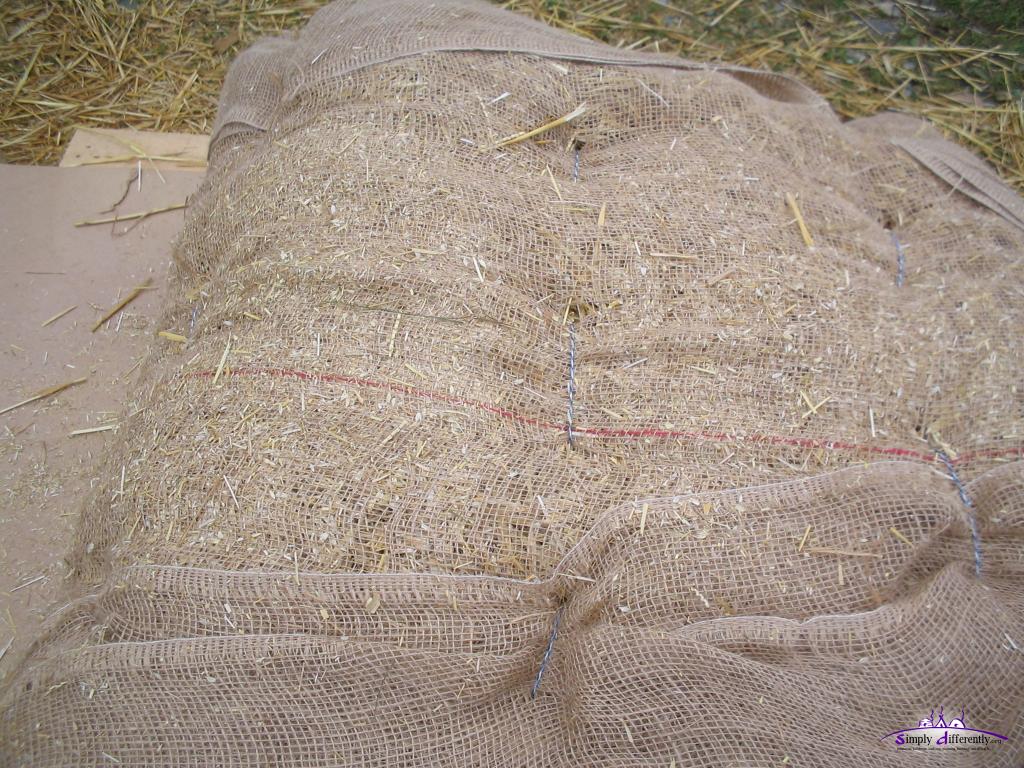
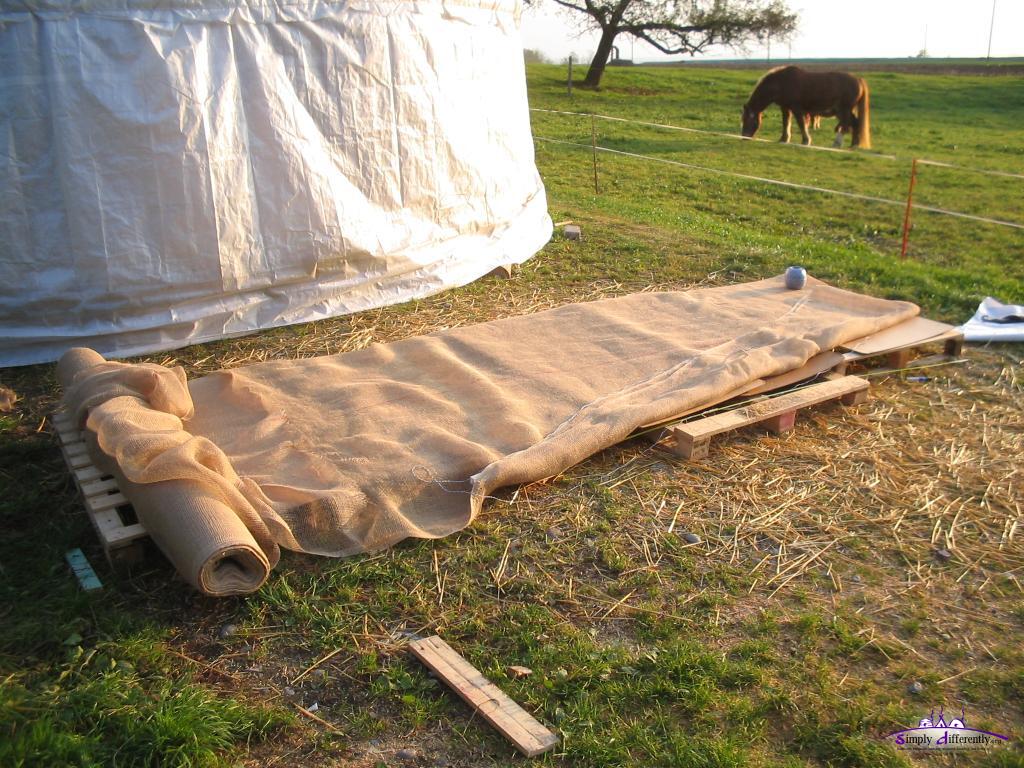 Laying out jute for roof insulation (pieslice-wise), using timber to fold one side to sew 2006/11/10 14:52 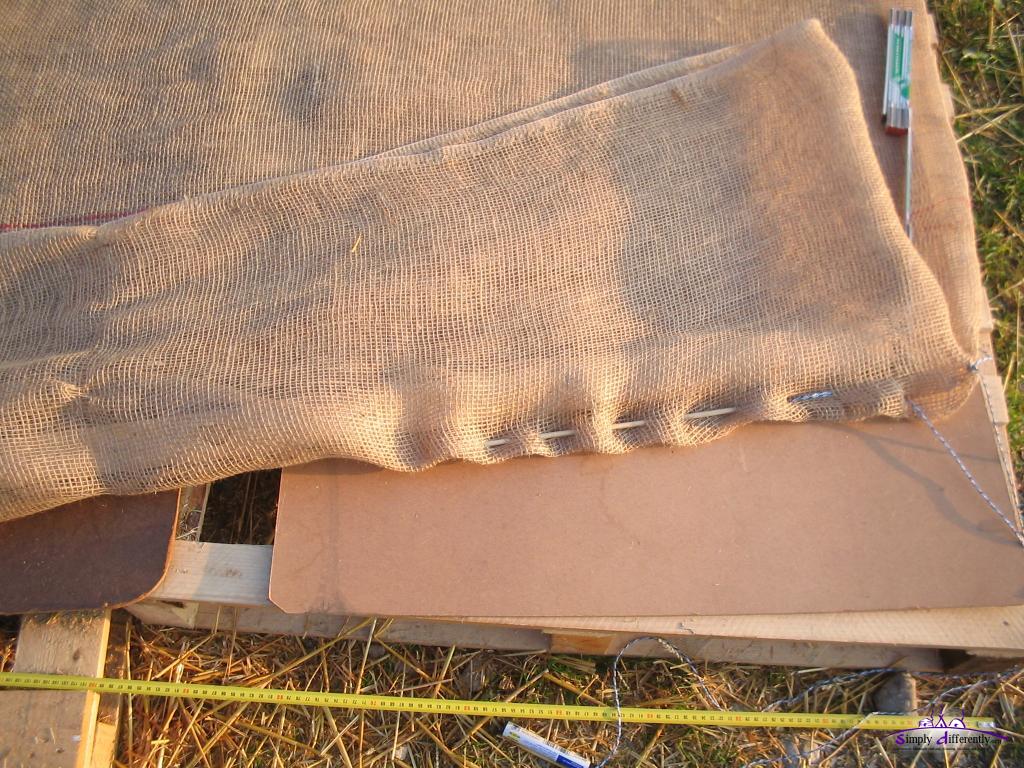 Sewing with cord (2mm thick) and handmade needle, "straight through waved" 2006/11/10 14:54  2006/11/10 14:57 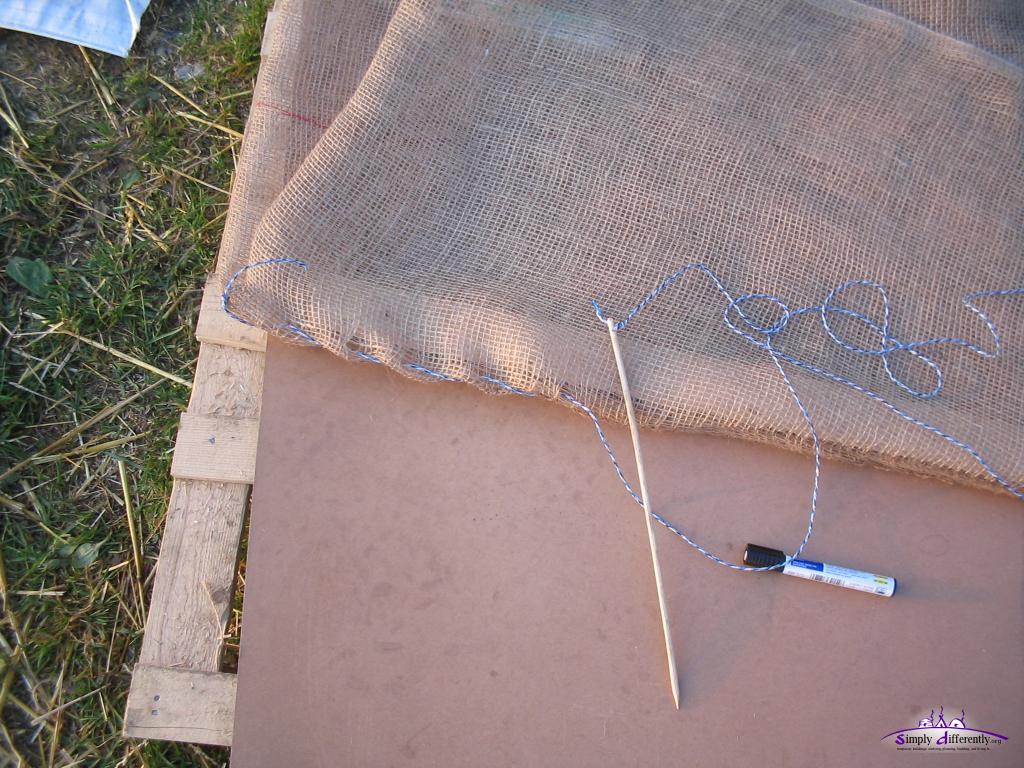 Sewing with coord (2mm thick) and handmade needle, "spiral waved" 2006/11/10 15:11 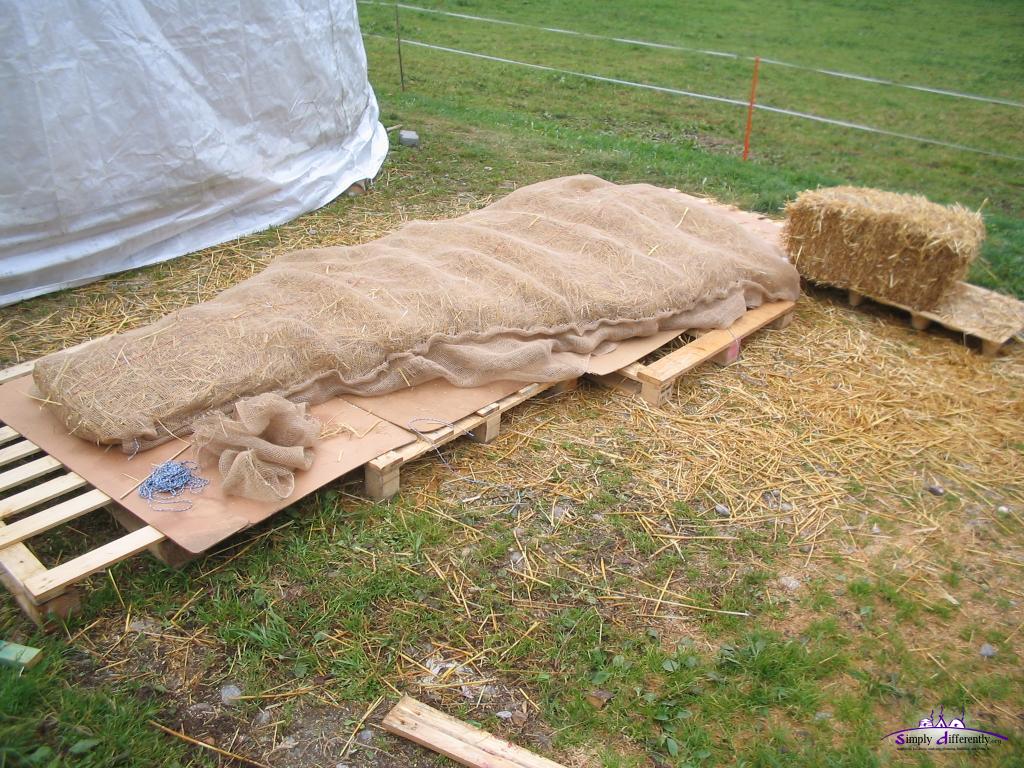 Filled straw in the finished sewed blanket 2006/11/11 09:28 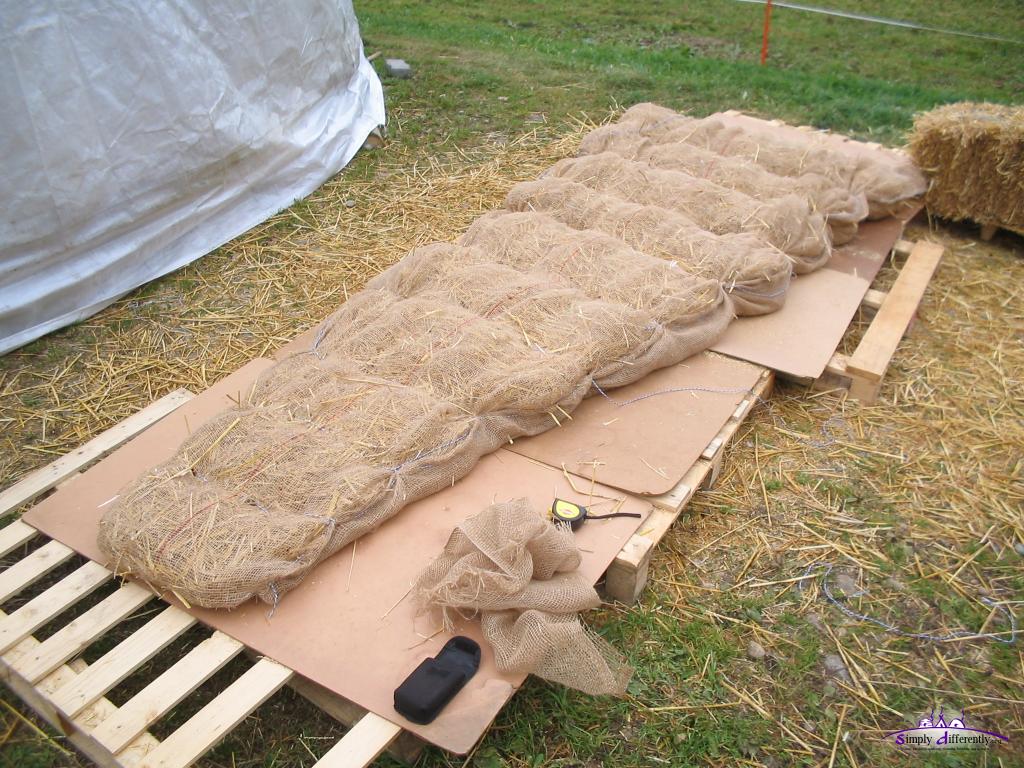 Finished quilted (aprx. each 20-30cm) 2006/11/11 10:16 Some numbers which may help you as well, in case you consider this approach as well:
I could only finish two slices for today, as it started to rain around noon and I had to stop working on them. I hope during the week I get chance to work further and finish all by next weekend if all goes well. But I also still enjoy the bright interior of the yurt as PE and light interior roof cotton canvas I use keep it daylight bright inside, and when putting up the thick thermal insulation will make it darker, how much I will see.
I finished the pipe installation and slightly changed the setup, now the pipe goes 45° from the stove up to the roof/wall junction, and then horizontally outside. I insulated the pipe at the wall/roof junction with one layer of glass wool (2cm thick, 100cm x 80cm), and wrapped it around apprx. 2-3 times, then used thin wire to fixate it, and then wrapped aluminium or tin foil around it, and then taped it with clear tape.
The day before yesterday I did a small fire with some saw leftovers, but tonight I used "regular" stove wood from the farmer to heat the yurt despite not being finished with thermal insulation. It's nice!
4. 11. 2006: Continuing Straw Blankets, Finishing WallAnother wonderful day, clear sky - the night was again below 0°C but with the sun it warms up quickly again inside and outside in the sun it feels much warmer - a good day to work outside. I made the blankets a bit more than 3m each, total 5 blankets required for the remaining 15m wall circumference. Once I'm done the 4 blankets I measure the required remaining wall piece/blanket. Finally made the 5th blanket, also a bit over 3m again, and overlap all blankets 5-10cm. I used some garden fixation binders, very useful. 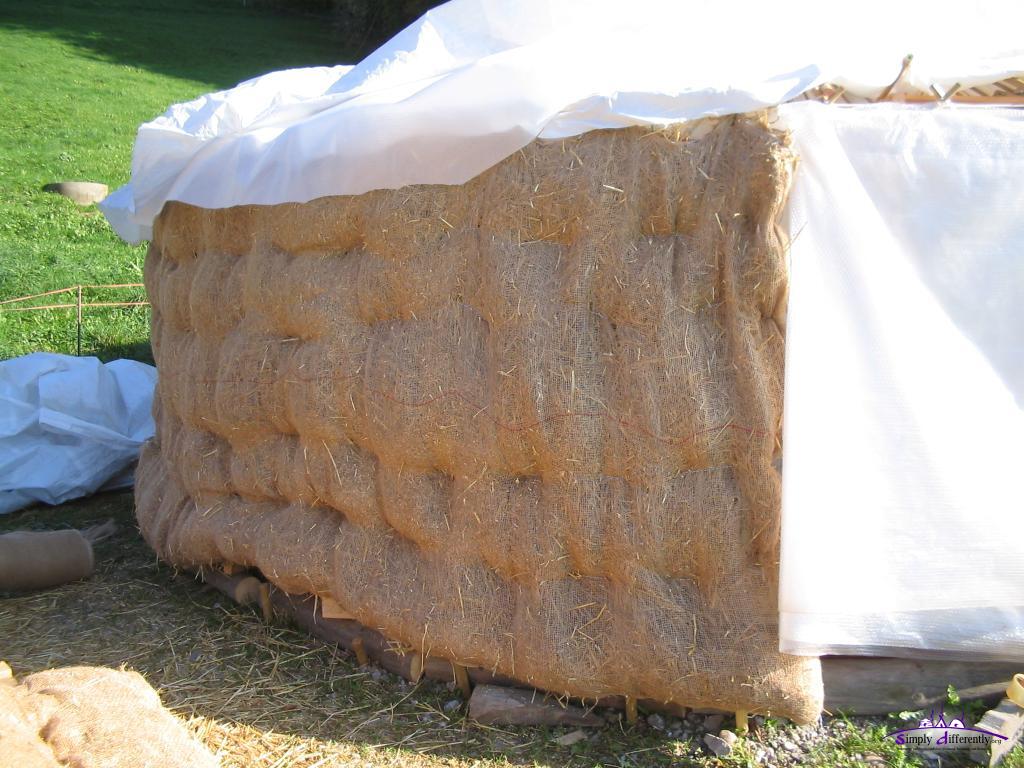 First straw filled jute blanket 2006/11/04 11:42 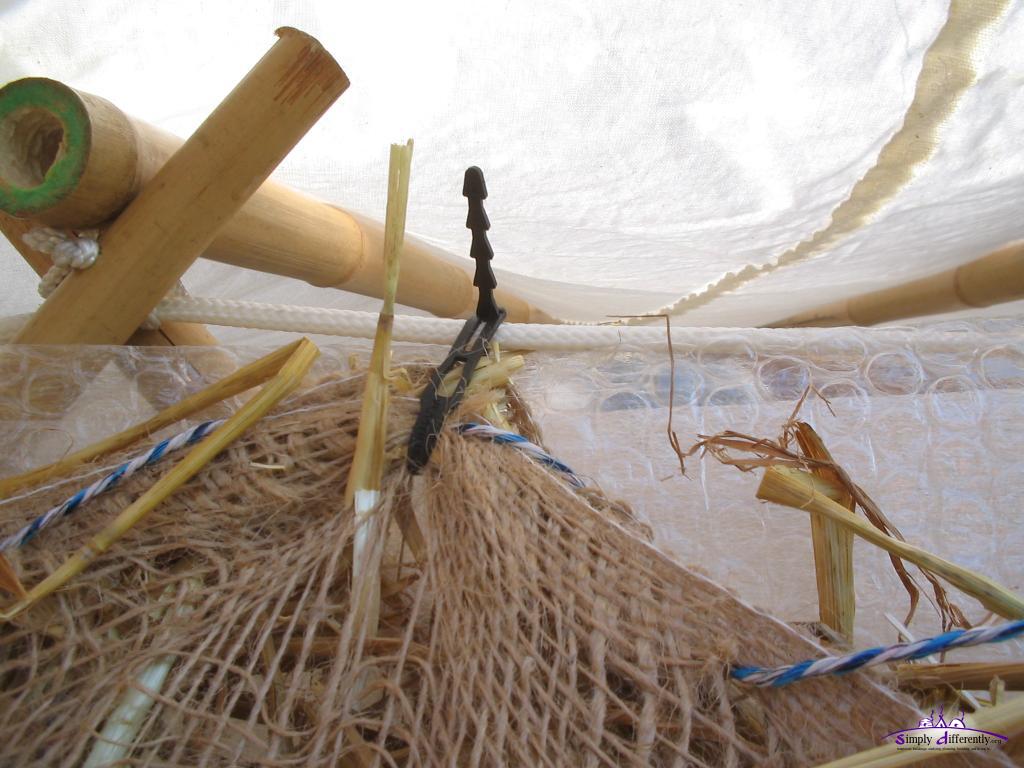 Fixation binder, very useful (Closeup) 2006/11/04 11:42 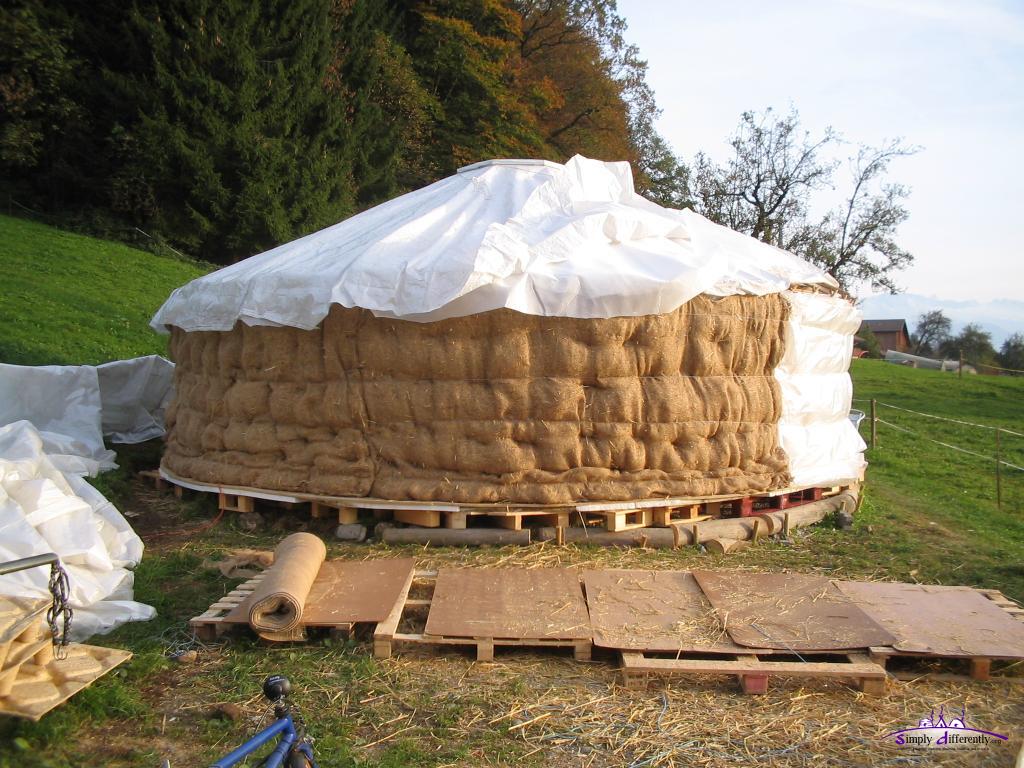 2006/11/04 14:52 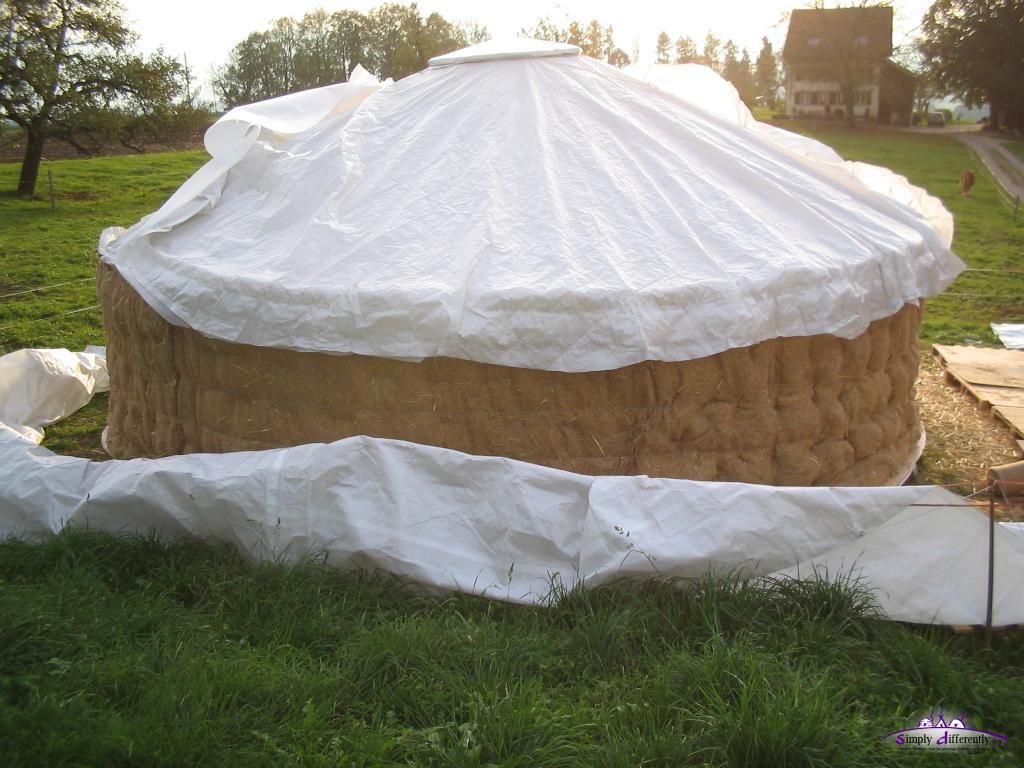 All straw filled blankets done (2) 2006/11/04 14:53 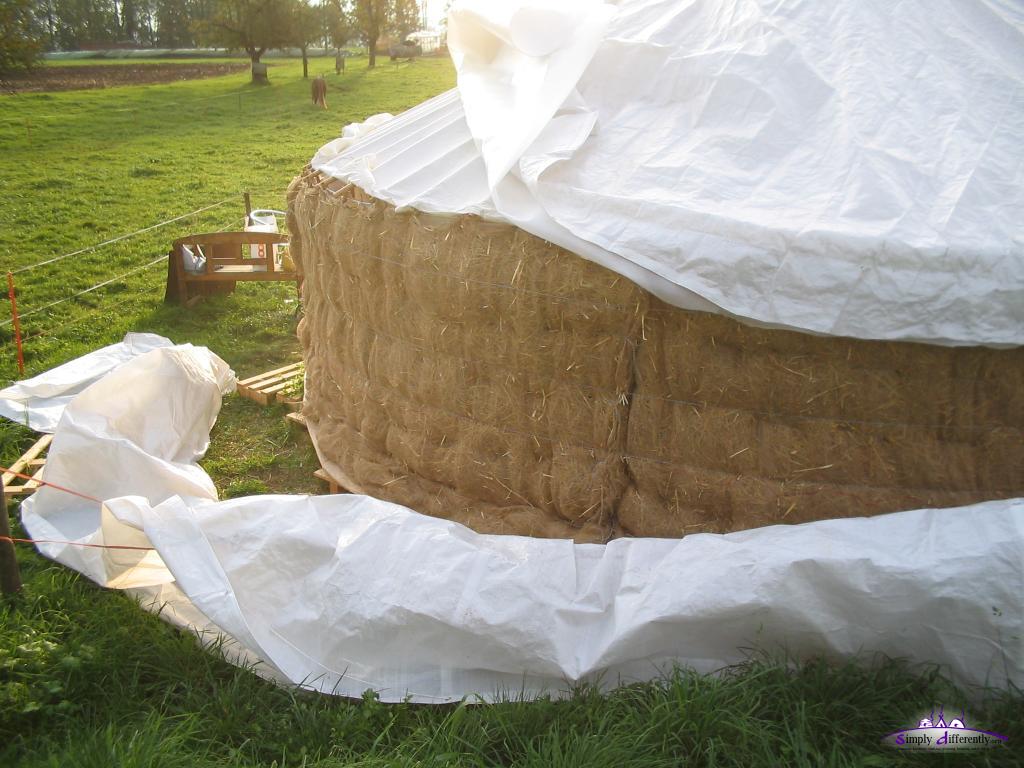 All straw filled blankets done (3) 2006/11/04 14:53 Addtionally I used 4 cords to tie them all around at different heights to increase stability of the straw blankets. Finally I added some leftover bubblewrap to most of the wall, before I added the wall rain cover preliminary again, as tomorrow I likely have to take the wall rain cover down again when I put up thermal insulation on the roof. The next days I do the roof thermal insulation, also with straw filled jute blanket in shape of a pieslice. Page << Prev | 1 | 2 | 3 | 4 | 5 | 6 | 7 | 8 | 9 | 10 | 11 | 12 | 13 | 14 | 15 | 16 | 17 | 18 | 19 | 20 | 21 | Next >> Content:
|


| Home | · | About | · |  Tipi | · |  Yurt | · |  Dome | · | Features | · | Gallery |


Creative Commons (CC) BY-SA-NC 2005-2017, developed, designed and written by René K. Müller
Graphics & illustrations made with Inkscape, Tgif, Gimp, PovRay, GD.pm
Web-Site powered by FreeBSD & Debian/Linux - 100% Open Source