|
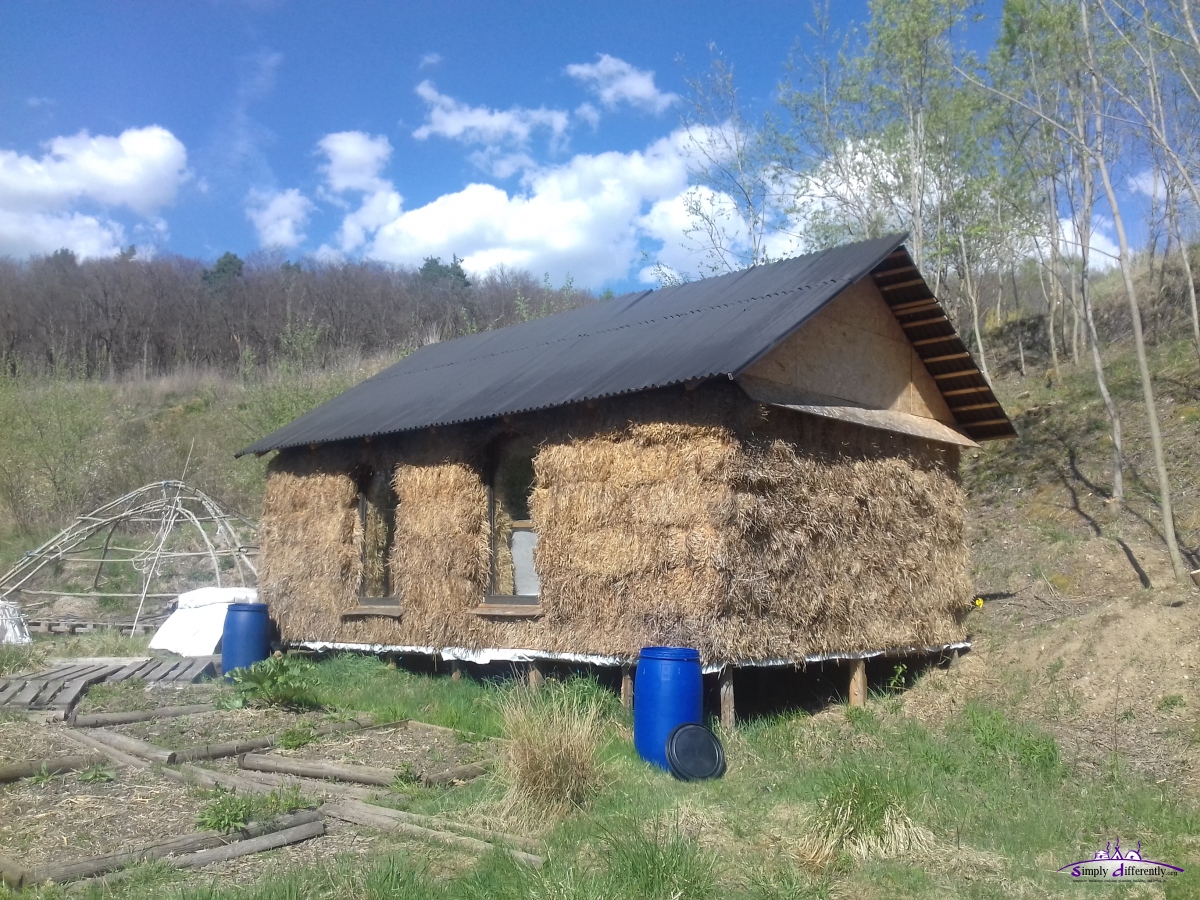
Strawbale Cabinwritten by Rene K. Mueller, Creative Commons CC BY NC 2014, 2015, 2020, last updated Sat, July 18, 2020
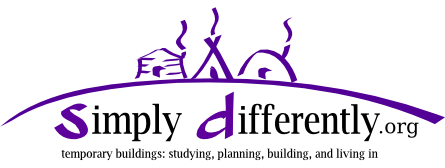
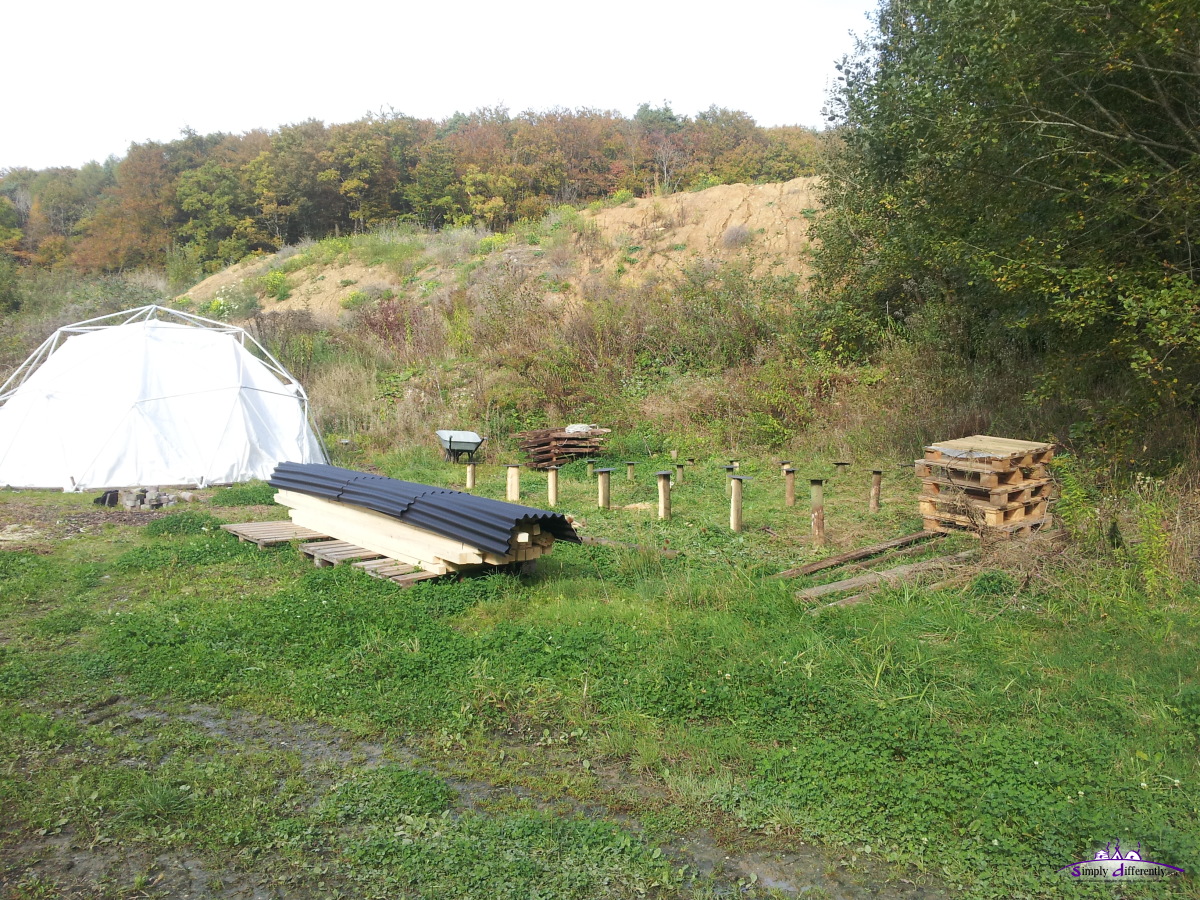
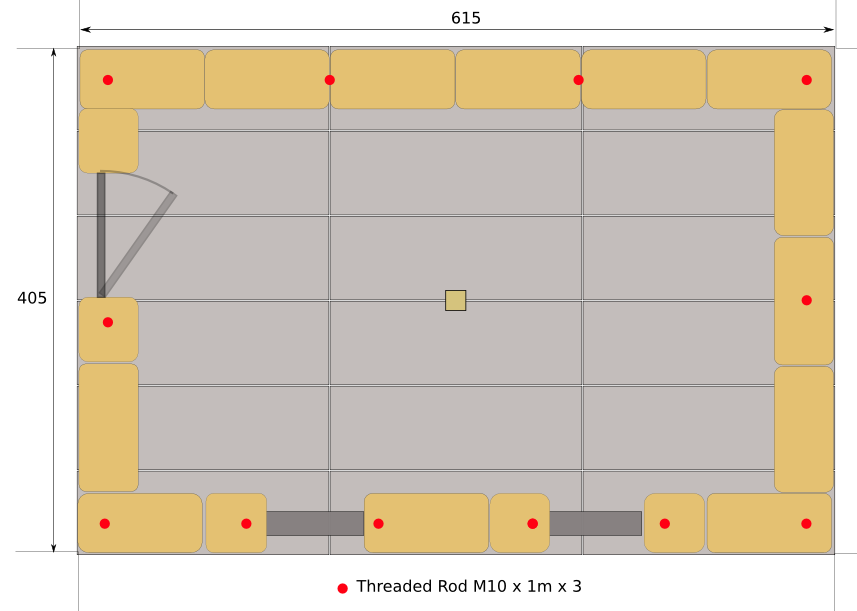
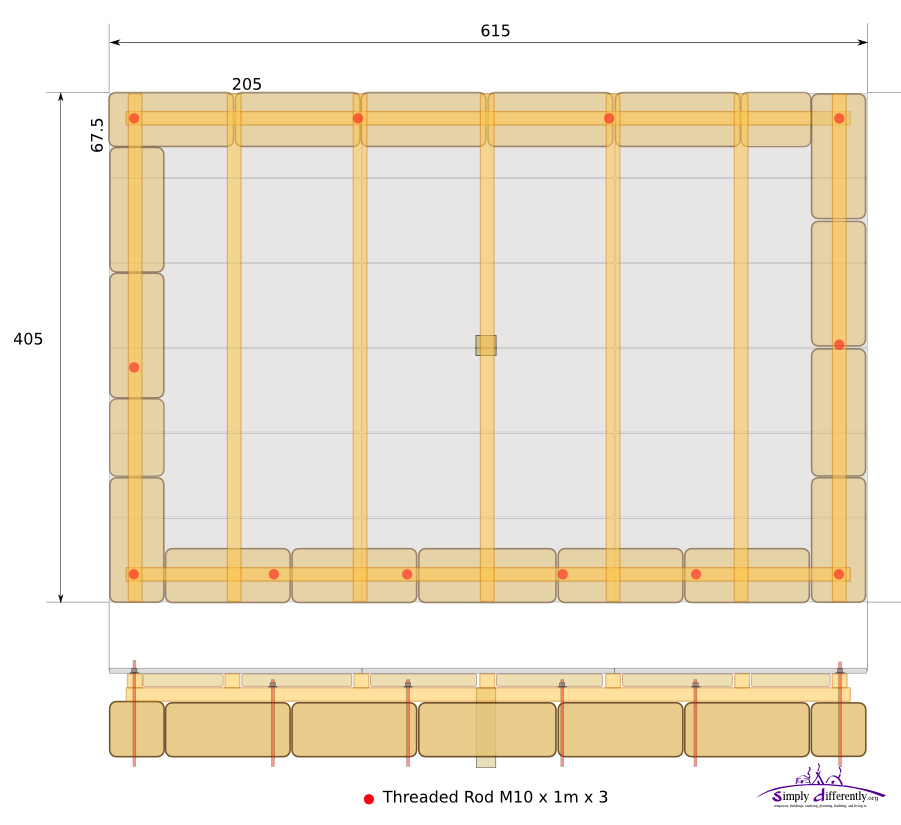
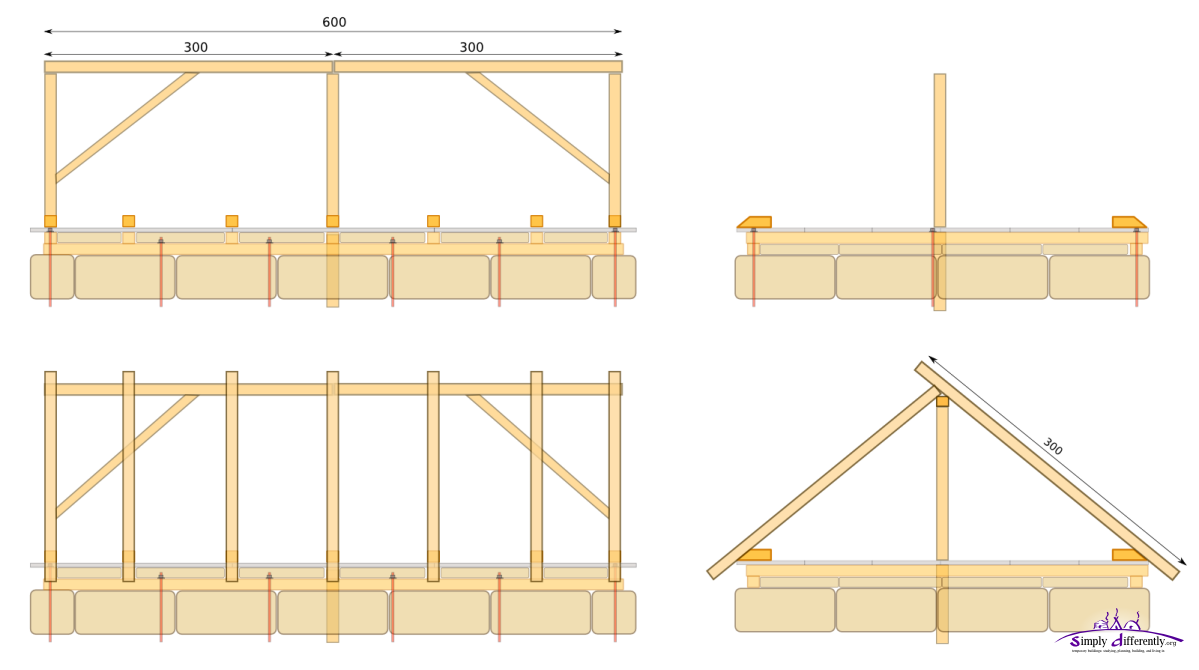
The main idea is to be modular and cutting as little parts as possible of common sized timber, like 3m and 4m long beams, and maintain bare strawbales, inside and outside and see how it does. The main measures are based on the OSB/MDF, in my case I used 22mm thick 2050mm x 675mm OSB/MDF, and I ended up with roughly 4m x 6m, or to be exact: 3 x 6 x OSB 2050mm x 675mm = 6.15m x 4.05m floor size, the room height is around 2.20m. Reminder for non-metric people: 1m (meter) = 100cm (centimeter) = 1000mm (millimeter) Plans
Numbers
MaterialStrawbales
Solid Wood
OSB
Misc
Prices as of 2014/10, wood & OSB from Bauhaus.info ReflectionI started to plan the cabin with the idea for a single person to build it, and test some of the wall construction methods. Due to logistic issues like belated arrival of strawbales, the late fall and more humid and rainy days cut the experimentation period short and I had to accept help by two people.
I estimated the material cost about ~1500 Euro overall, given you have the basic tools for construction, and door and windows are already available. It took 9x afternoons (~4 hrs), or ~4 1/2 days to raise the cabin with the roof complete, apprx. 2-3 persons worked on it. A single person might work 10-14 days on it, an experienced person a few days less.
So far this has been the most "solid" temporary building I did, and also the first were I had to accept help from others to actually raise the building,
with domes, tipi and yurt, you can raise it as a single person (up to 6m diameter of those). With some patience and dedication one can build a strawbale cabin as a single person as well,
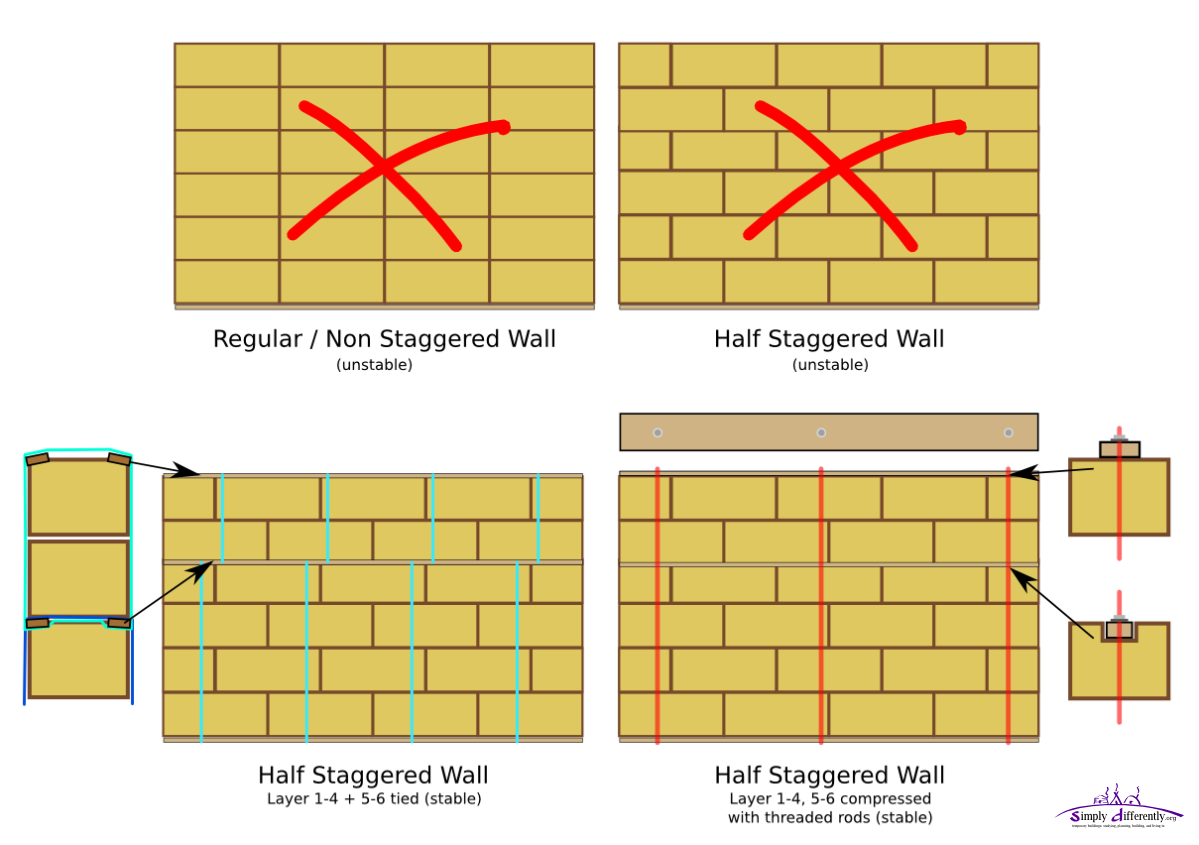
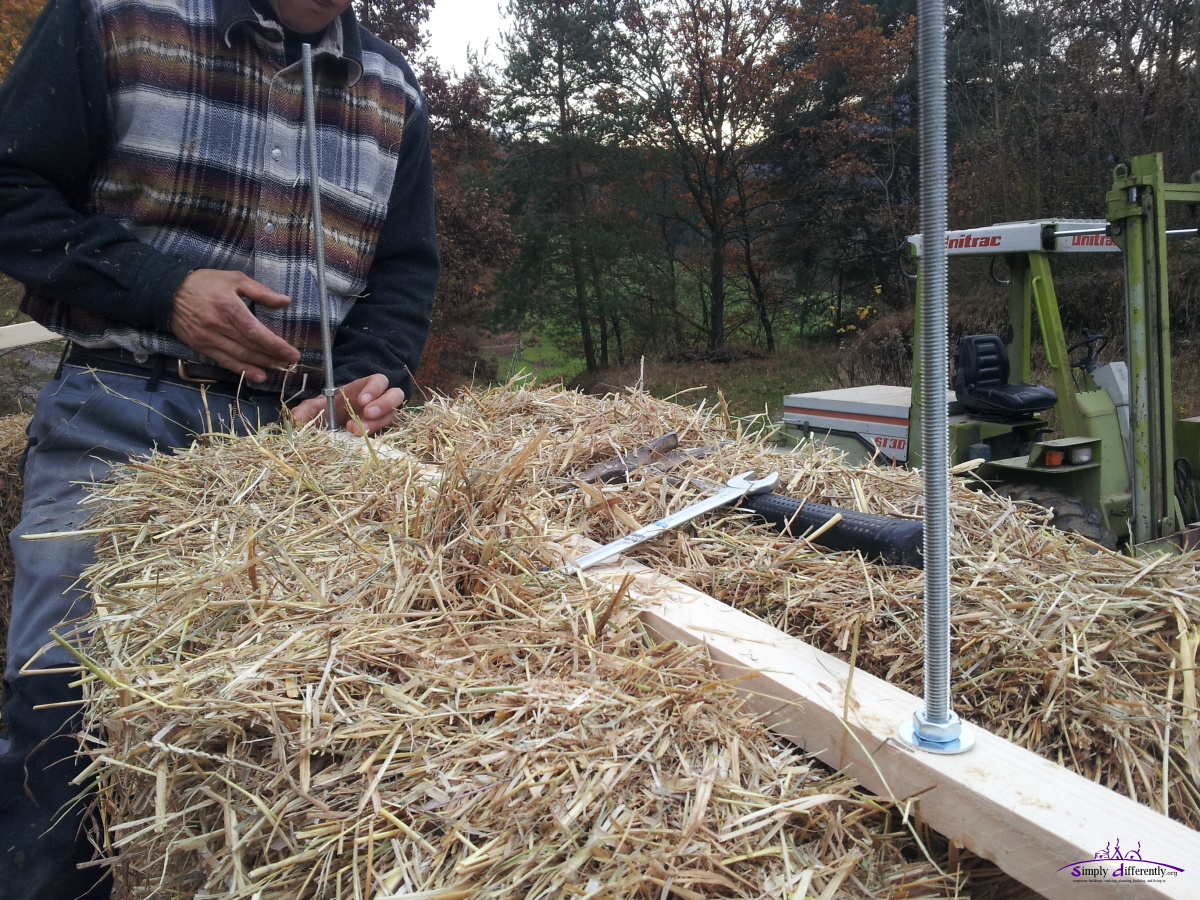
e.g. by compressing the wall with cords instead of threaded rods as I did, and this way simplify the manual handling when positioning the bales.
 2014/10/12 14:54 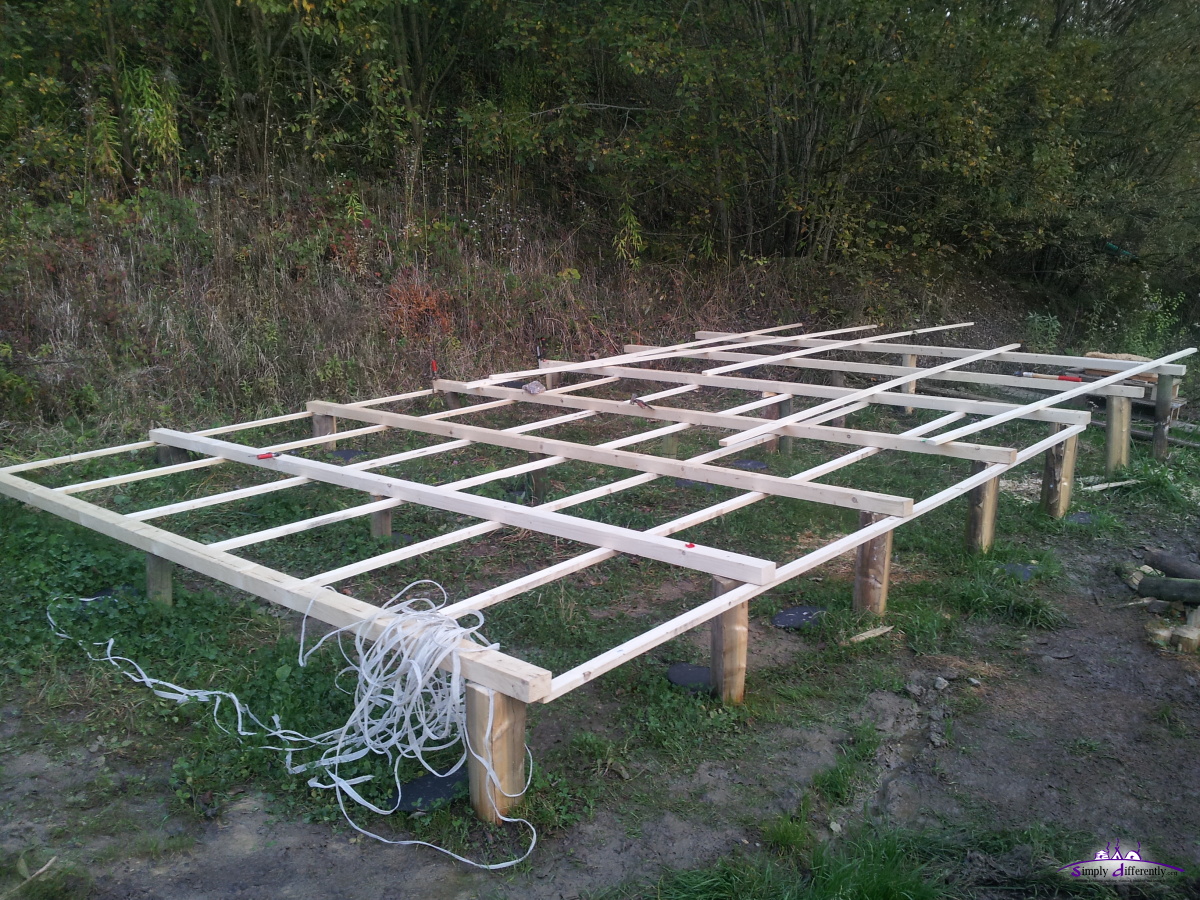 2014/10/30 16:51  2014/11/02 15:29 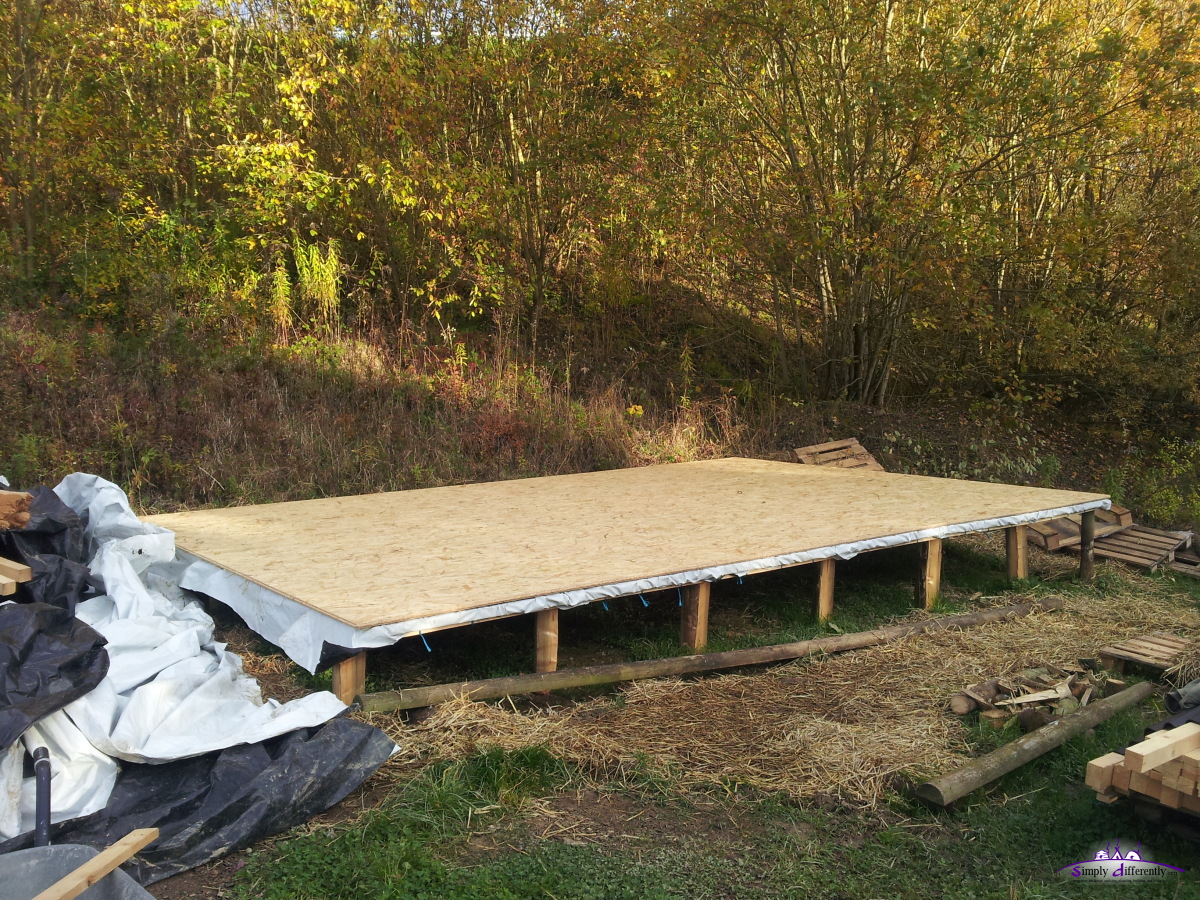 2014/11/04 15:34  2014/11/19 14:02 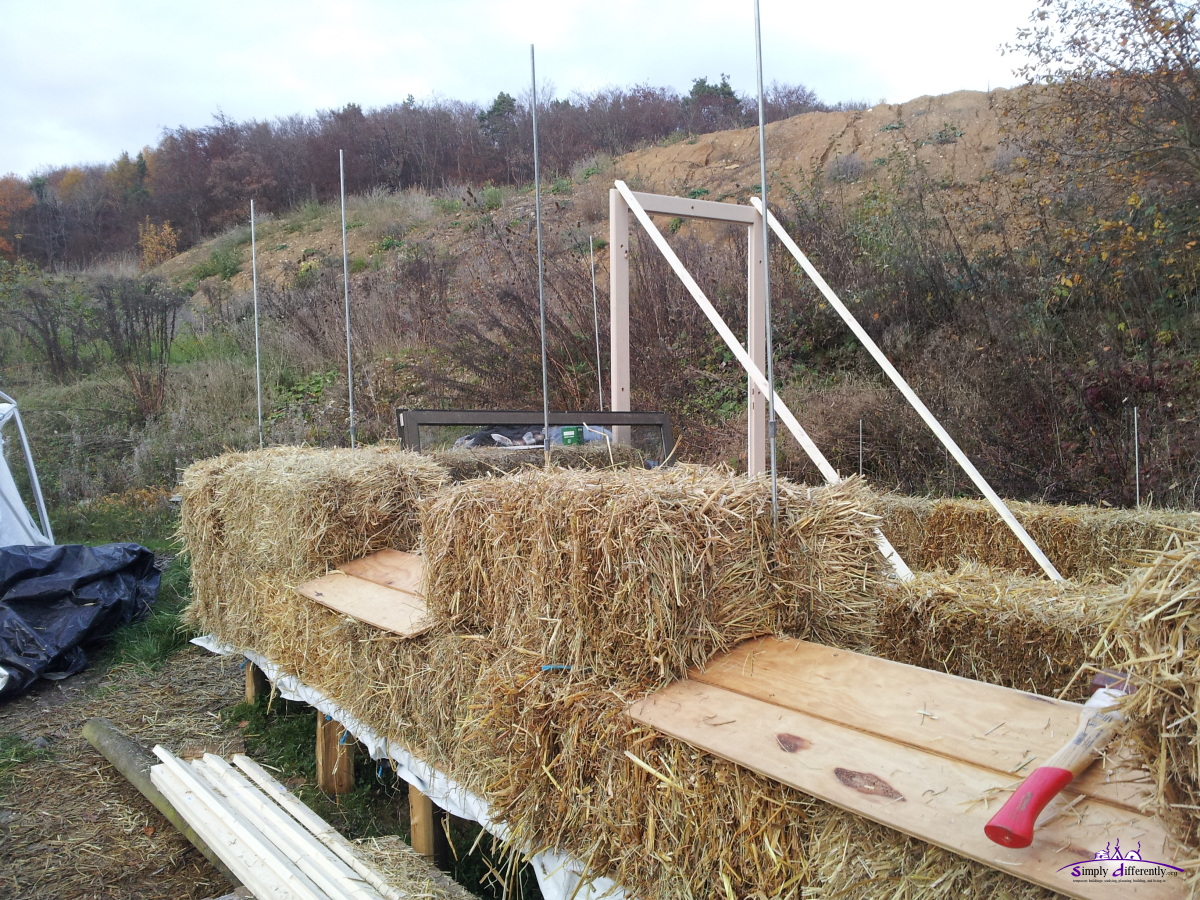 2014/11/19 16:03 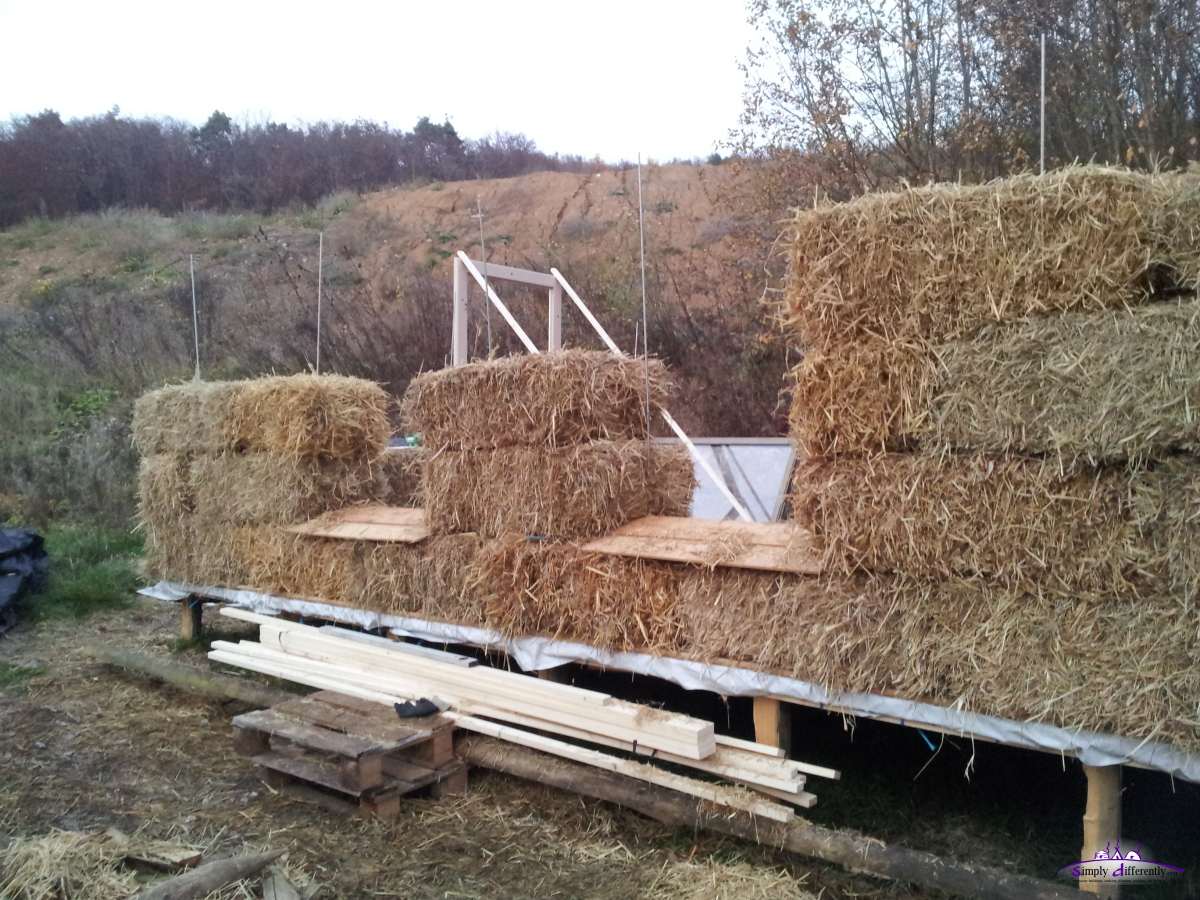 2014/11/19 16:55 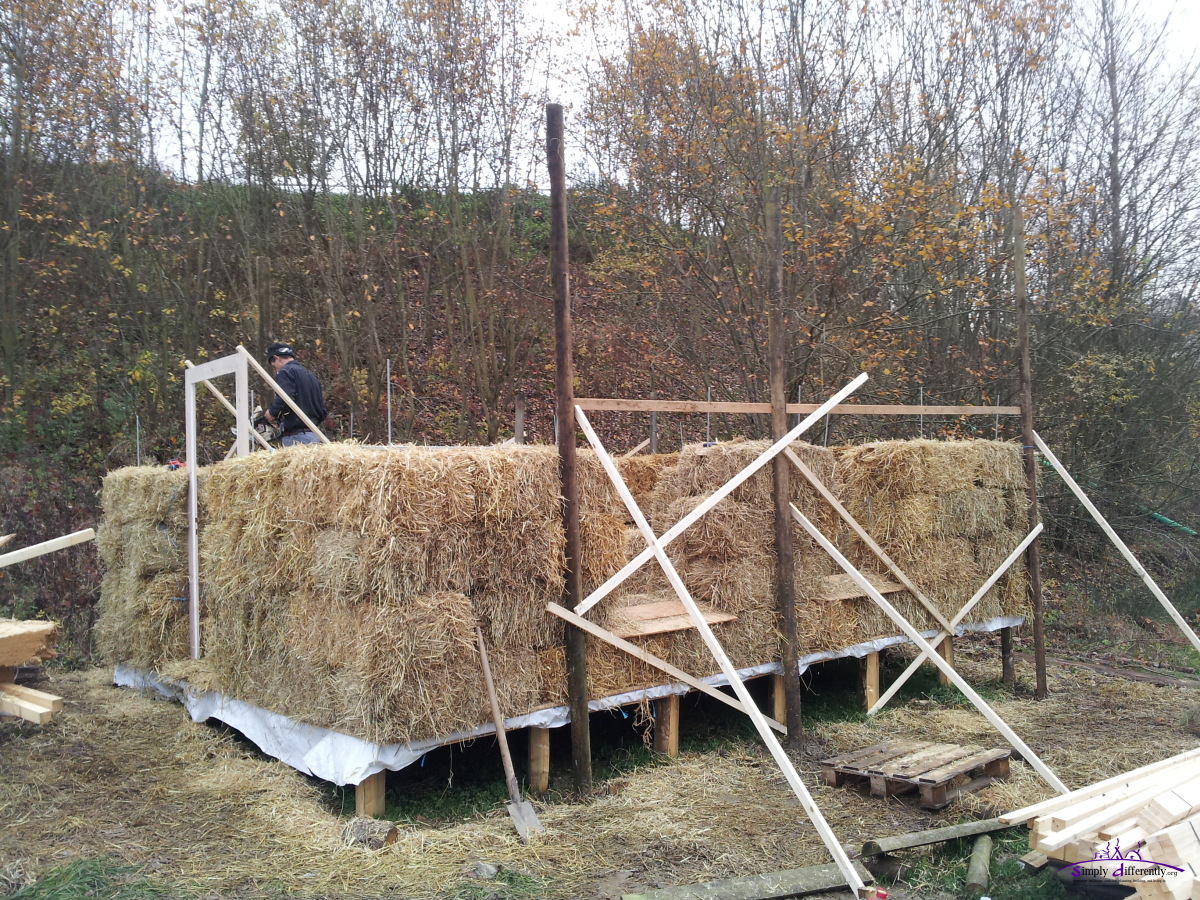 2014/11/20 15:44 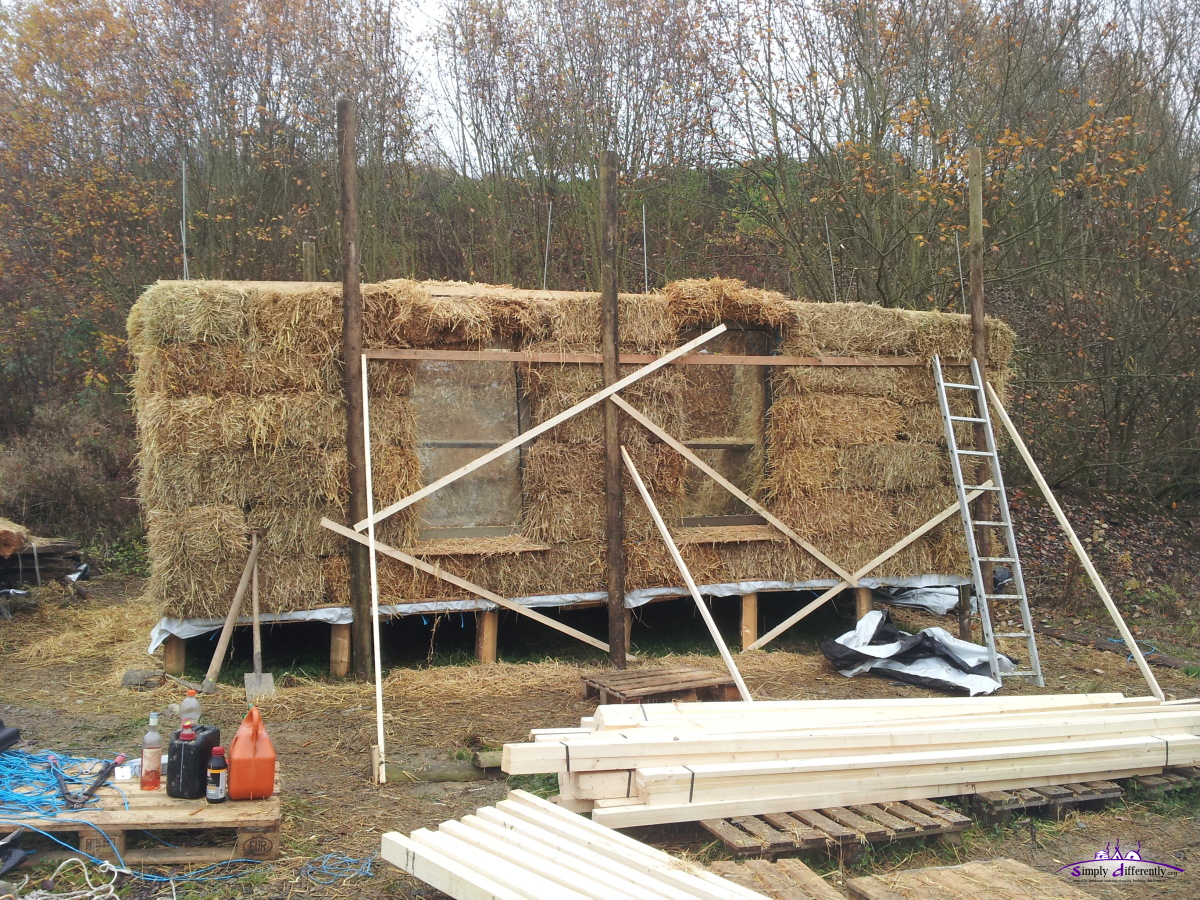 2014/11/22 13:05 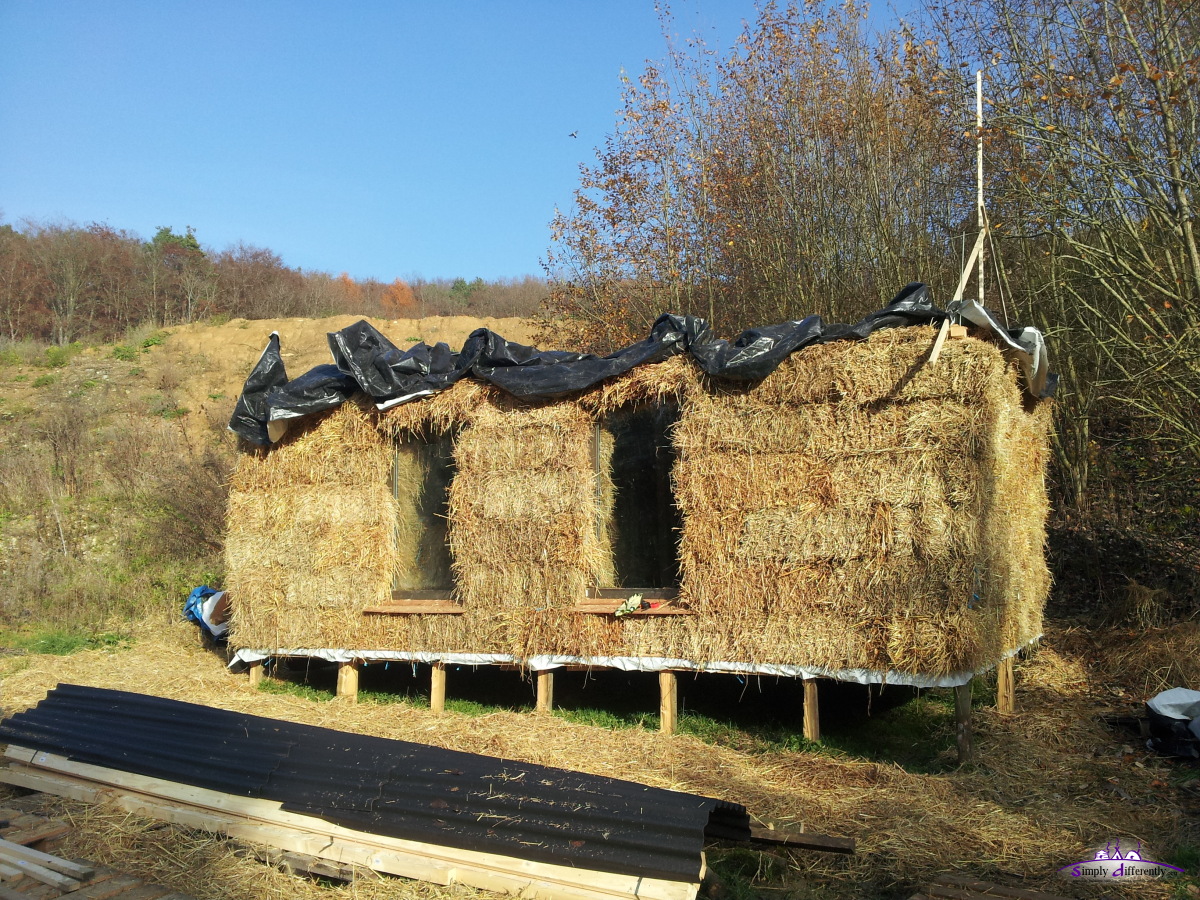 2014/11/24 13:13 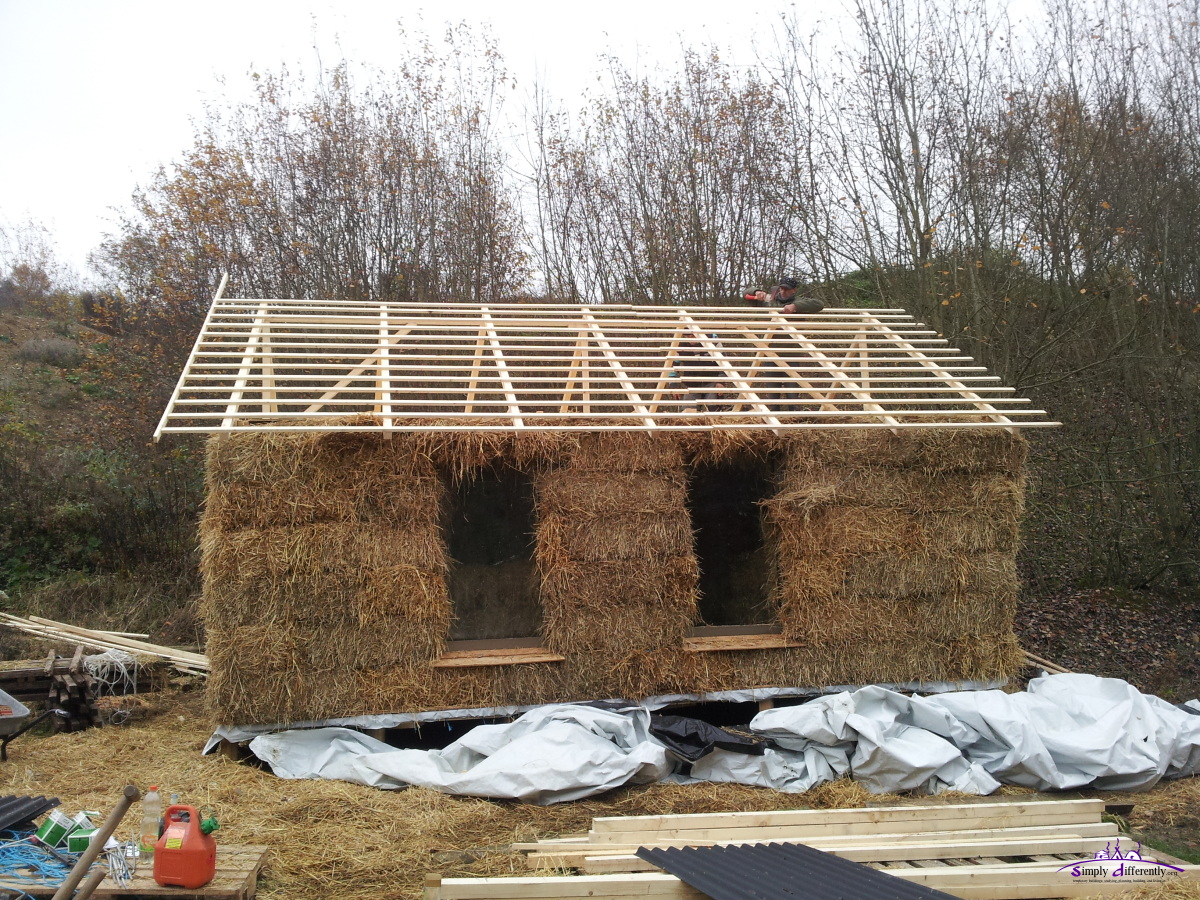 2014/11/25 15:08 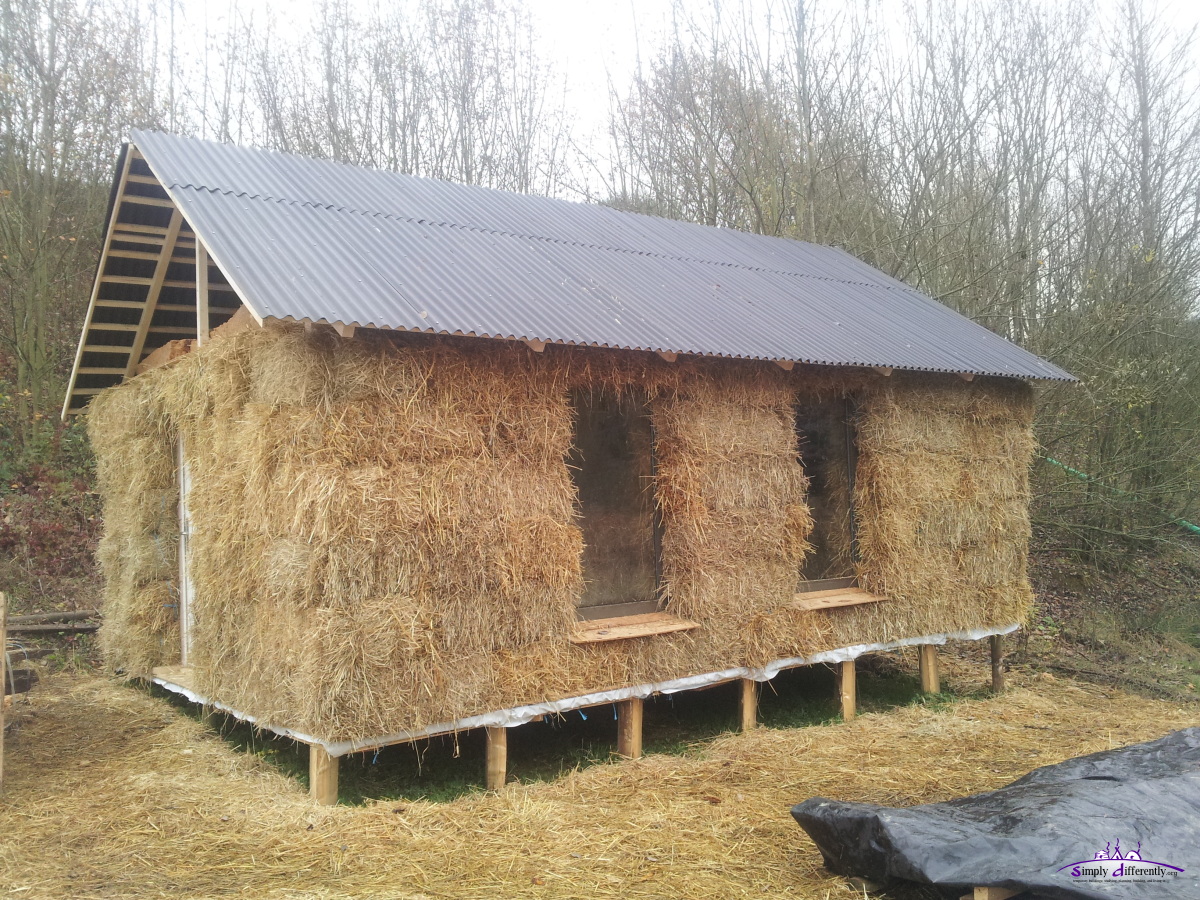 2014/11/27 14:28 The main disadvantages of constructing with bales are
whereas the main advantages on the other hand are
About the actual exposure of the bare strawbales as I plan, I can't say anything yet (2014/11/26), check later in a couple of months. I'm more fond of circular and spherical structures, as the rest of this web-site tells, there were two reasons to go rectangular with the strawbale cabin:
in particular the roof sheets were a strong reason to keep the rectangular shape. I thought first of a strawbale based dome, but the rain cover would have been very cumbersome, as the entire surface or most of it, to be properly sealed, as straw does compost quickly when exposed regularly to water and air. So, to minimize the roof I decided to go with vertical walls and due the assembly of overlapping bitumen roof sheets, I went rectangular overall. Content:
|


| Home | · | About | · |  Tipi | · |  Yurt | · |  Dome | · | Features | · | Gallery |


Creative Commons (CC) BY-SA-NC 2005-2017, developed, designed and written by René K. Müller
Graphics & illustrations made with Inkscape, Tgif, Gimp, PovRay, GD.pm
Web-Site powered by FreeBSD & Debian/Linux - 100% Open Source