
|
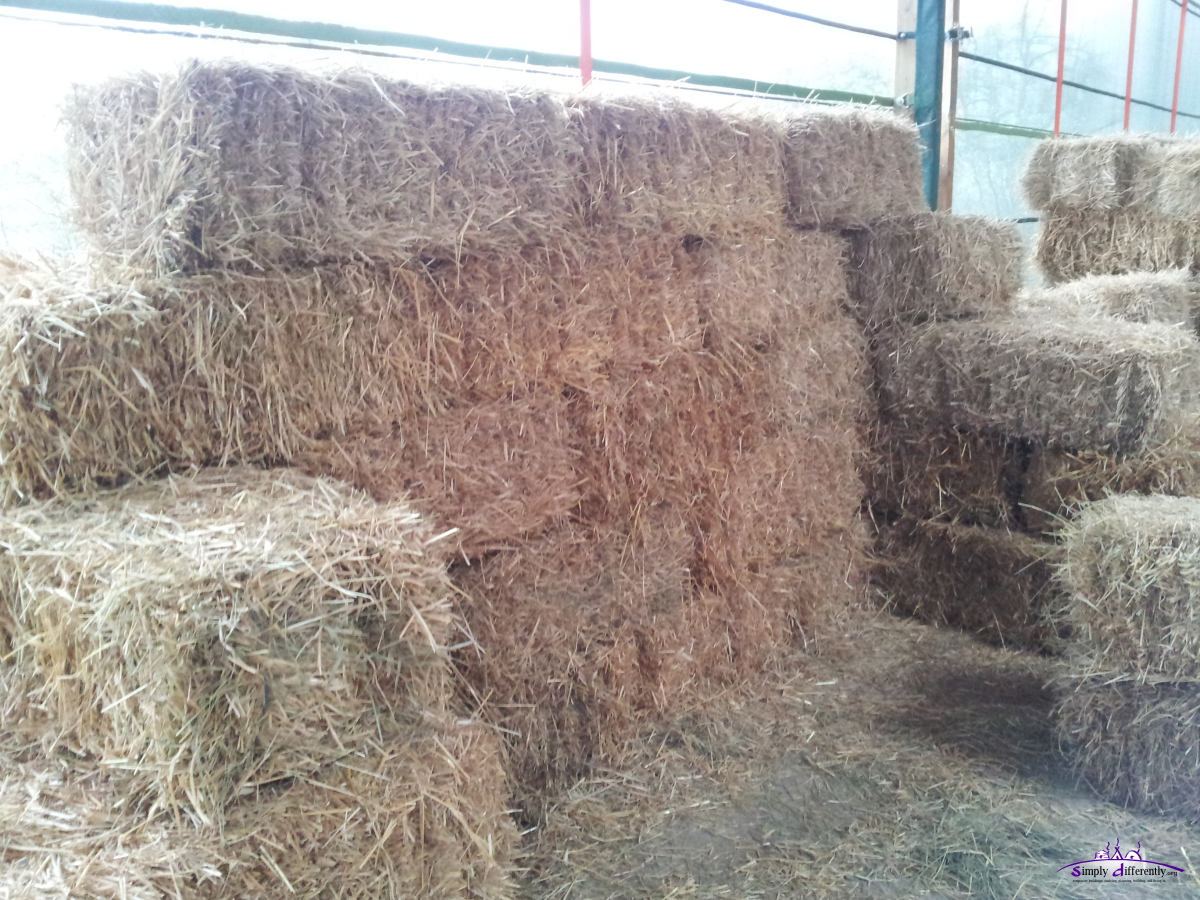
Strawbale Cabinwritten by Rene K. Mueller, Creative Commons CC BY NC 2014, 2015, 2020, last updated Sat, July 18, 2020 2014/11/18: Sorting StrawbalesI took the afternoon to sort all ~180 strawbales:
A few strawbales I fixed by re-binding, using additional cords to make it strong again. As mentioned, since I didn't instruct the local farmer to press bales for actual building, the bales are quite light (~15kg) and not that strong. The advantage of light bales is that the decided procedure using threaded rods to compress bottom 4 layers and then top most (7th) layer again - that the rods can penetrate the strawbales with a bit effort and keeping them straight while pushing down (M10 x 1m are ok, perhaps M12 x 1m would be better choice for next time). 2014/11/14: Planning ProcedureToday I drew some more detailed plans how to proceed building the cabin:
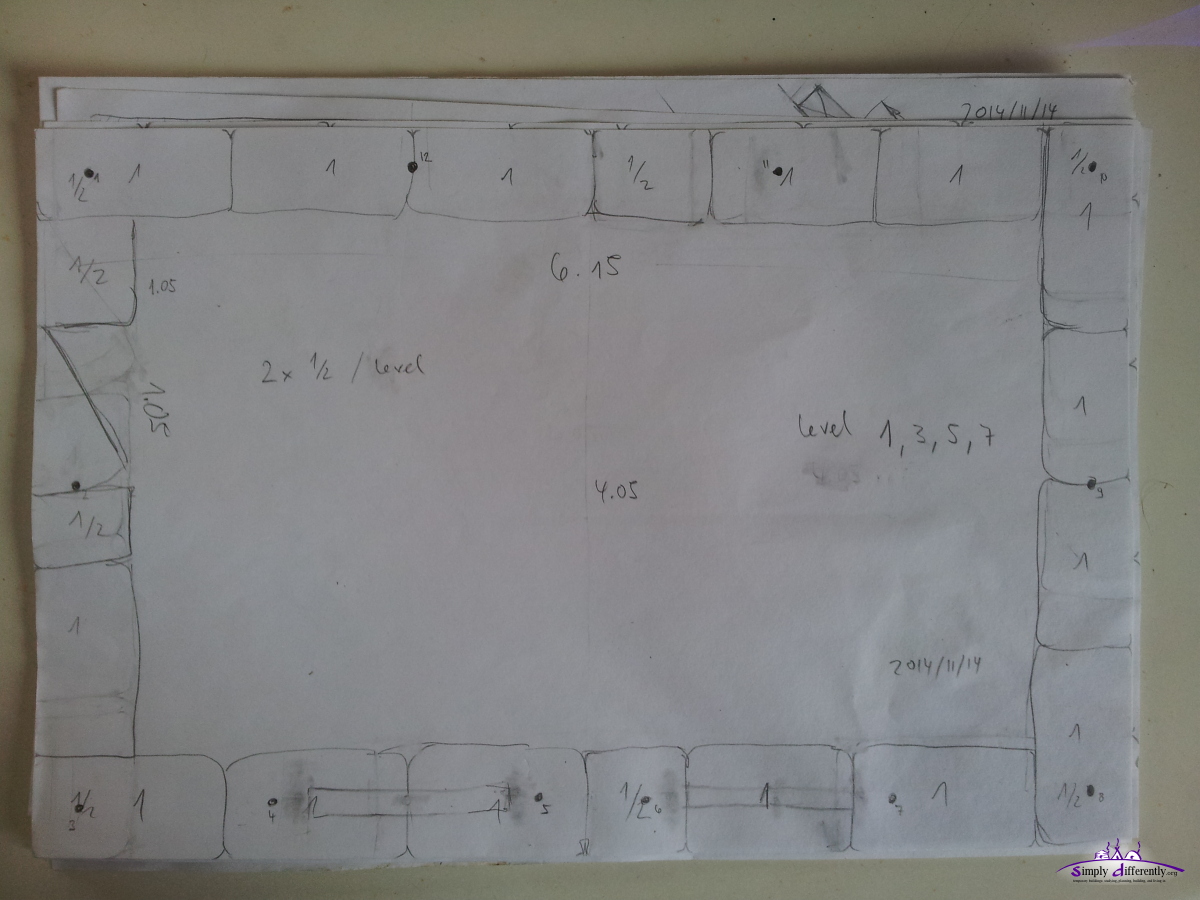 Level 1,3,5 strawbale wall 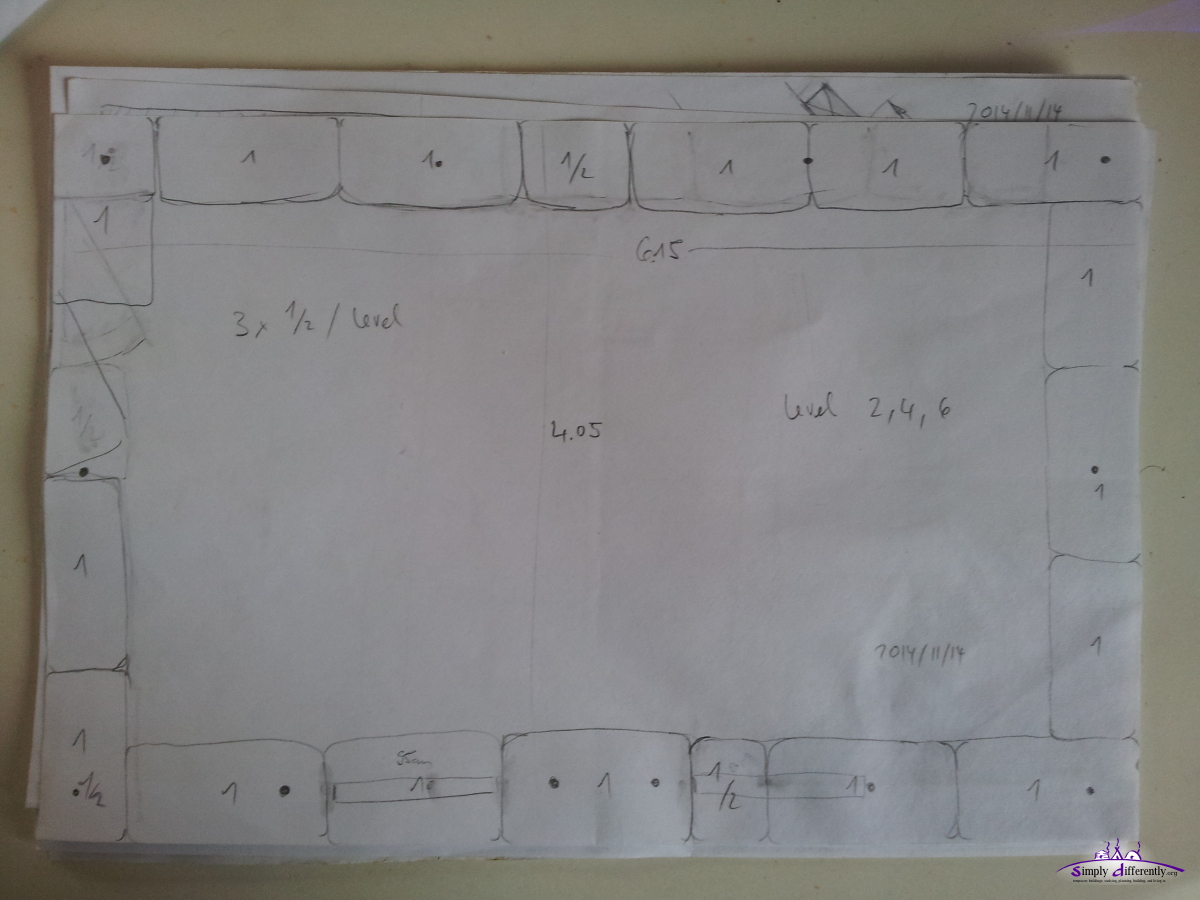 Level 2,4,6 strawbale wall 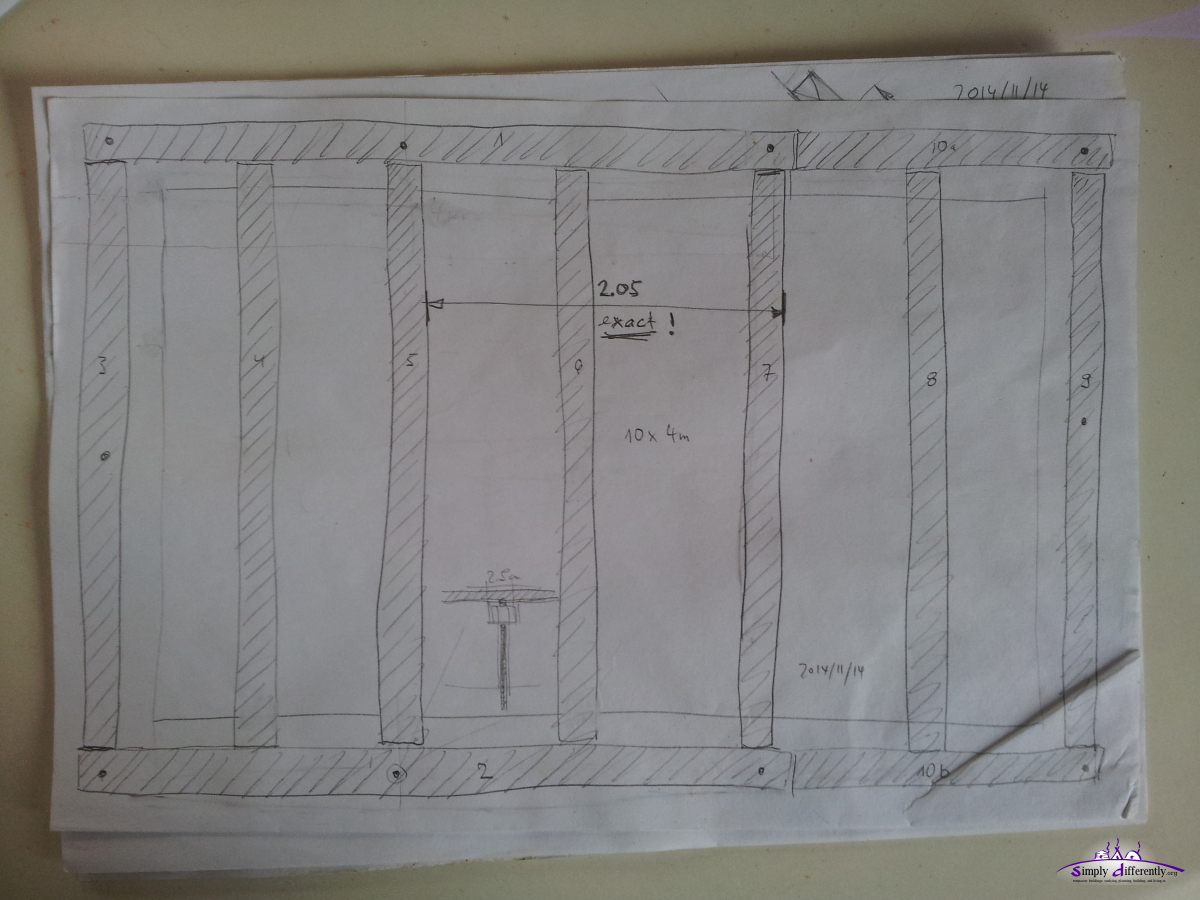 Ceiling plan 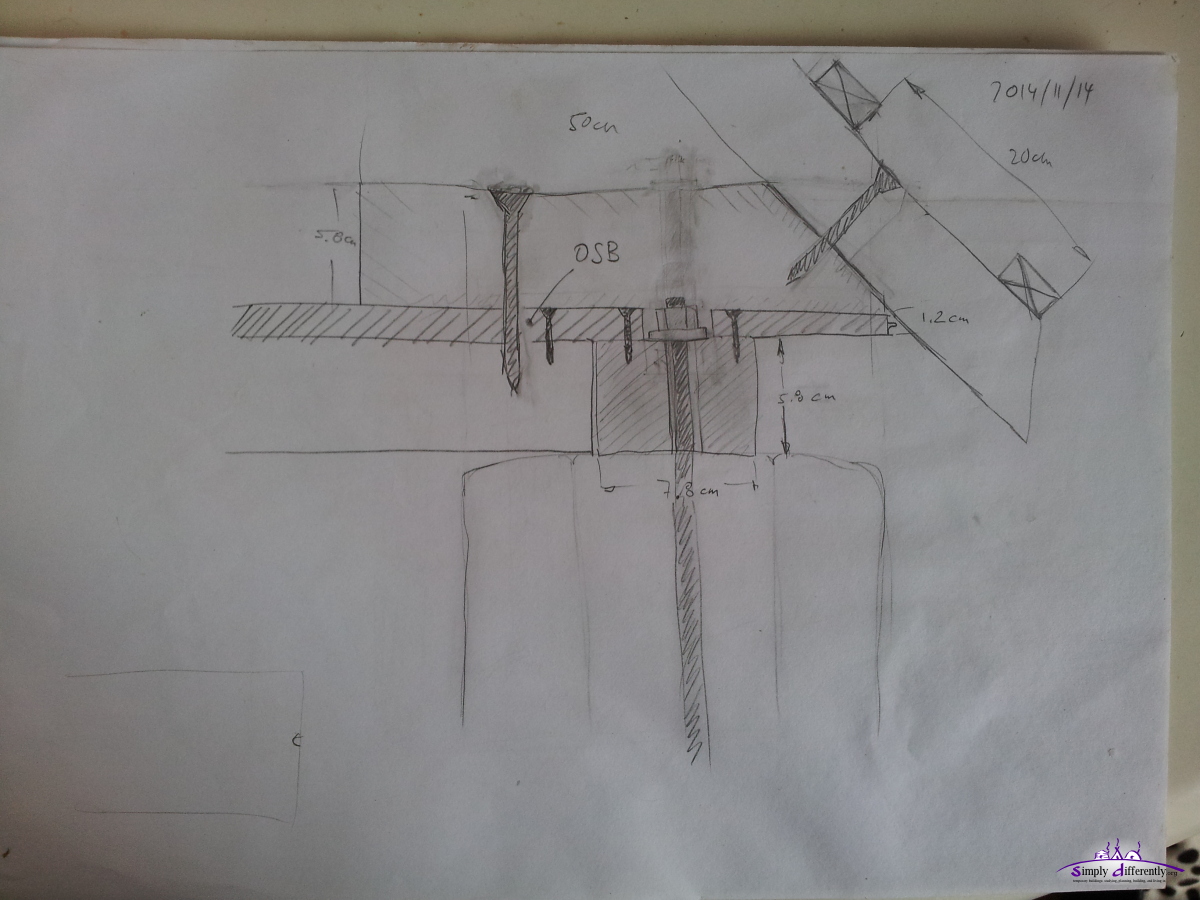 Detail ceiling foot / roof plan 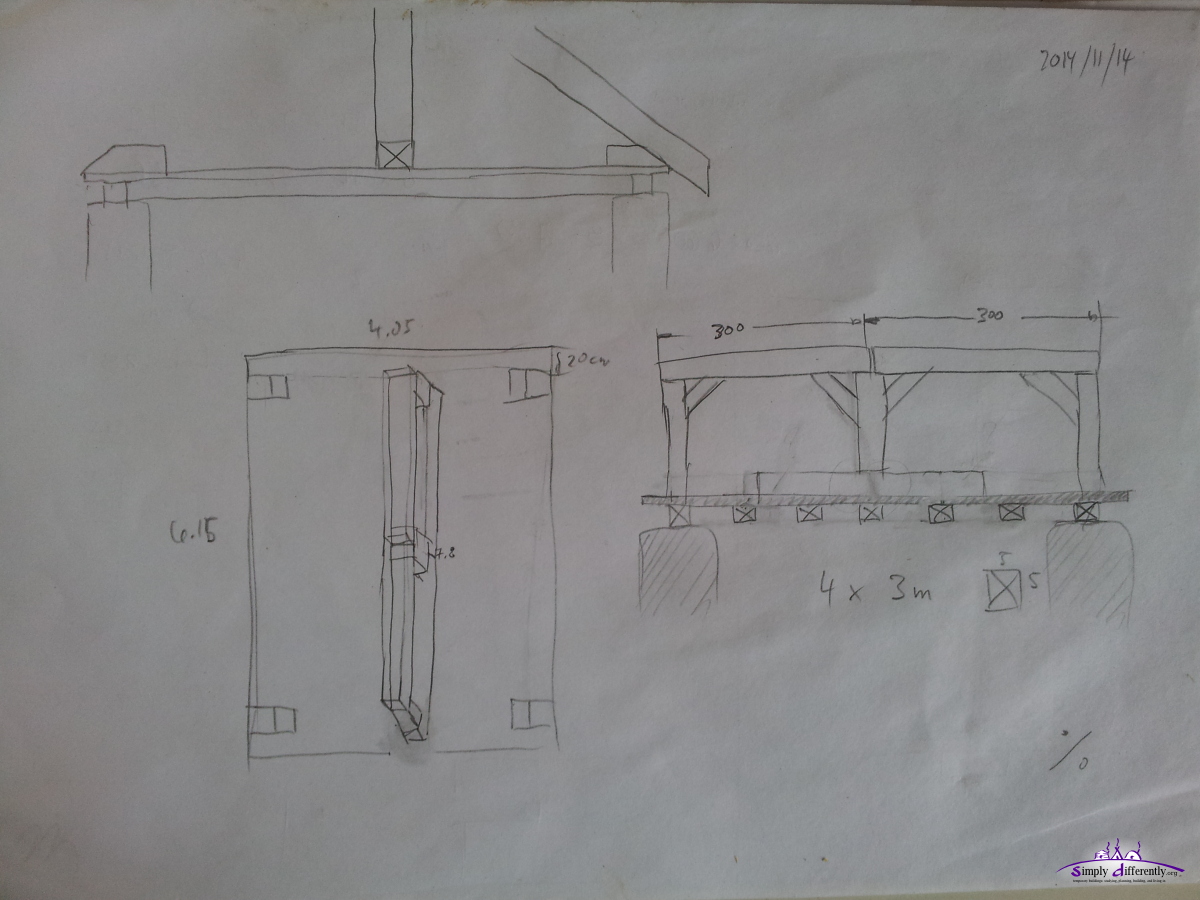 Rough sketch of roof structure 2014/11/12: Planning the Walls
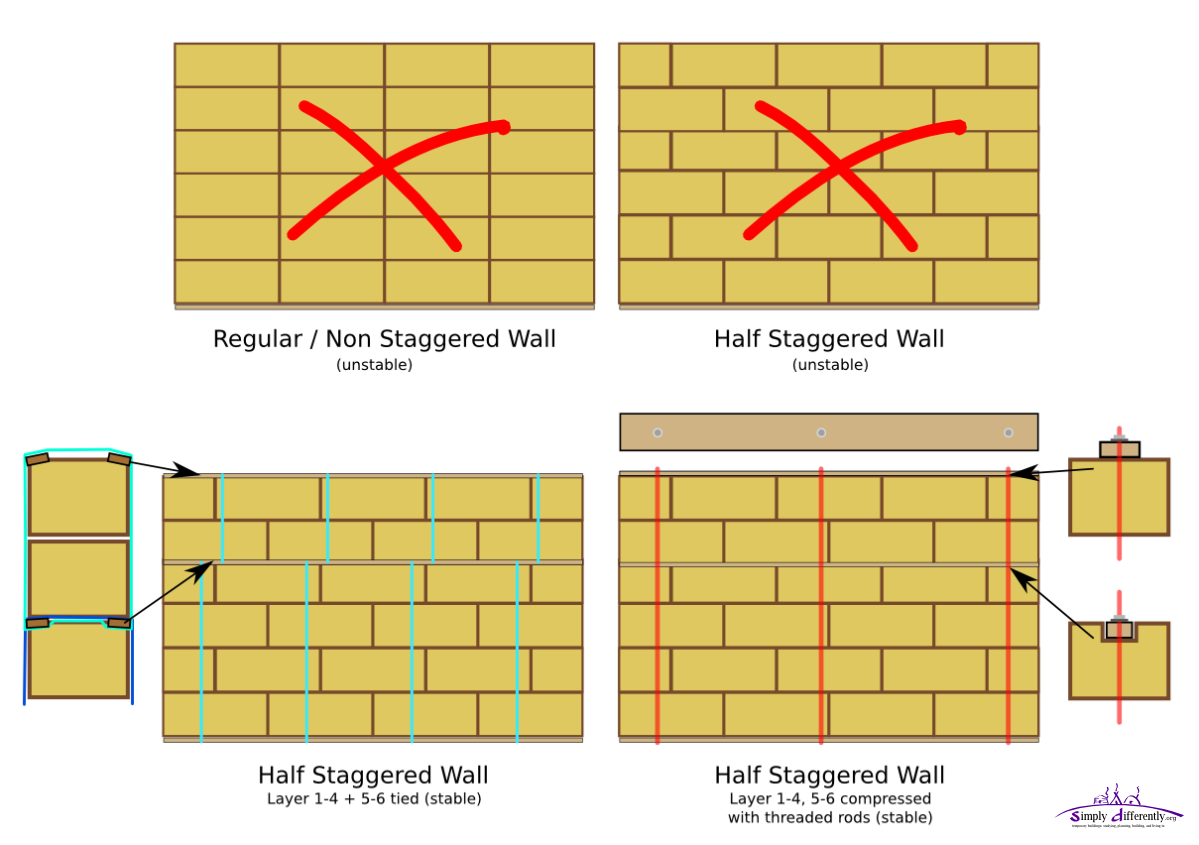
Options:
 Shifted wall with no support 2014/11/12 11:20 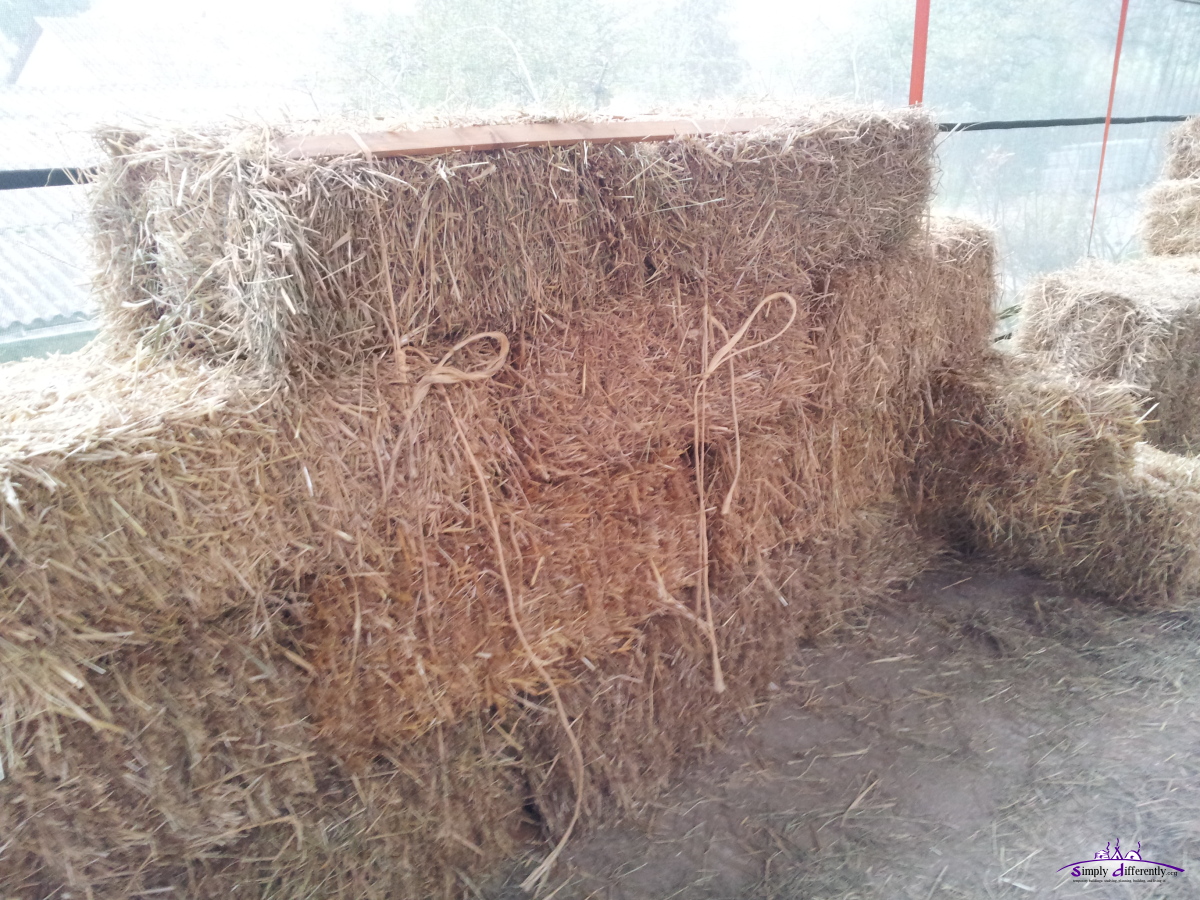 Shifted wall with 4 layers combined 2014/11/12 11:33 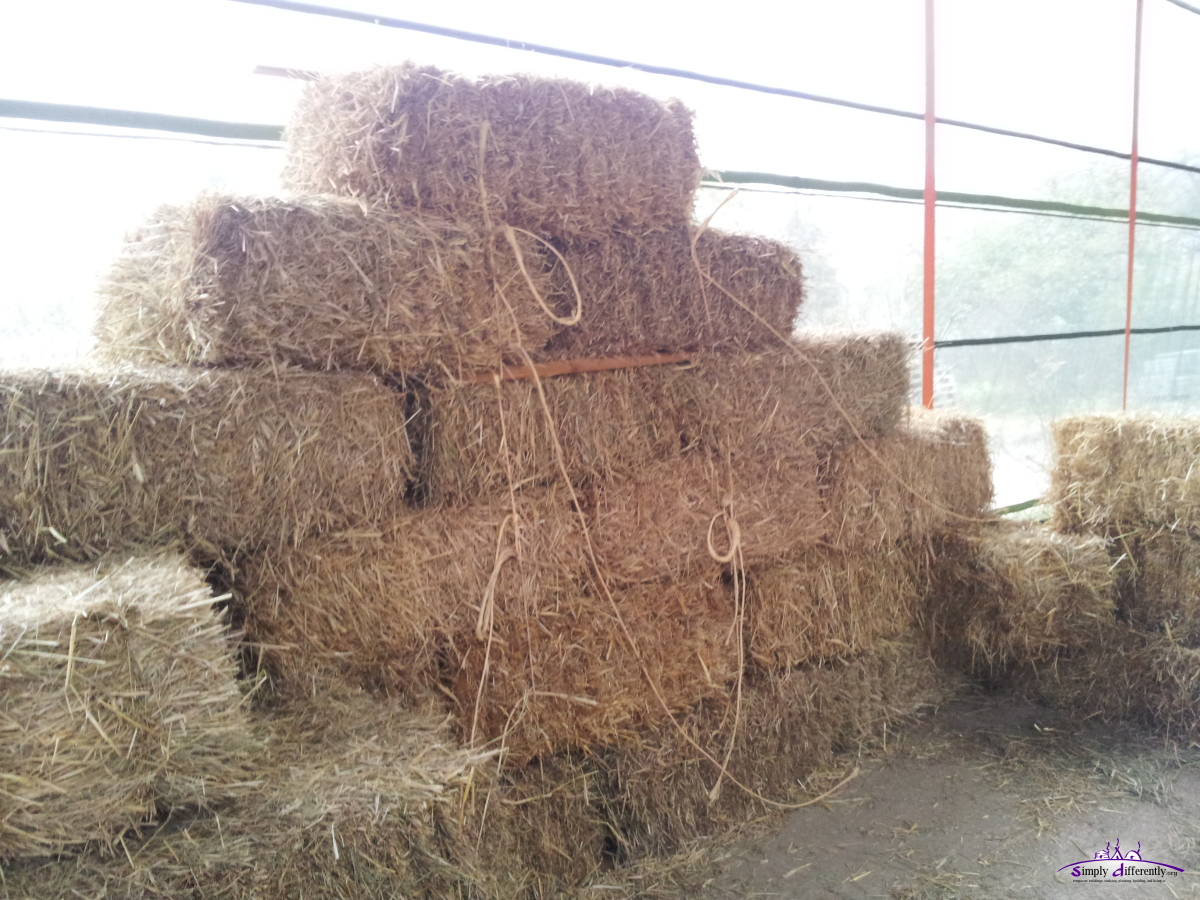 Shifted wall with 4 + 2 layers combined 2014/11/12 11:53 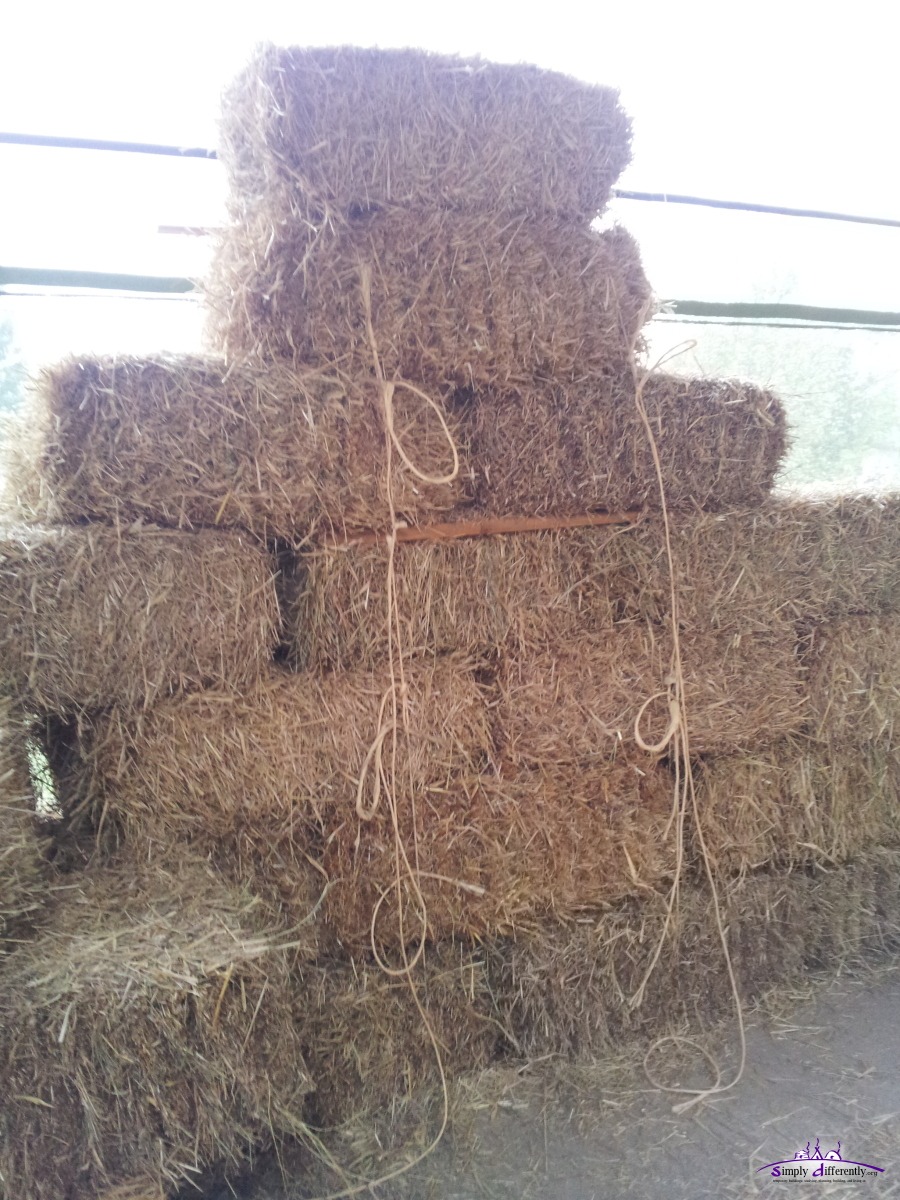 Shifted wall with 4 + 2 layers combined + 1 layer 2014/11/12 11:57 Yet, even the last option gave some improvement, I decided to go with following solution:
Stabilize the wall each 2m distance 3m long M10 threaded rods (total 30 x M10 x 1m, Euro 1.40 / pc) vertically positioned and using nuts at the bottom and top: under the floor, and on top a long piece of wood which presses then the 6 or 7 layers of bales together. It keeps the bales and wall therefore in position, and gives the possibility to compress the layers together in a controlled way (height-wise). It's a bit more overhead than I anticipated, but I think it makes the cabin sturdy and less prone to become unstable. The door I use is exactly 210cm in height, its frame to be precise, so I pondered on follow options:
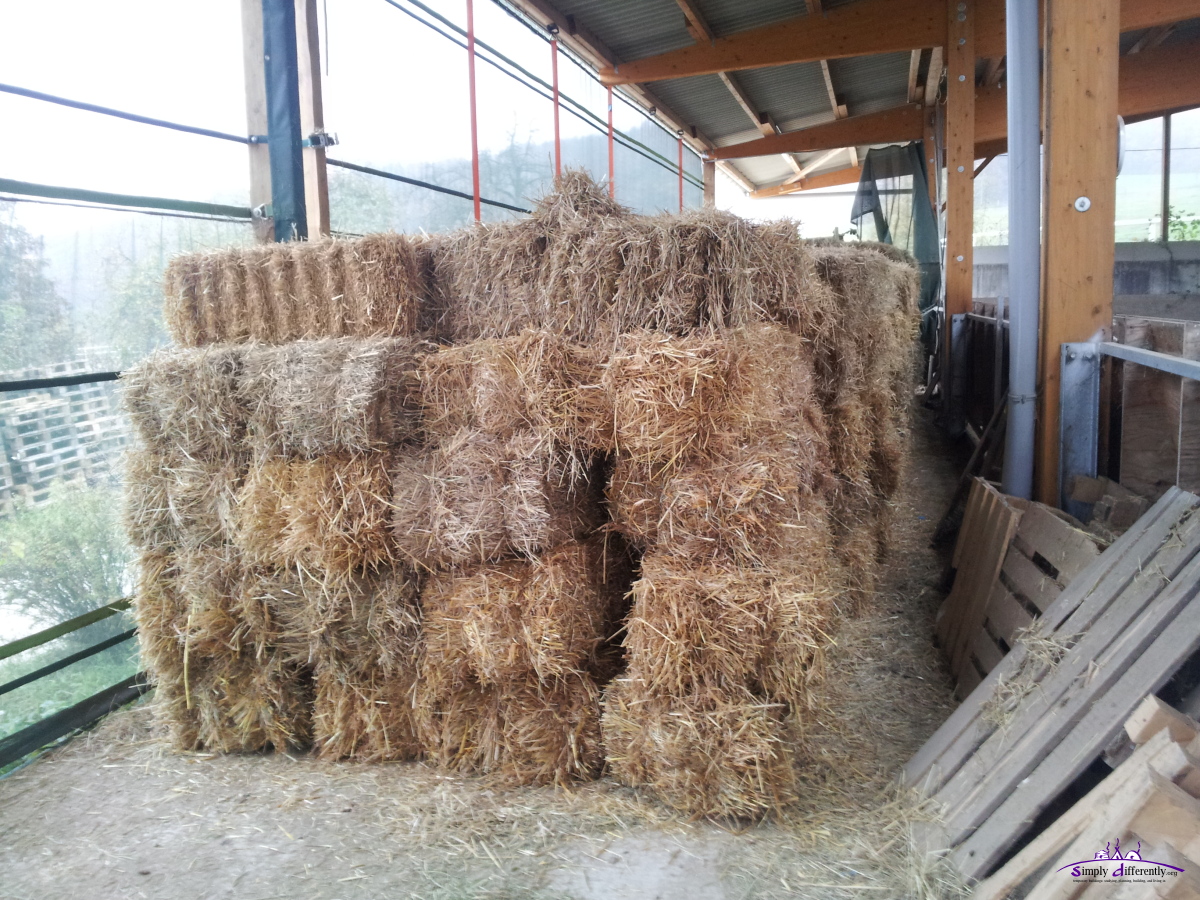
and I likely go with the 2nd option using 7 layers, as 6 layers with resulting 200cm ceiling height is a bit low for my taste, and I have sufficient amount of bales spare. With apprx. 23 bales per layer, and 7 layers I reach total of apprx. 161 bales (2.4 tons). 2014/11/08: Strawbales ArrivedToday, after weeks of delay, the strawbales arrived - so called "small" strawbales, as nowdays "large" 400kg heavy strawbales are sold. I've got apprx. 180 strawbales in this shipment:
 ~180 Strawbales 2014/11/09 14:00 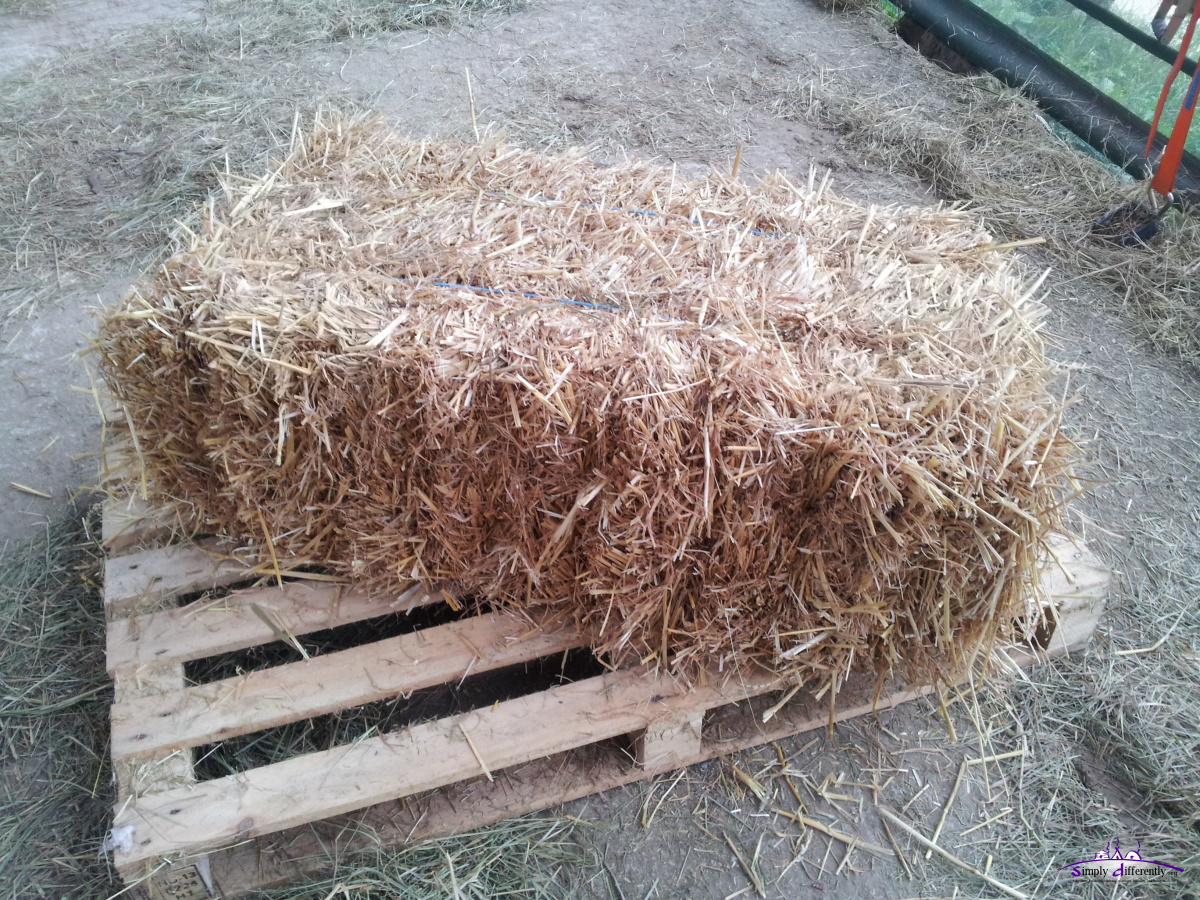 Frontside of Strawbale 2014/11/09 14:01 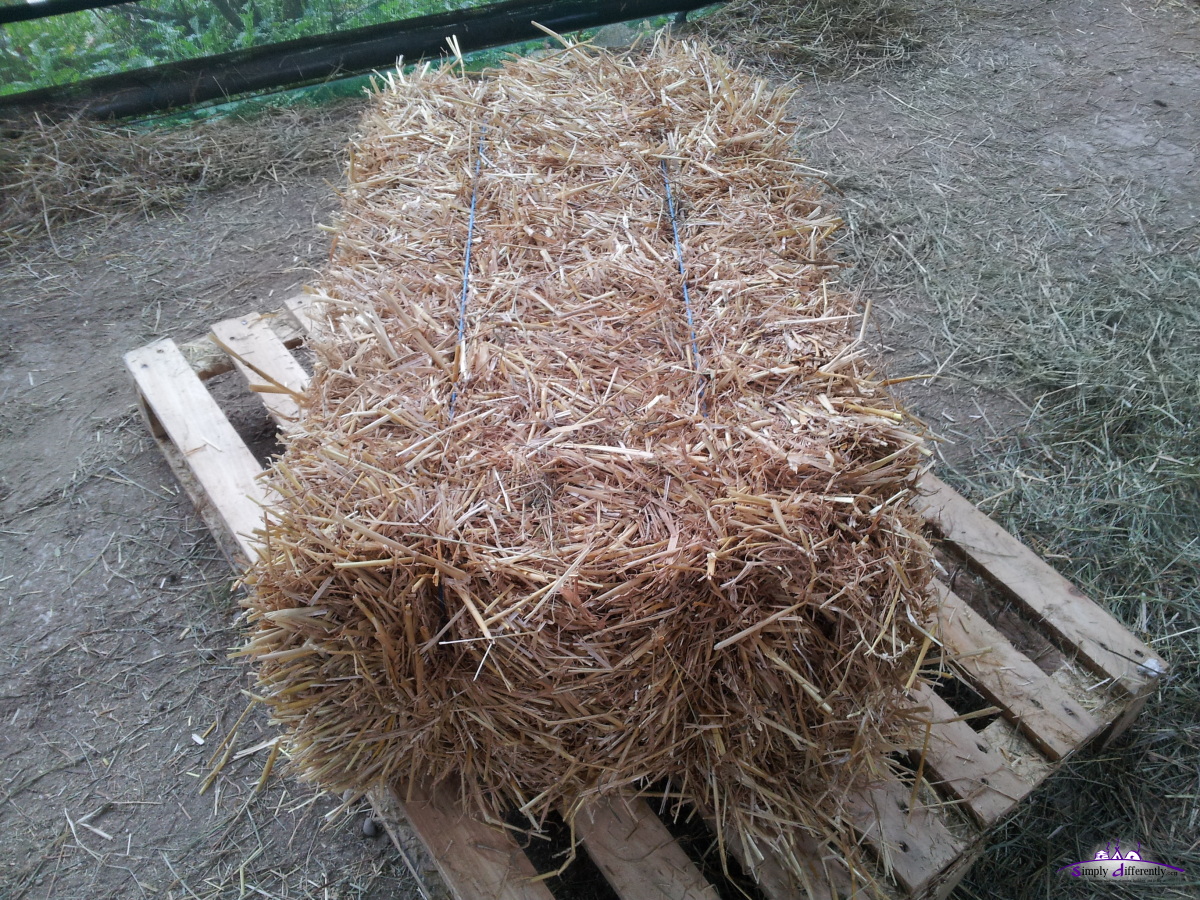 Headside of Strawbale 2014/11/09 14:02 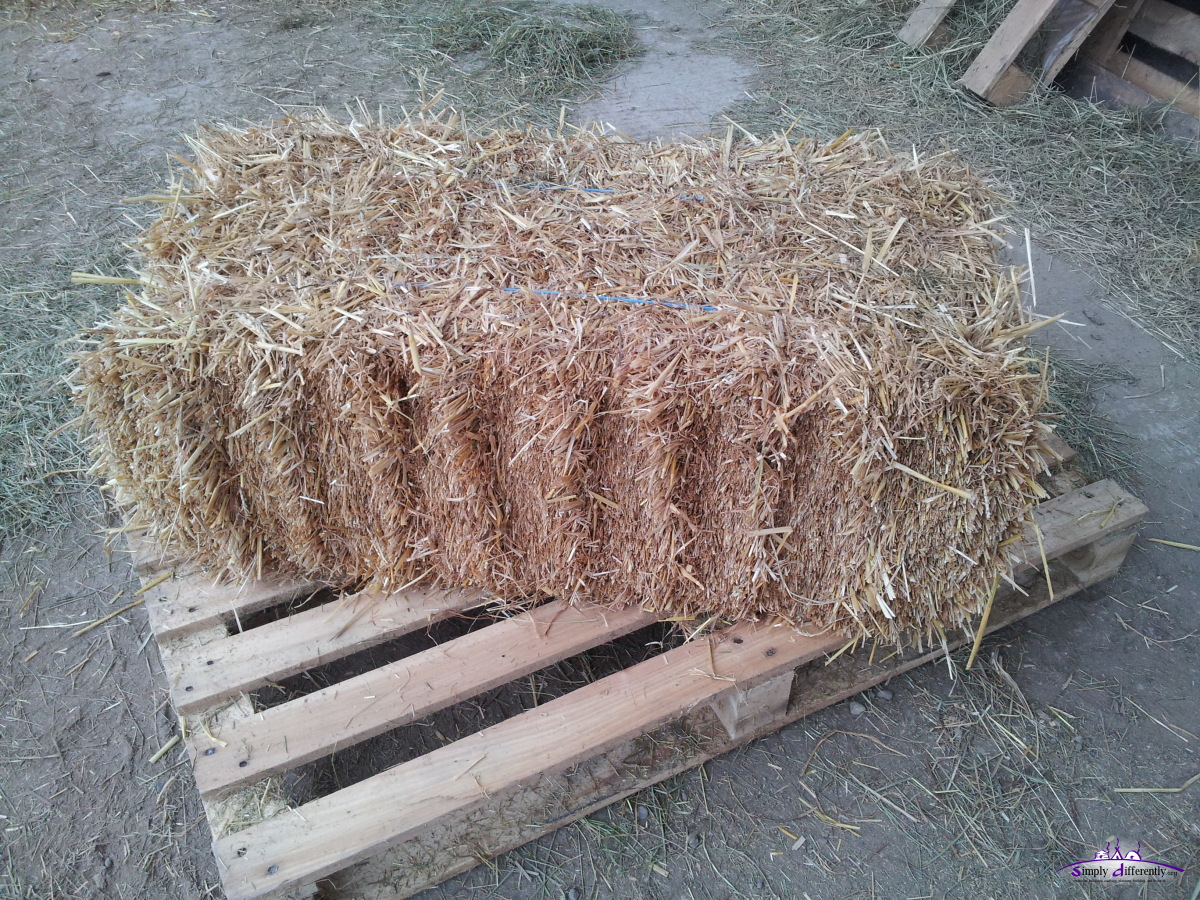 Backside of Strawbale (9 layers) 2014/11/09 14:02 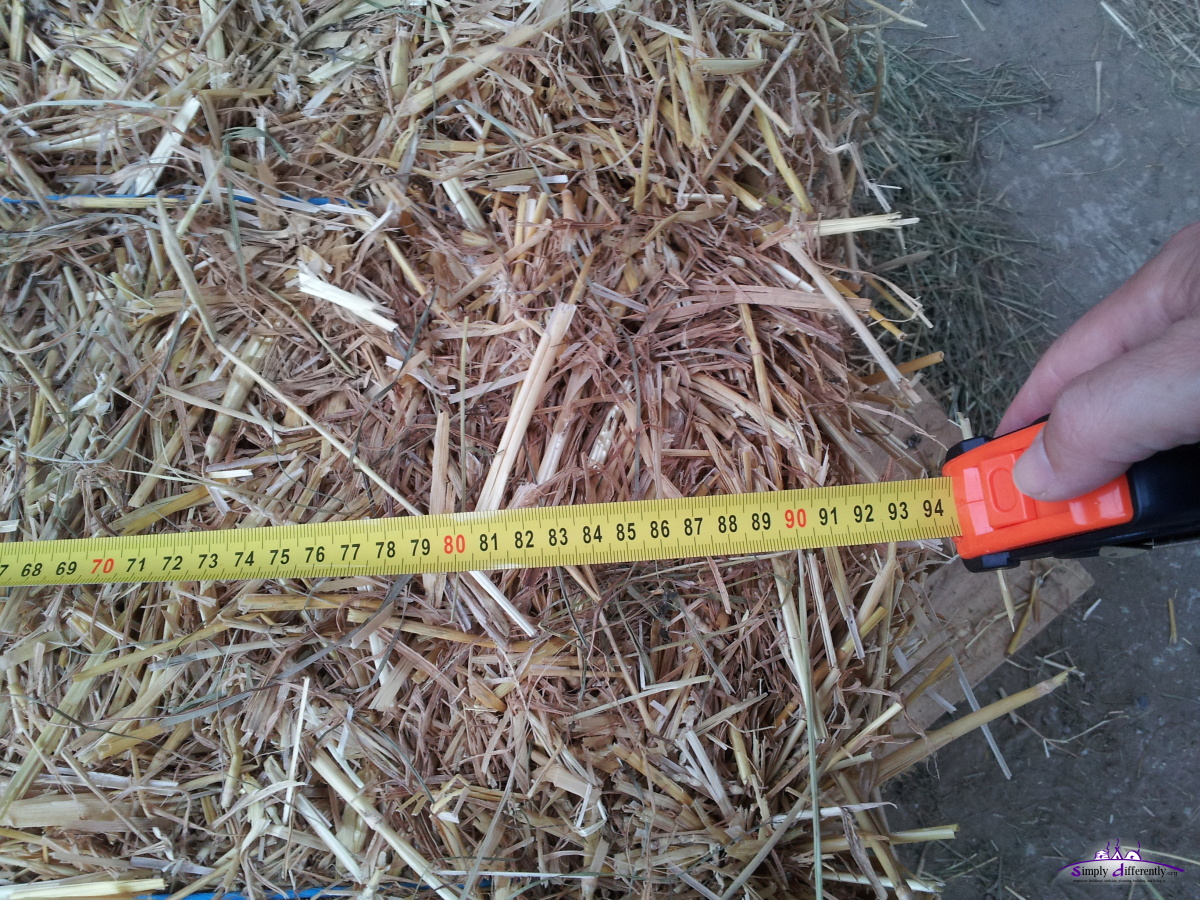 Width ~90cm 2014/11/09 14:02 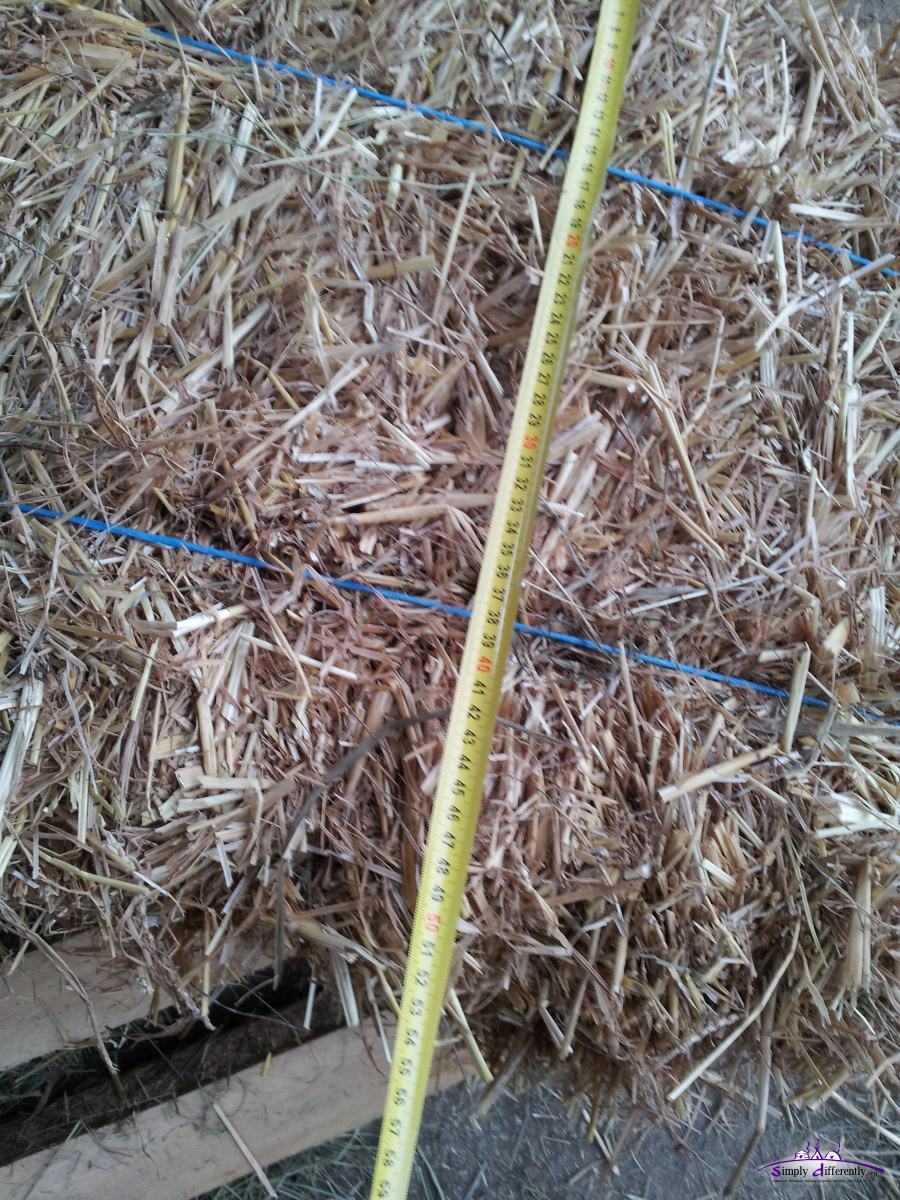 Depth ~50cm 2014/11/09 14:03  Height ~37cm 2014/11/09 14:03
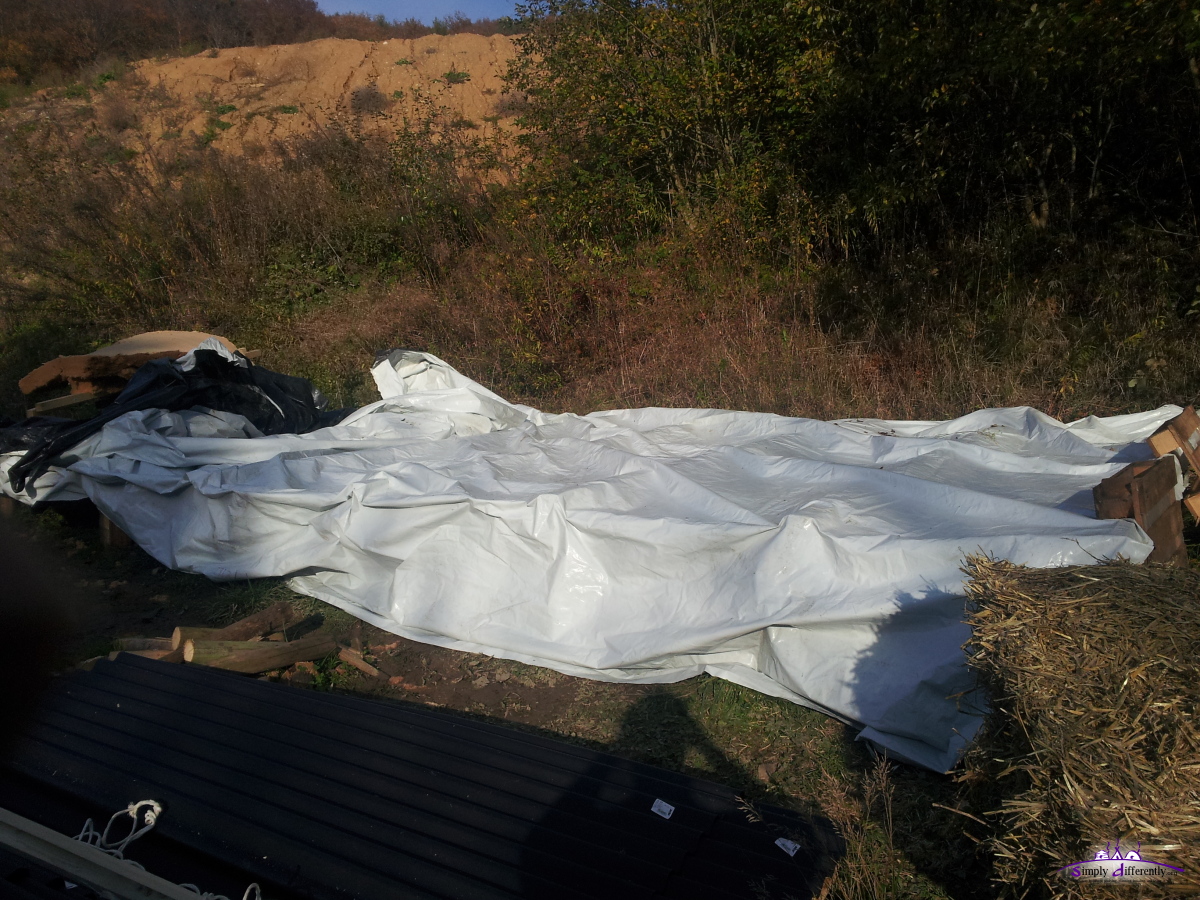
I call the "Frontside" where the straw is bent, and "Backside" where the straw is cut and the hollow diameter of the straw exposed - the backside will likely reside inside of the cabin, whereas the frontside outside. The strawbales are made from 2013 straw, and did cost Euro 3.00 per bale, which is rather expensive, as 1-2 months ago straw 100kg was Euro 8 which are 4-5 heavy bales (Euro 2.00), or ~6 light bales (Euro 1.35). I've got also got rather light bales, apprx. 15kg. The farmer informed me, if I told him ahead, he would have pressed heavier and compacter bales for me. About 10% of the bales are misaligned, and the two cords no longer straight, so I expect to "fix" some of the bales again. Based on the photos you see about 9 layers pressed together - the farmer told me he pressed based on 100cm and the final length of ~90cm came from compression. I also expect about 2cm loss of height when compressed per layer. So, based on the measure of a sample strawbale I need:
which results in 6 x 23 bales => 138 bales, about 5 x 3 bales are not needed for door and two windows, which makes 123 bales in total, or apprx. 123 x 15kg = 1.8 tons weight. Now, the coming week are 1-2 dry days, other days it's exected to rain, so there is enough time to raise the walls, as I expect as my first strawbale cabin I require apprx. 2-3 consective days without rain and fog to raise the wall and assemble the ceiling. The roof can be postponed for a few days. 2014/11/07: Fixing Floor Insulation
2014/11/06: Rainy DaysLast night it began to rain intensesivly, and one of the bitumen parts bent so some rain water leaked on the new floor and through to the straw insulation, and due to the humidity blocker, could not run away - so I relieved it by poking some holes into the PVC. Yet, I have to remove some OSB and replace the humid or wet insulation straw, before I can continue. The next days will by foggy and partially also rainy - let's see how things go.2014/11/04: Floor Finished
I positioned the OSB as perfect as possible, there were some 1mm gaps at max but mostly I could pushed them closely together, and drilled 35mm screws on the 4m beams underneath, 4 screws per OSB.
As next I cut off the PVC left over and wrapped it under a bit. In order to prepare for the next 1-2 days with some rain expected, I used the bitumen roof parts to cover the floor, as the PVC cover has some holes which would leak water on the floor.
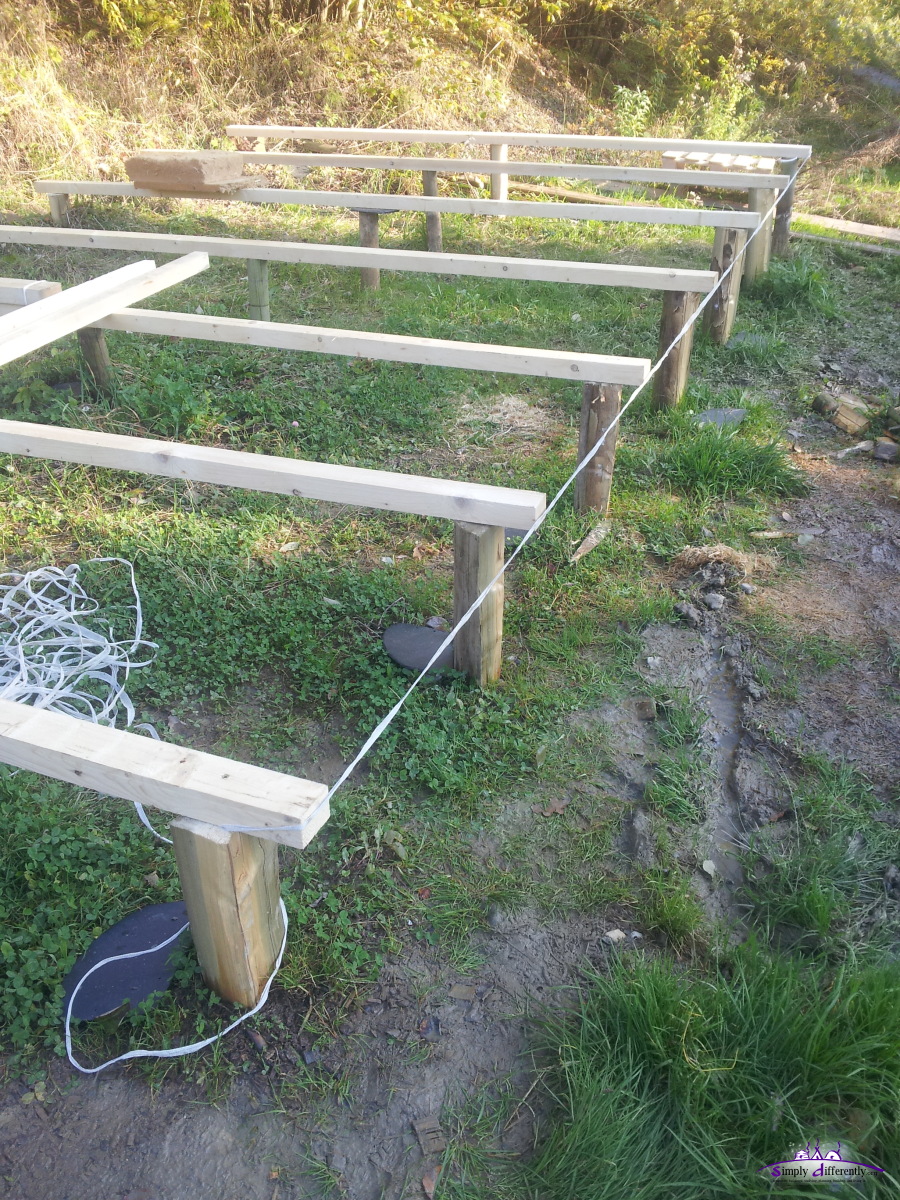
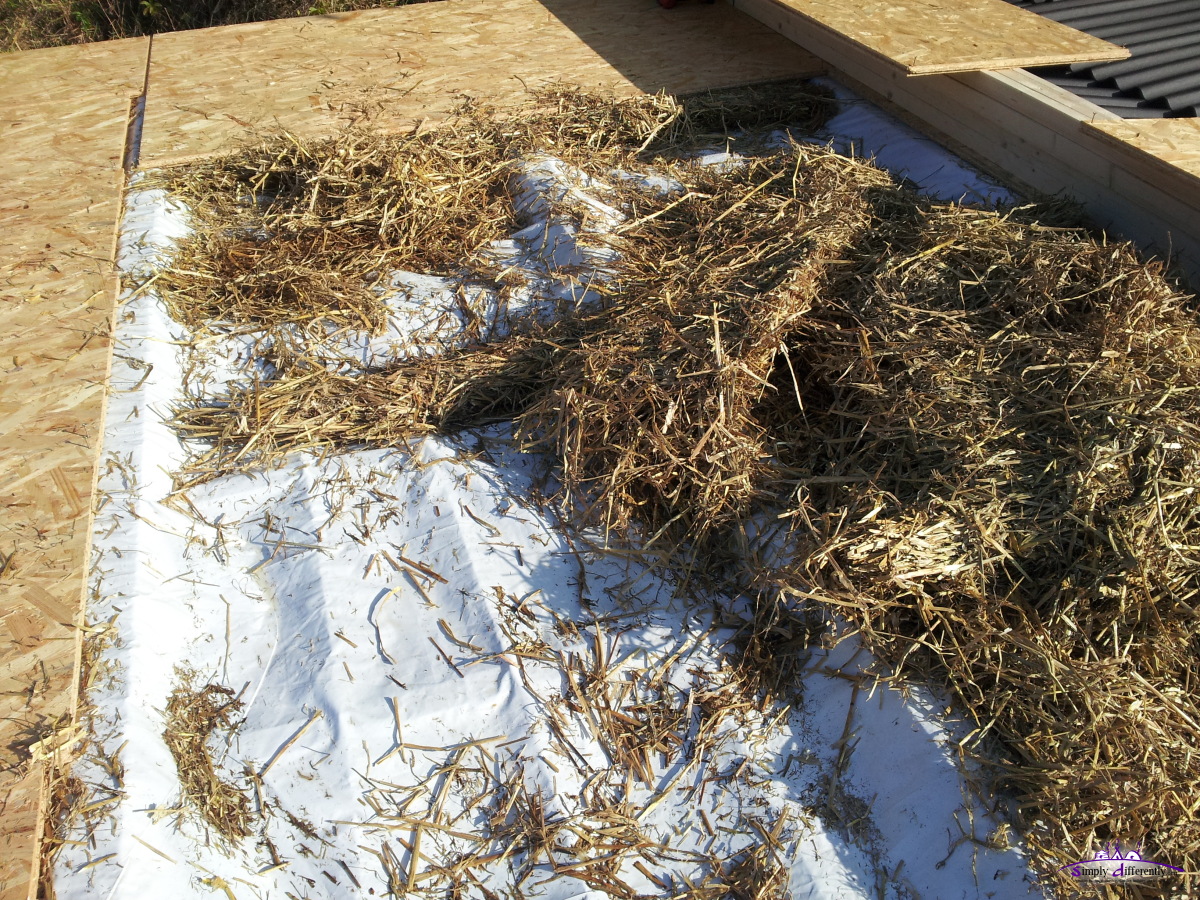
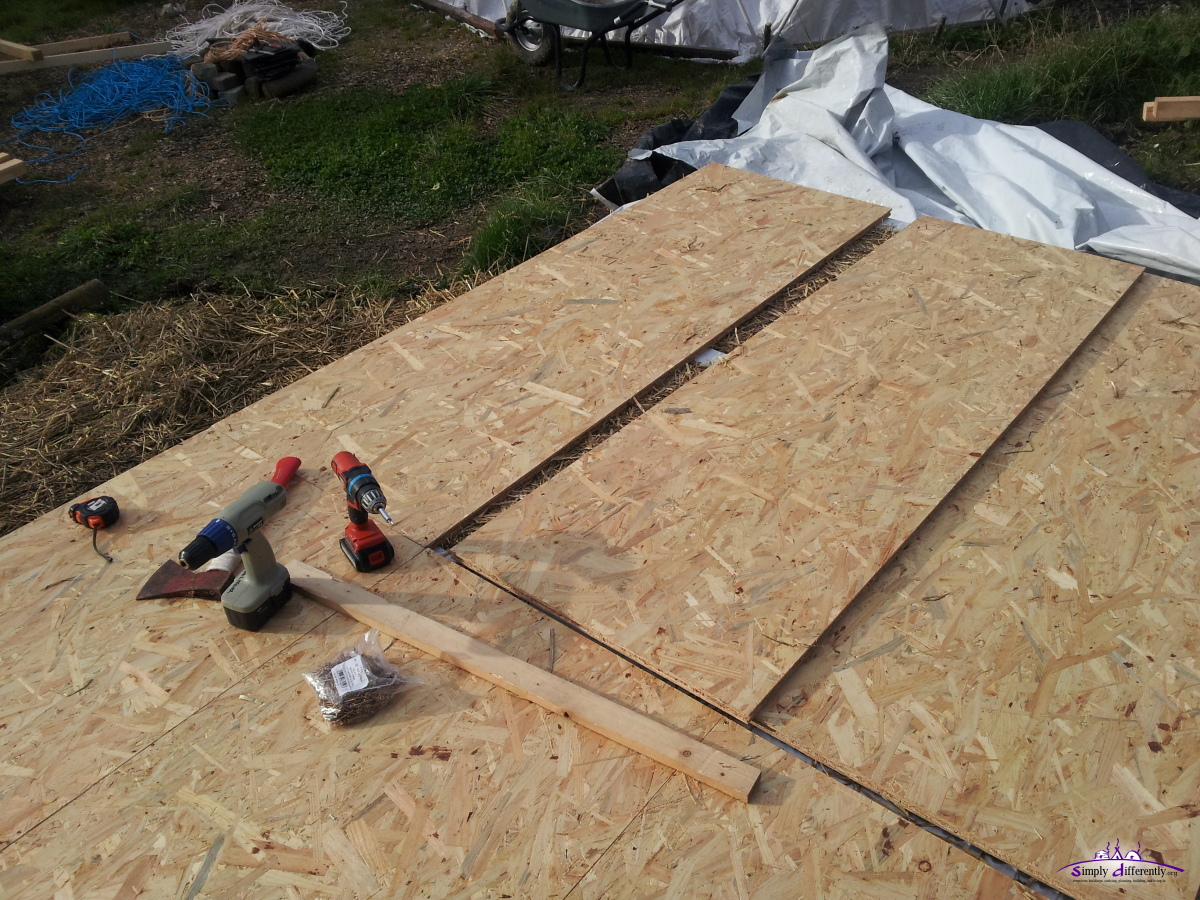 Position the OSB closely, with hammer and a piece of regular cut wood 2014/11/04 14:07 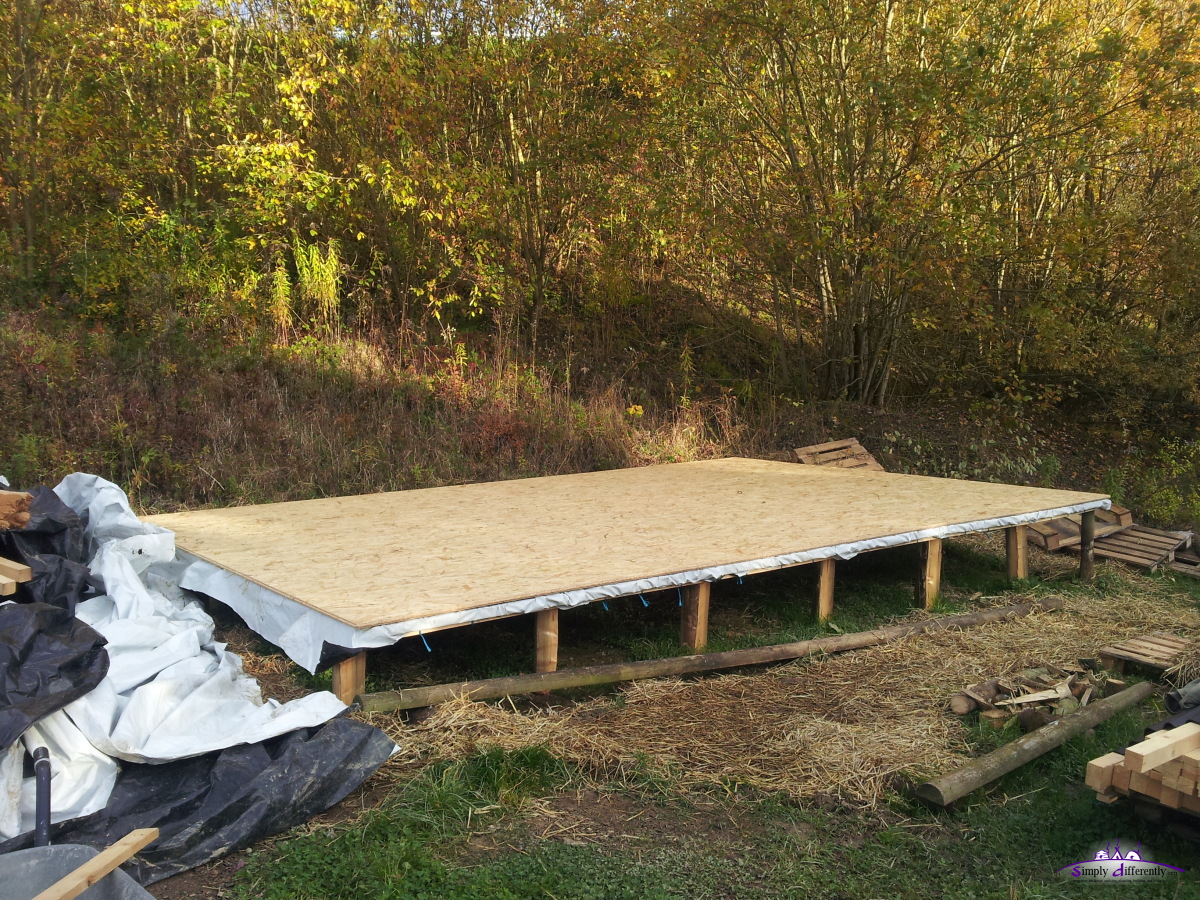 Floor finished, PVC wrapped underneath 2014/11/04 15:34 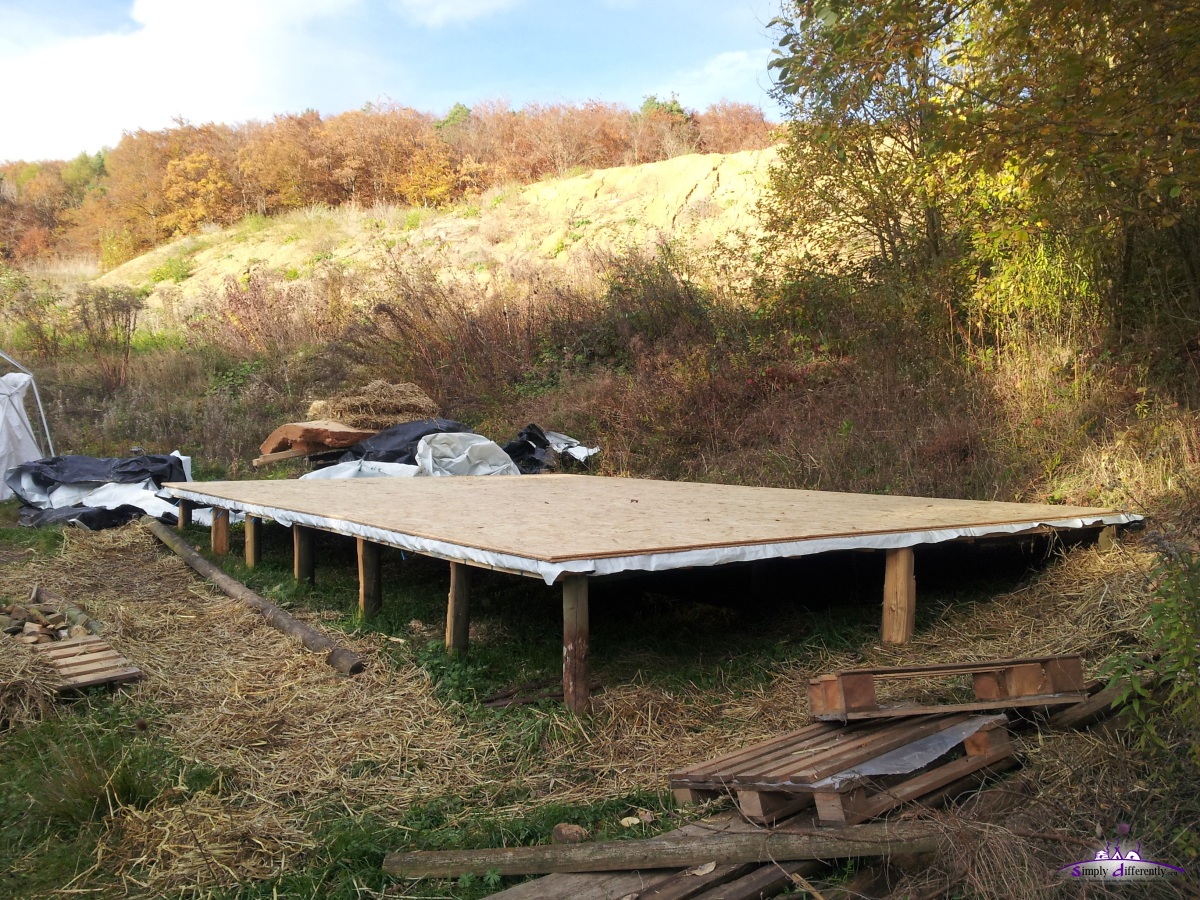 2014/11/04 15:34  2014/11/04 15:34 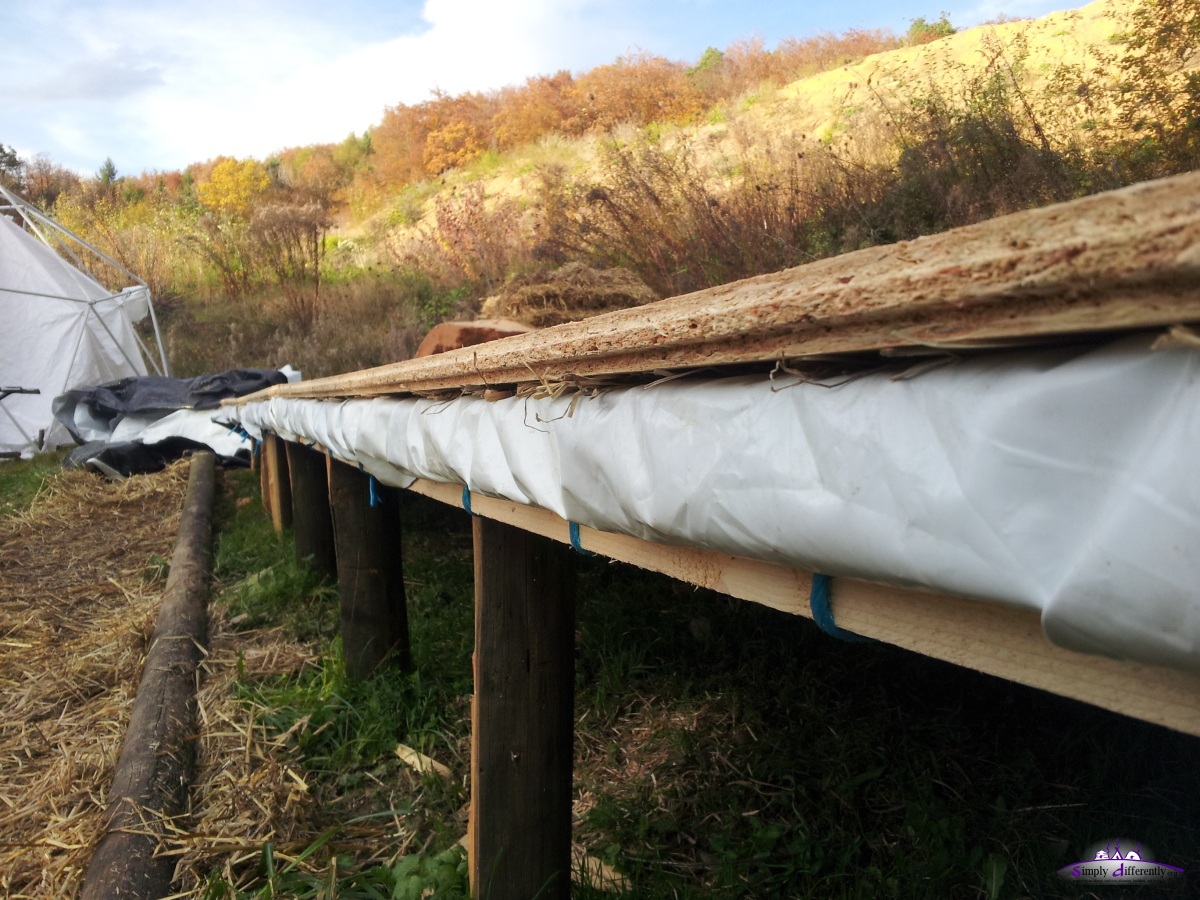 Closeup 2014/11/04 15:35 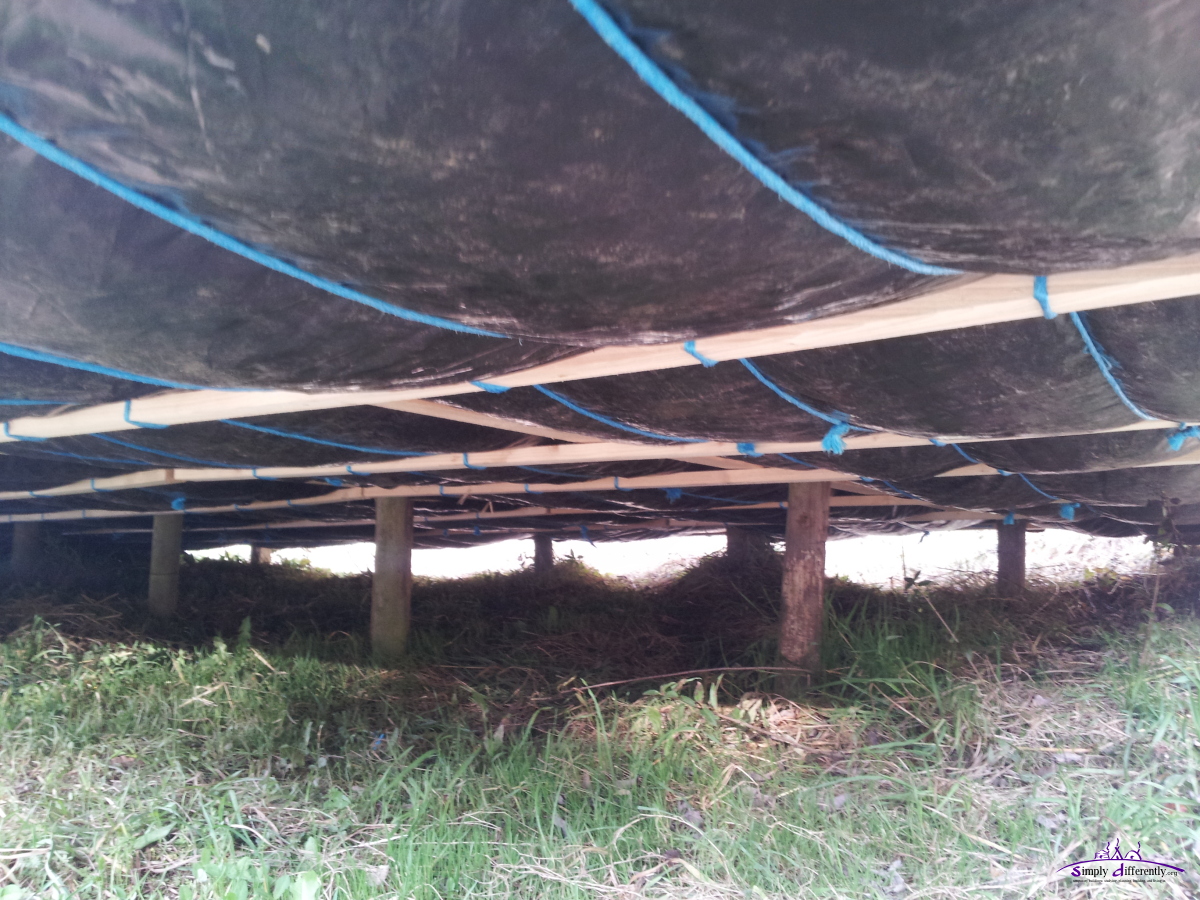 Look underneath with the blue cords 2014/11/04 15:35 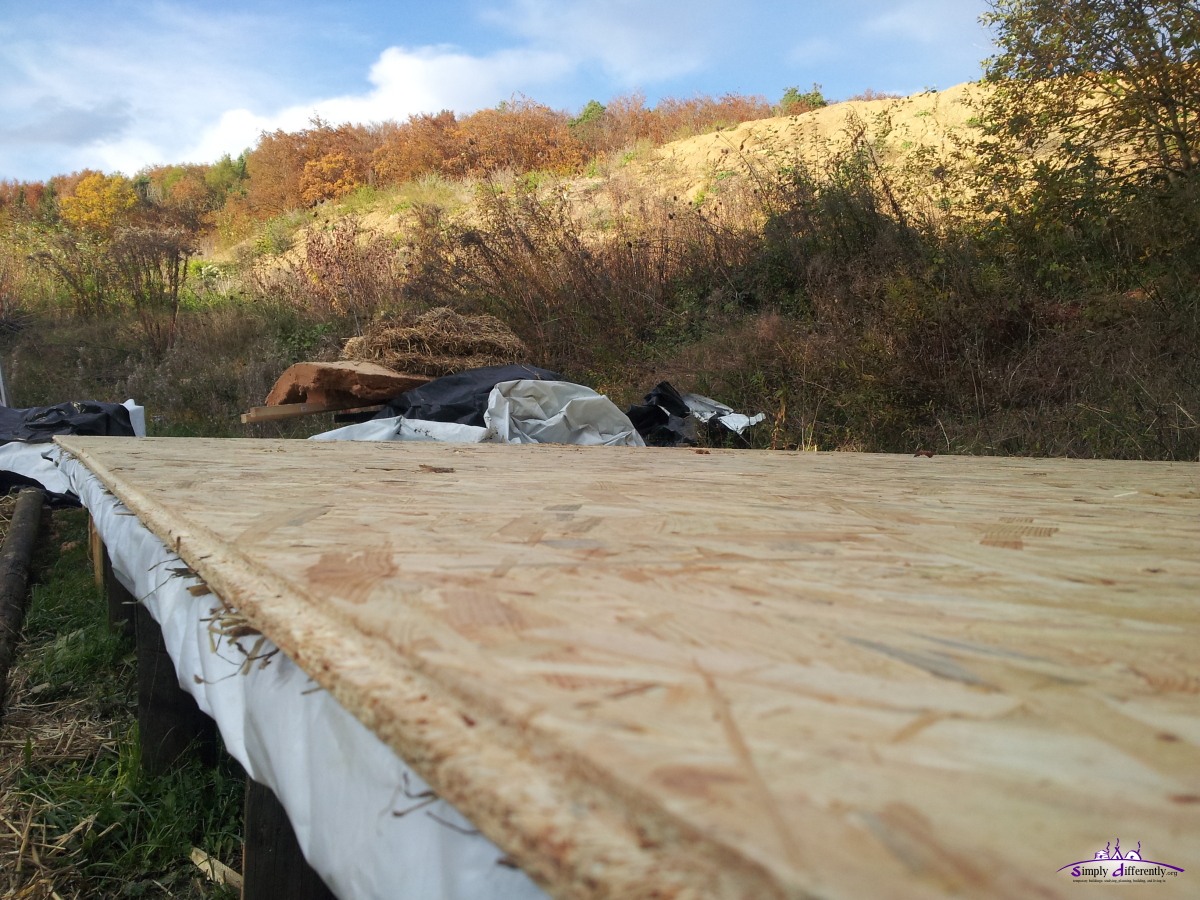 2014/11/04 15:36 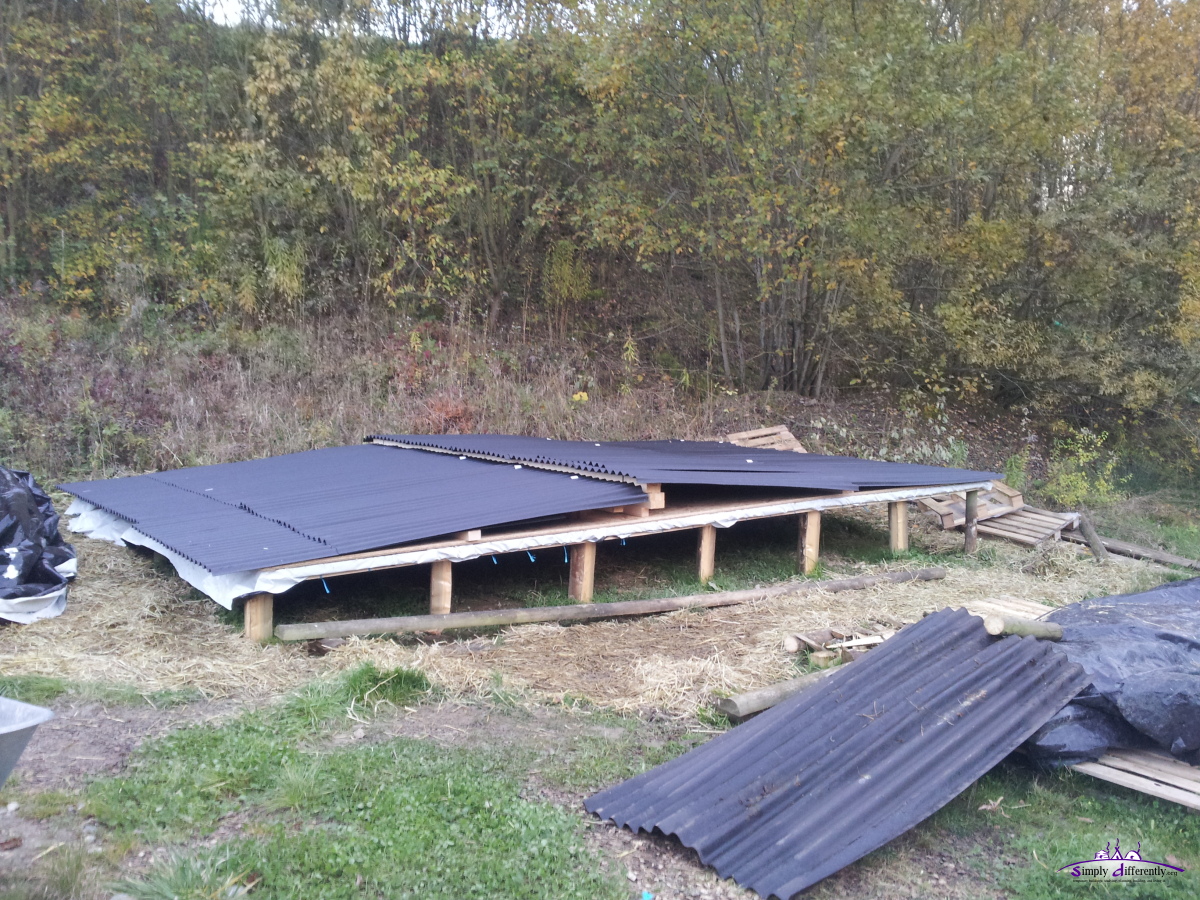 Covering with bitumen roof parts, protecting for the expected rain 2014/11/04 16:46 Tomorrow are finally the strawbale expected, hopefully - yet, the weather as mentioned won't be supportive to continue with the construction, so I wait for 2-3 day window to raise the walls. Once the walls (and door and 2 windows) are raised, the ceiling can be done quickly, and then, so far my plan, construct the roof on top of the ceiling within a day. 2014/11/03: Floor (Continued)Adding and removing some straw to level it properly, and roughly position the OSBs: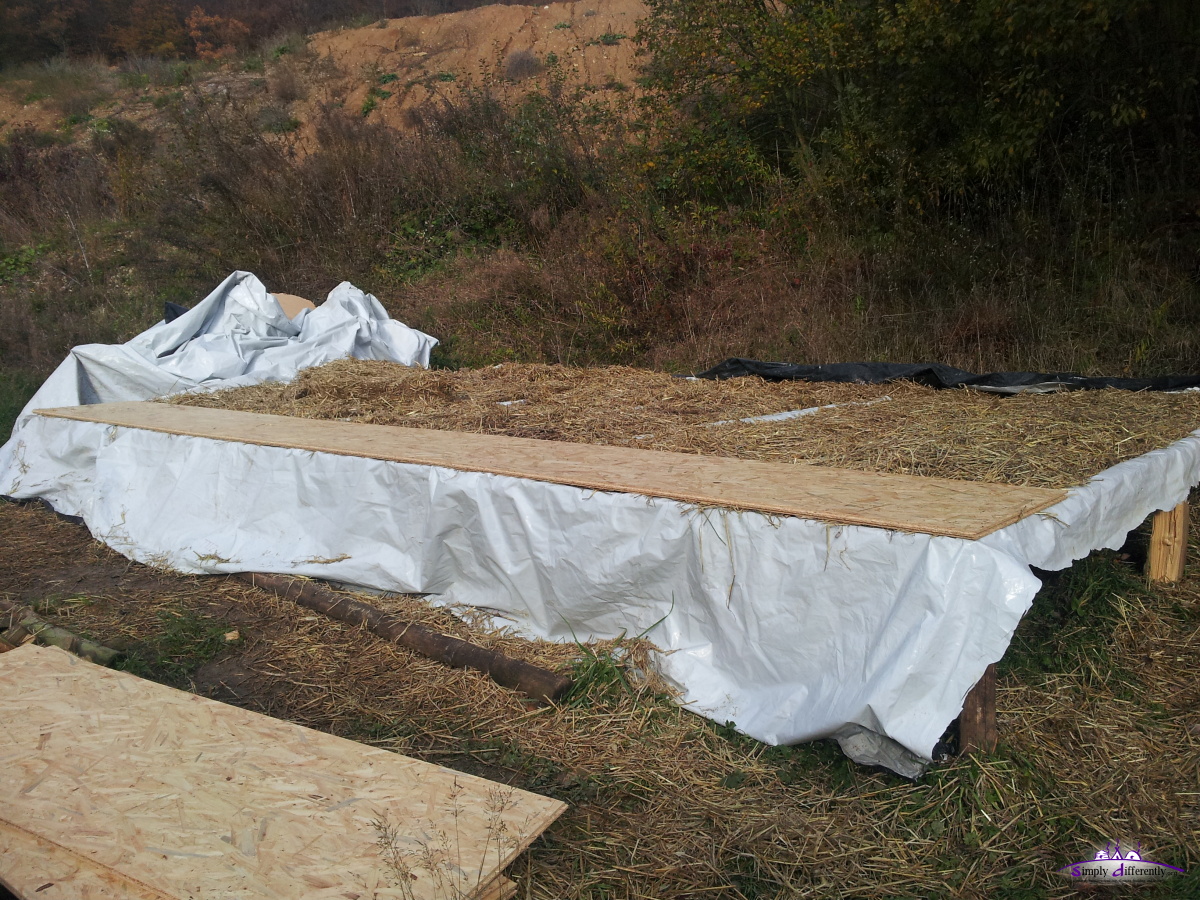 Starting to lay it out 2014/11/03 14:18 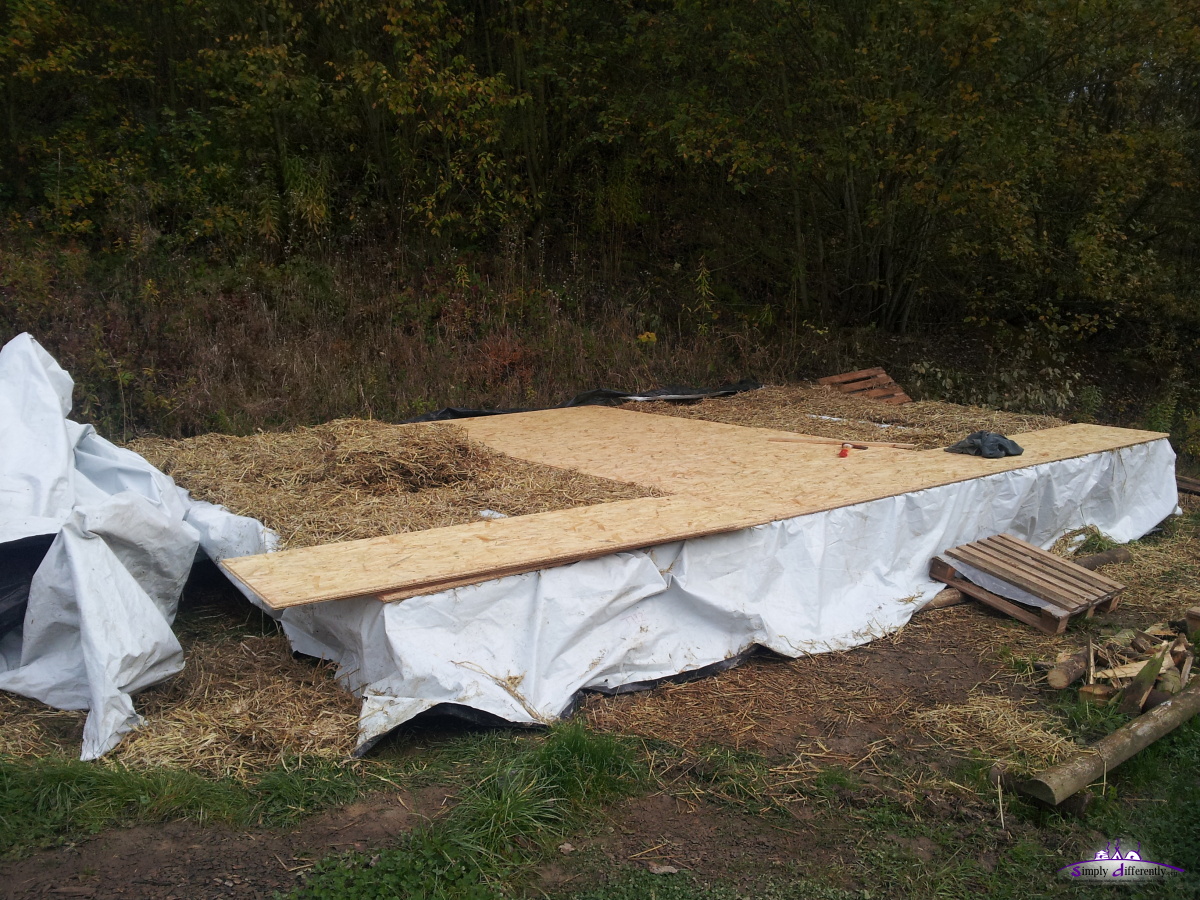 2014/11/03 15:02 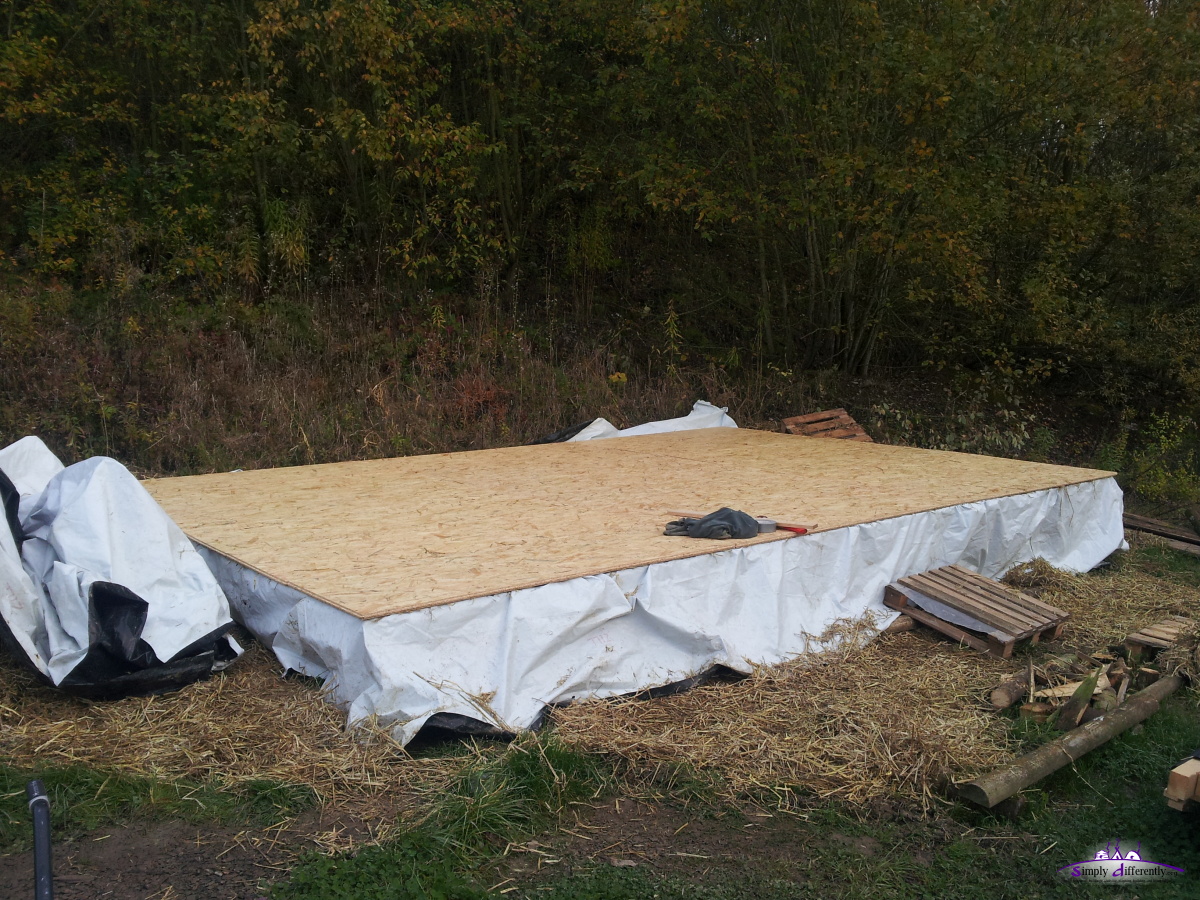 Roughly positioned, not yet fixated 2014/11/03 15:48  Covering it up for the night 2014/11/03 15:56  2014/11/03 15:56 2014/11/02: Floor (Continued)Since the wooden strut as enforcement turned out too thick under the floor insulation, I came up with the idea to use cords to wave a kind of net in between, then the PVC cover, and then the pressed straw layers: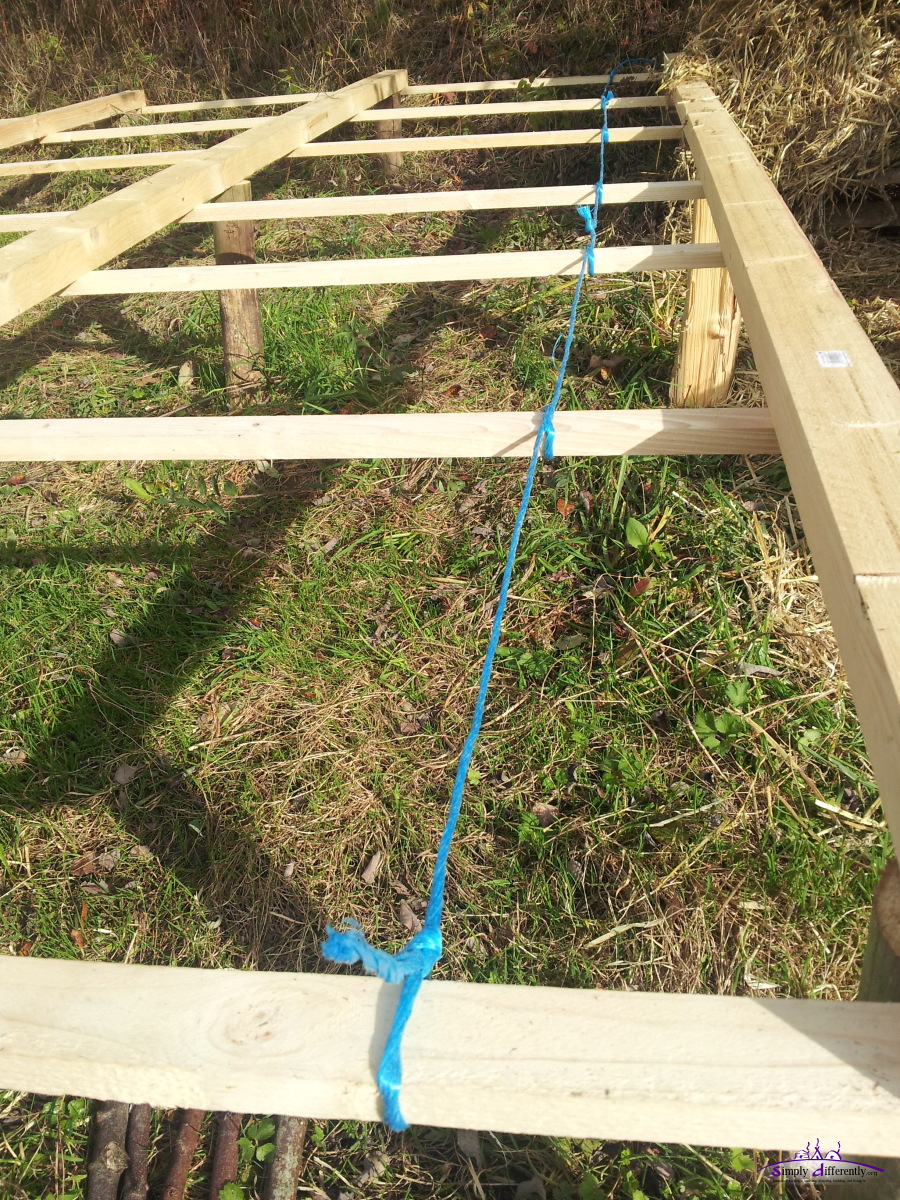 Using a cord to wave a tighter or closer support 2014/11/02 13:16 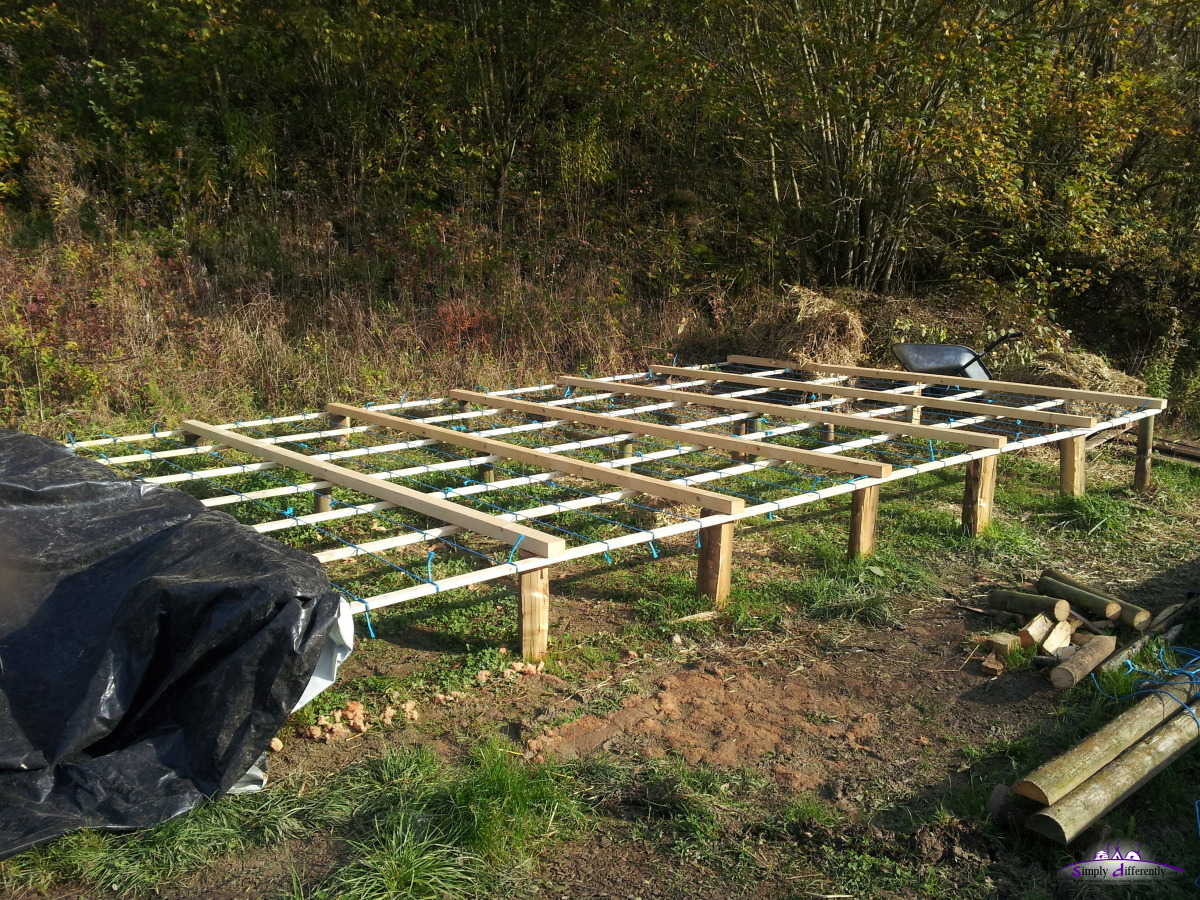 Cord net finished 2014/11/02 14:02  Cord net finished (closeup) 2014/11/02 14:02 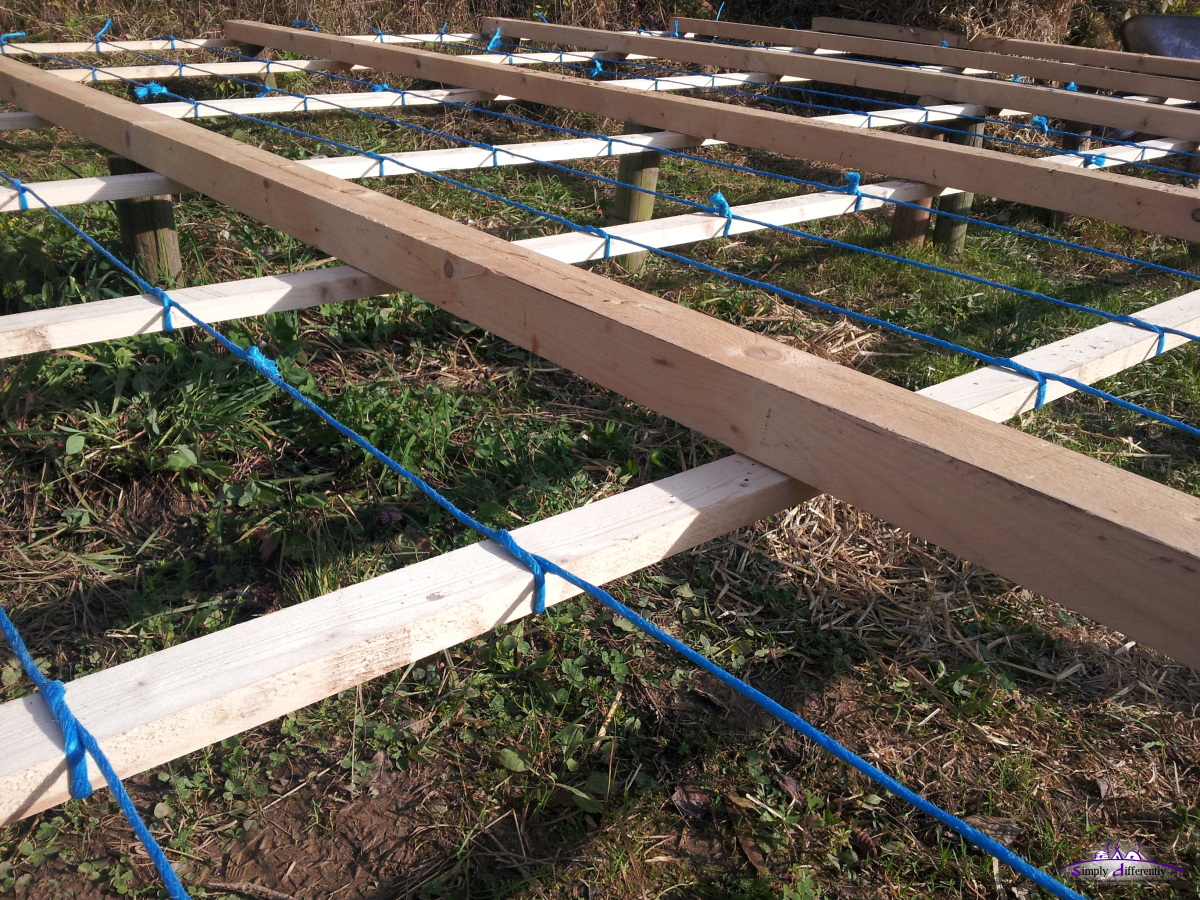 Cord net finished (closeup) 2014/11/02 14:02 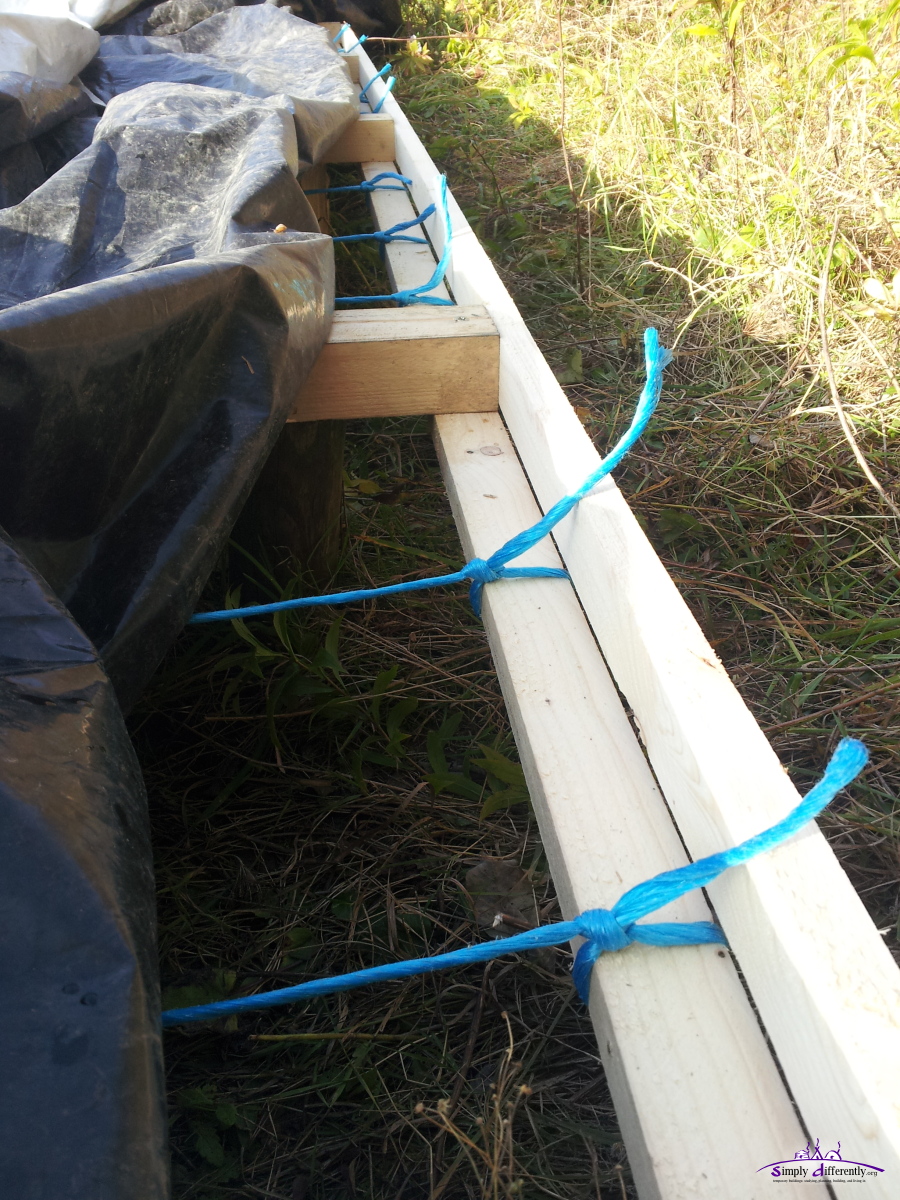 Vertical end strut 2014/11/02 14:36 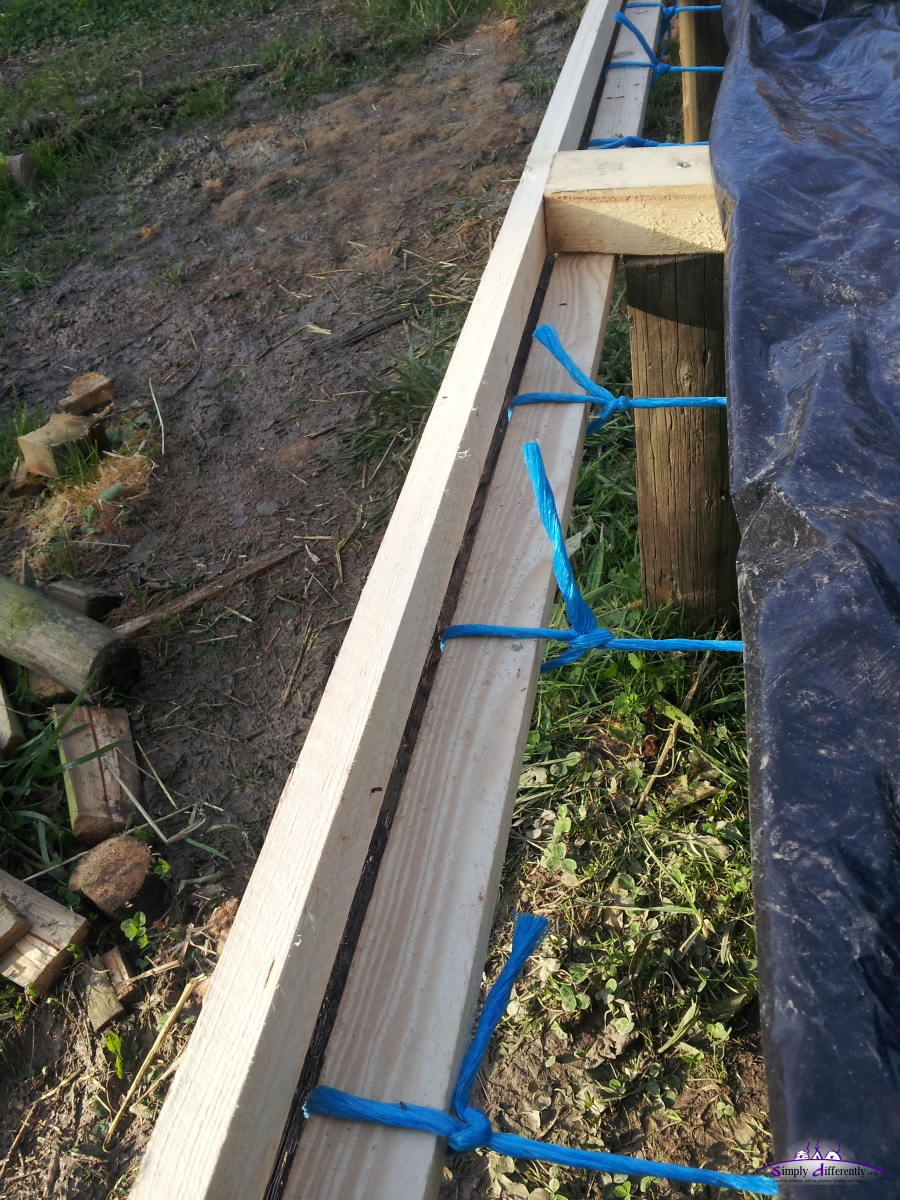 2014/11/02 14:40 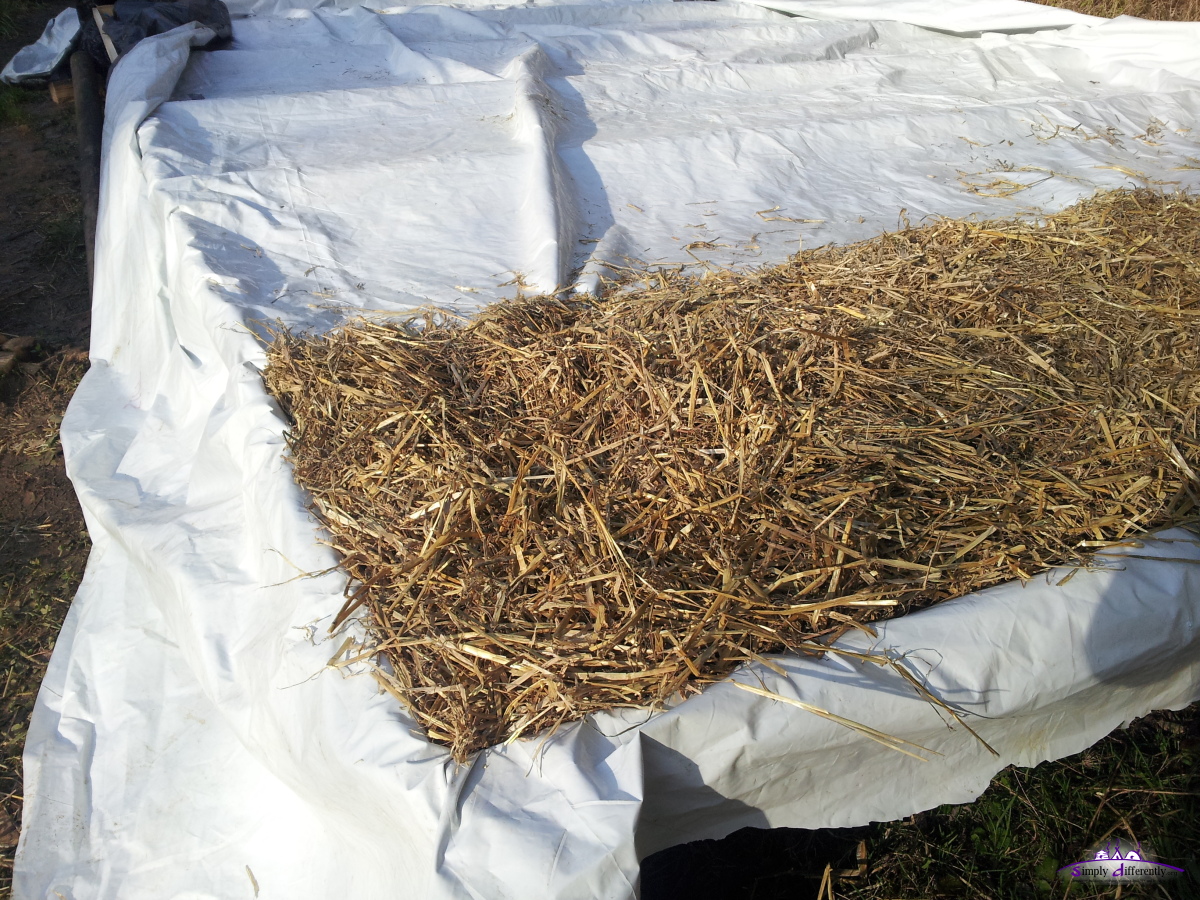 Refilling the straw layer 2014/11/02 14:41 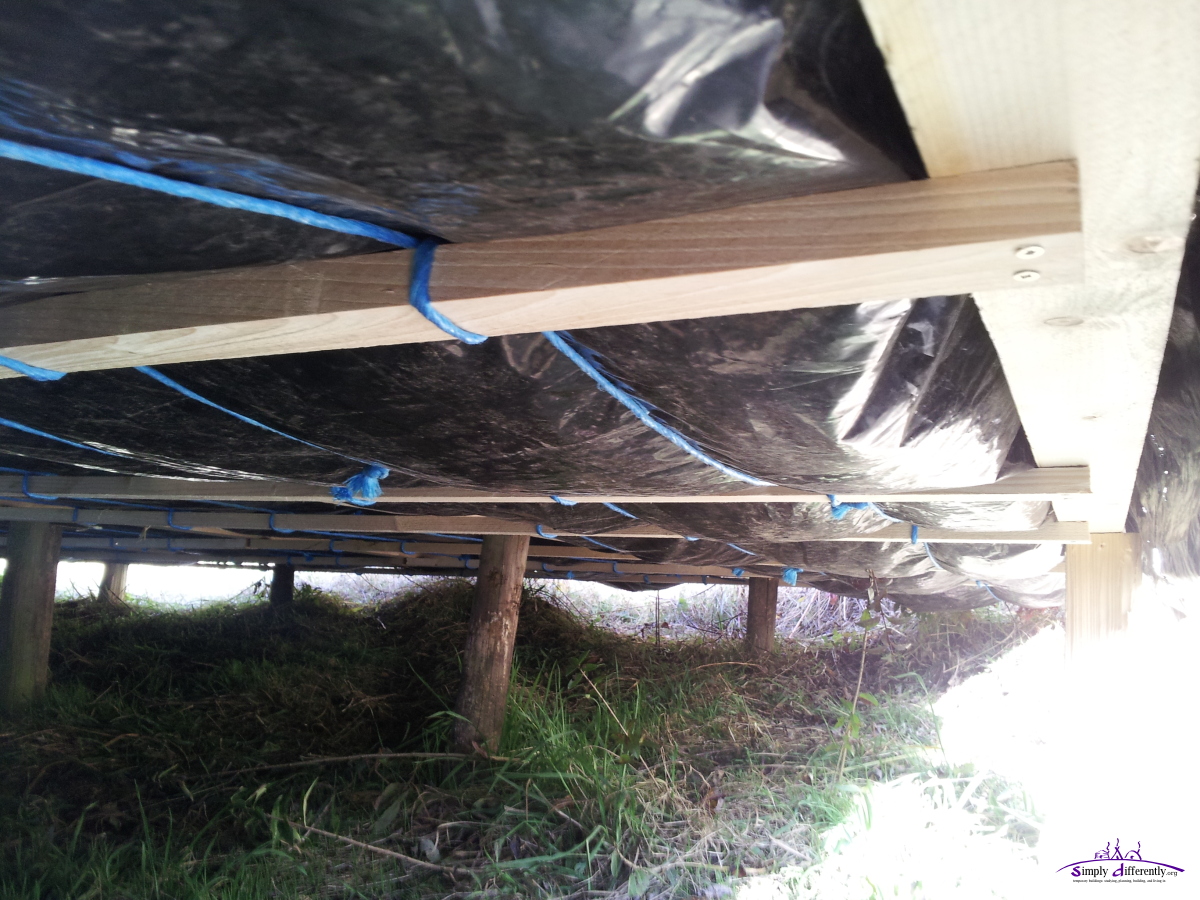 Looking underneath 2014/11/02 14:42  Continuing putting pressed straw layers 2014/11/02 14:52  Some layers are compact, but still fragile to handle (tend to fall apart) 2014/11/02 15:07 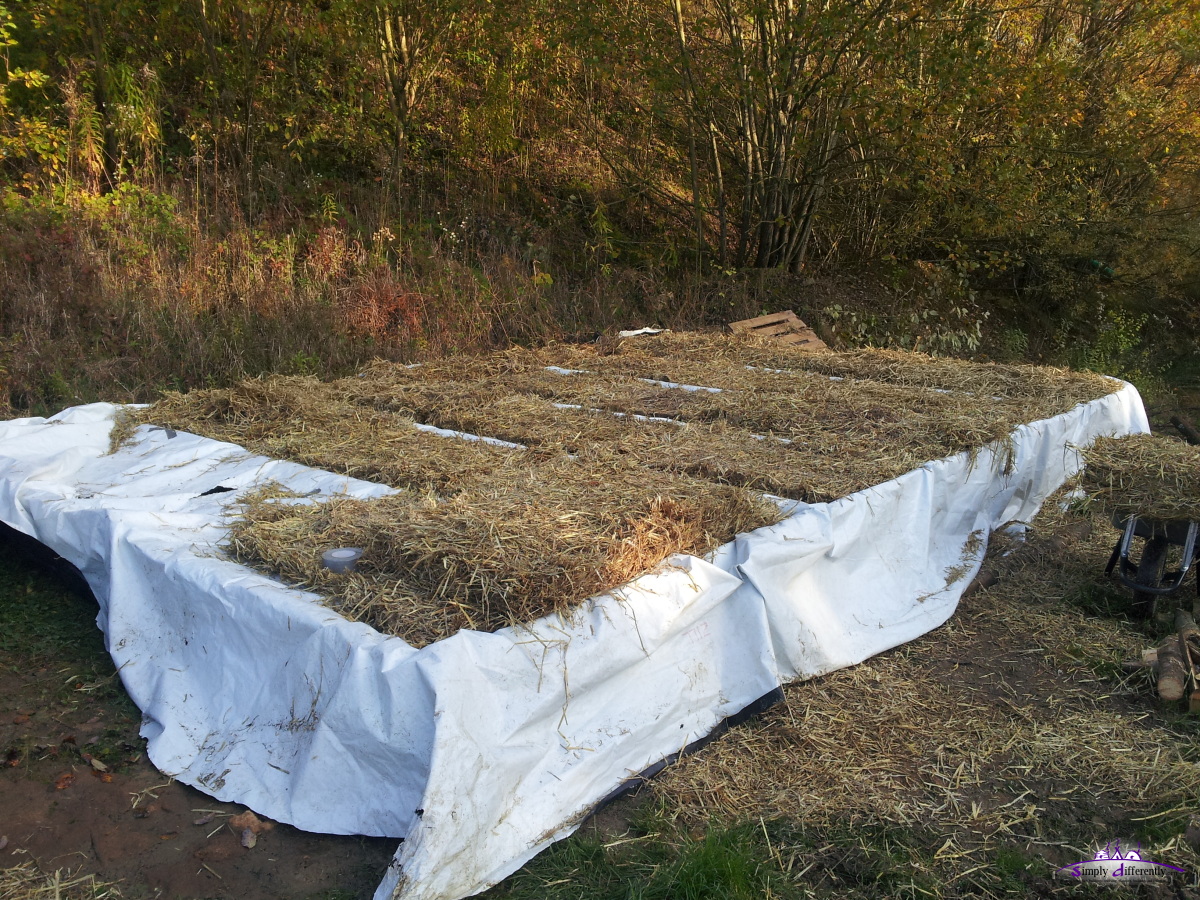 Almost done for today 2014/11/02 15:29 I'm going to loose the pressed straw layers so they use up more volume, yet, the OSB can easily press it again, to make sure entire dedicated space is filled with straw. It's quite foggy at mornings, around 12:30 to 13:00 the sun penetrates the fog and disolves the remaining fog, until 15:30 I have direct sunlight, afterwards the sun sets behind the trees and humidity falls on the surface - so limits the time to work on the cabin to about 2-3 hours per day. 2014/11/01: Floor (Continued)Today I laid a strong PVC canvas over the grid, and laid some straw over it - the pressed straw layer from a large strawbale (1.5m x 0.8m x 0.6m ~ 400kg) is about 90cm wide, and 8cm thick pressed, ideal for my use case. I used 3 layers for one "lane" of my grid. Some additional support is required which I will do with cords tomorrow.
 PVC canvas as humidity blockage underneath 2014/11/01 14:34 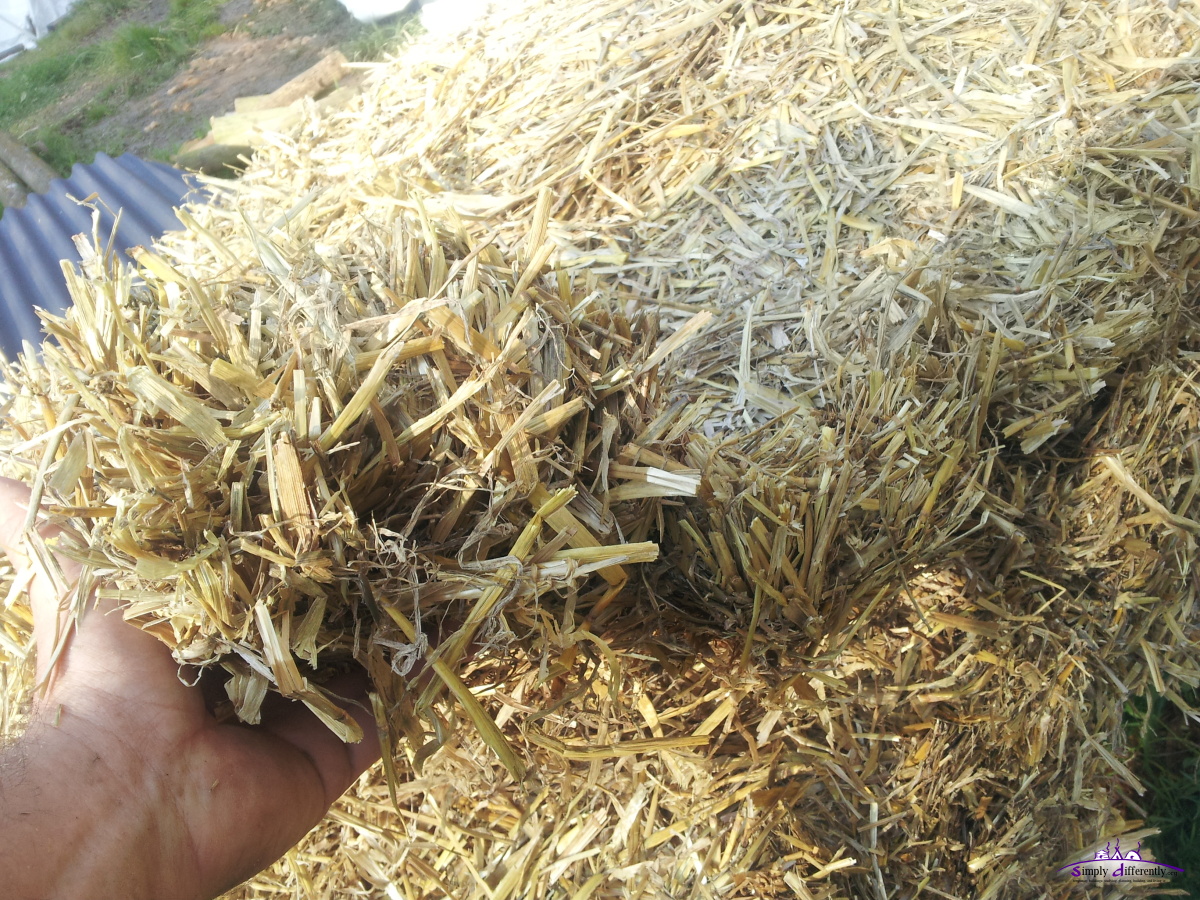 Single layer of pressed straw 2014/11/01 14:34 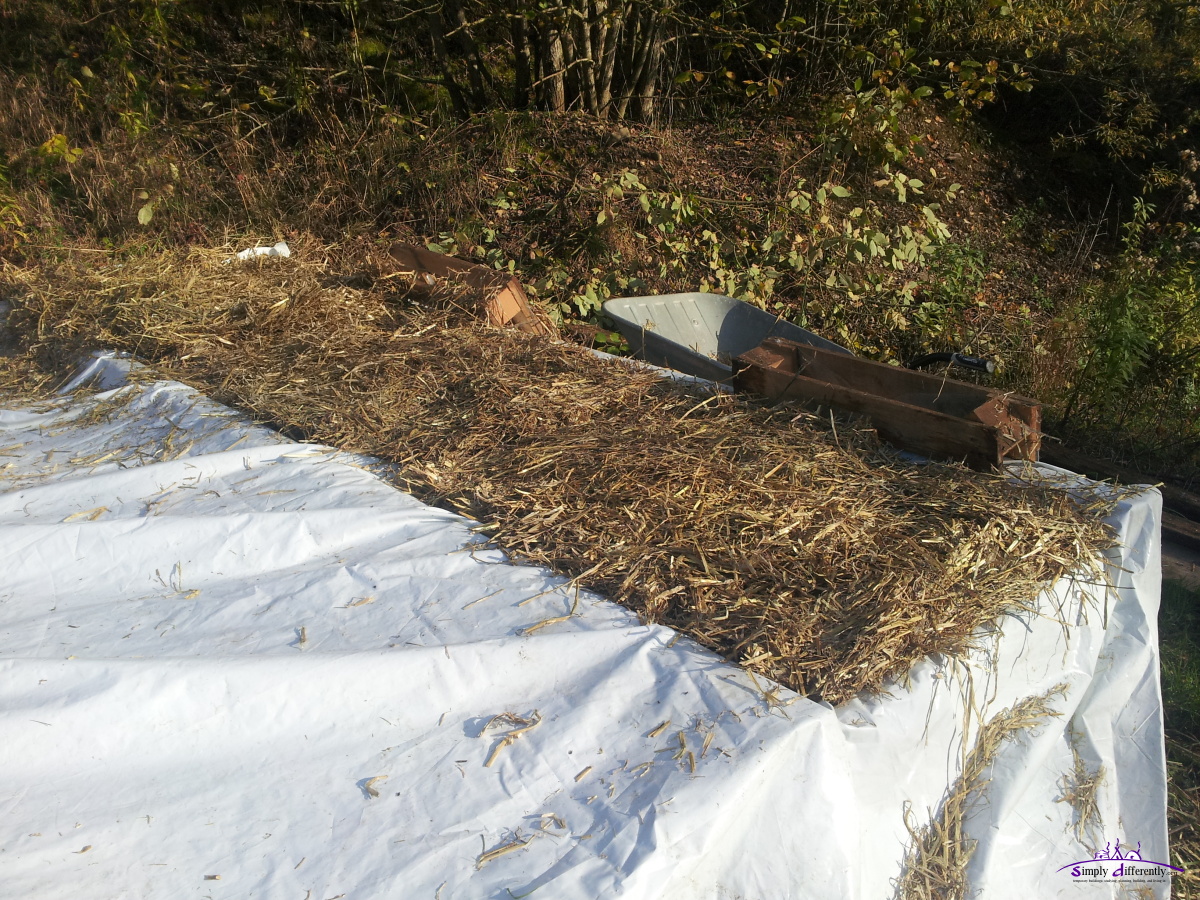 One lane of the grid with straw layers filled 2014/11/01 14:39 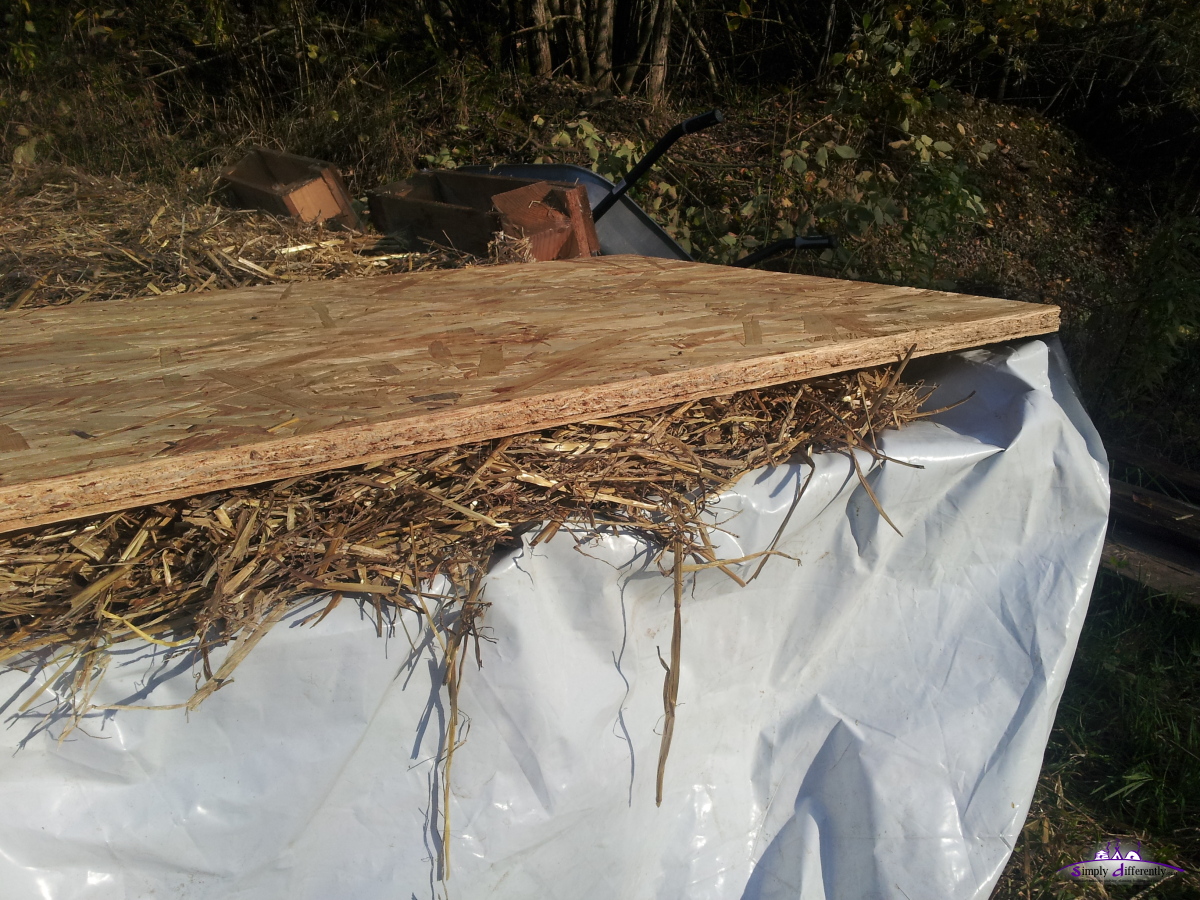 Testing with OSB over it 2014/11/01 14:46 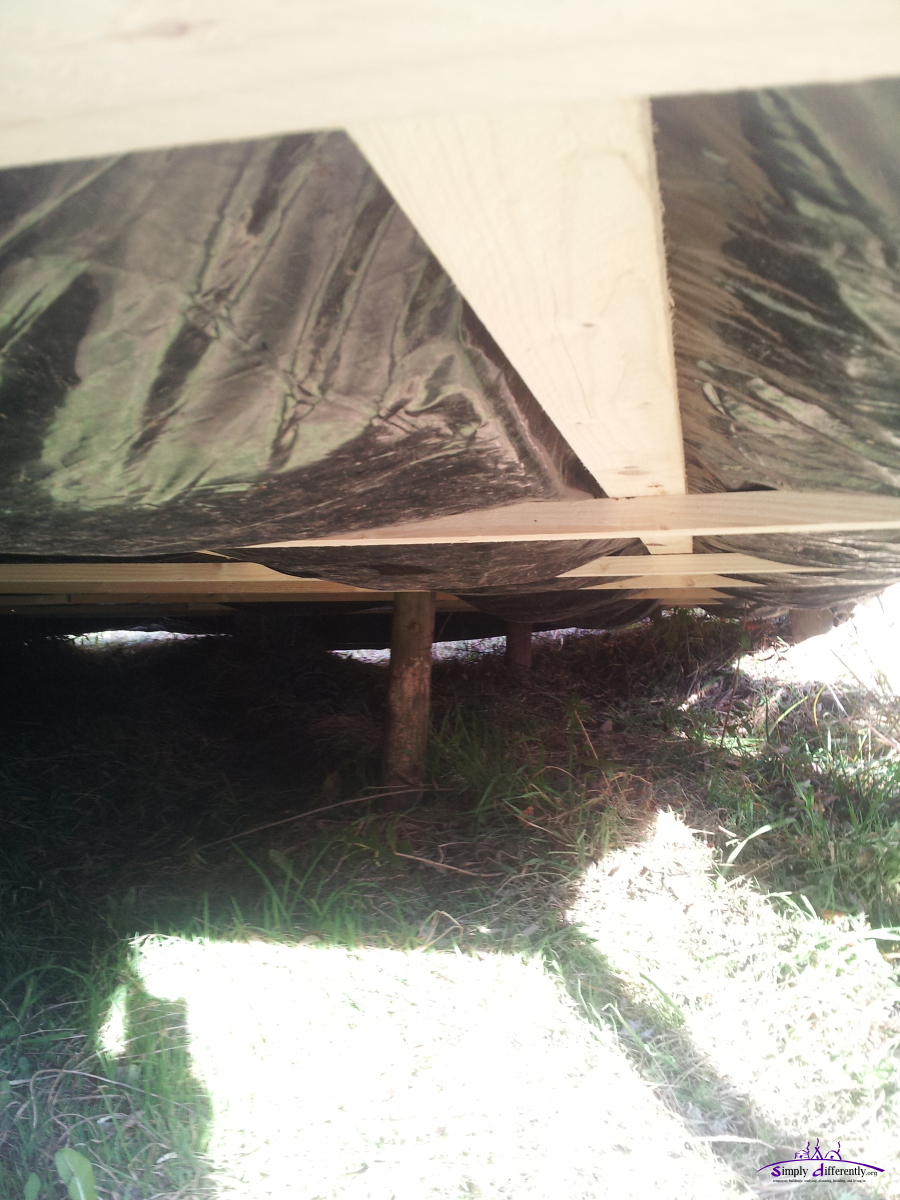 Supporting strut, but it's too thick 2014/11/01 14:46 2014/10/31: Floor (Continued)I finished the supporting grid for the insulation, and tested with some China Grass based insulation matt - unfortunately it's a bit too thick for my use case: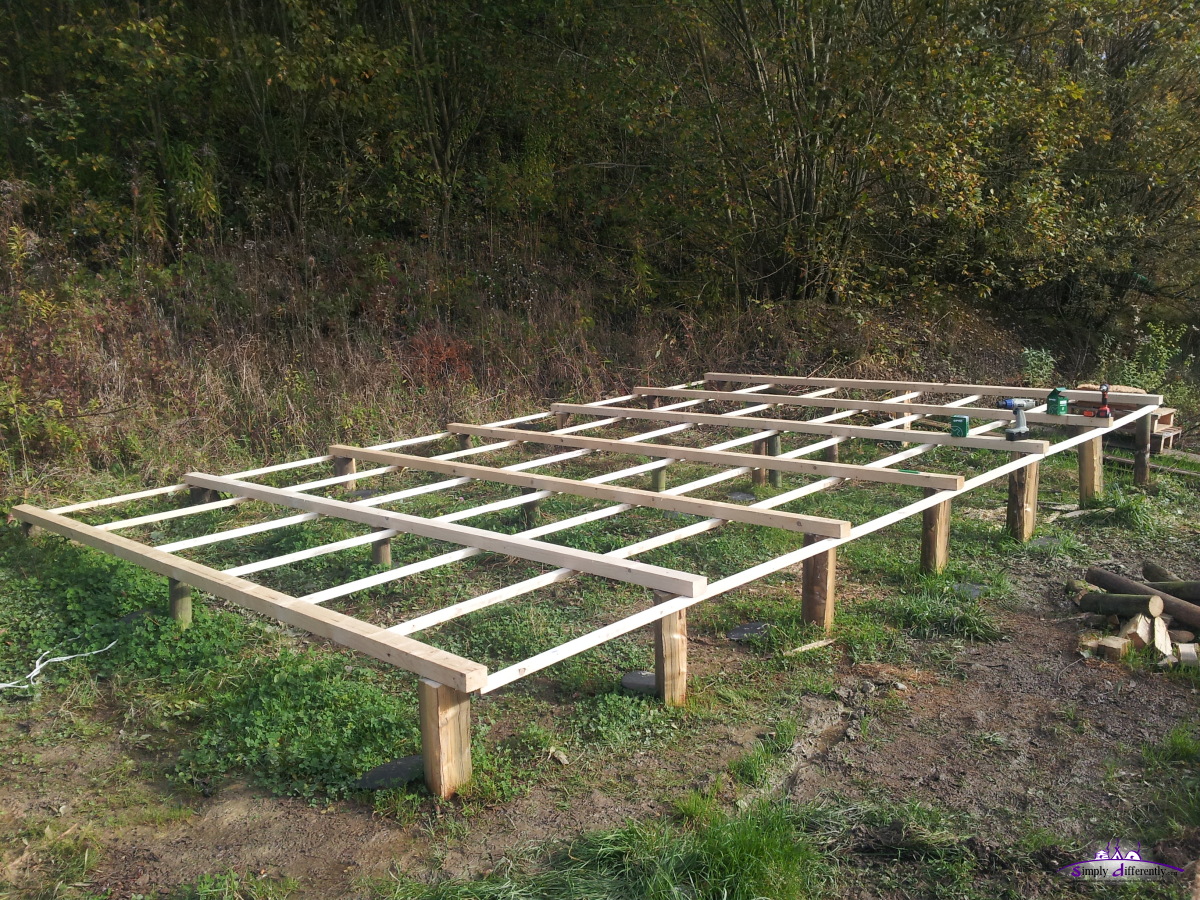 Floor grid finished 2014/10/31 14:00 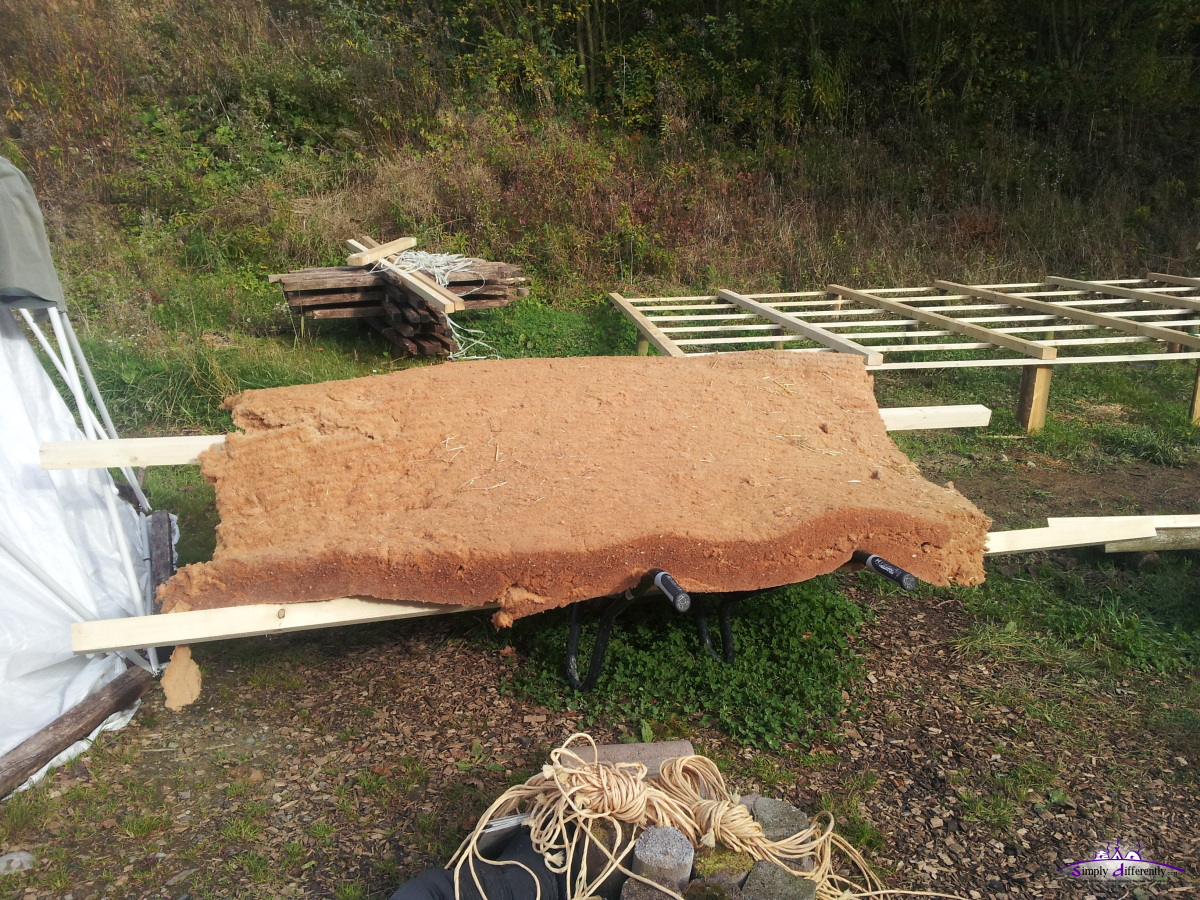 Testing with China Grass based insulation matt 2014/10/31 14:01 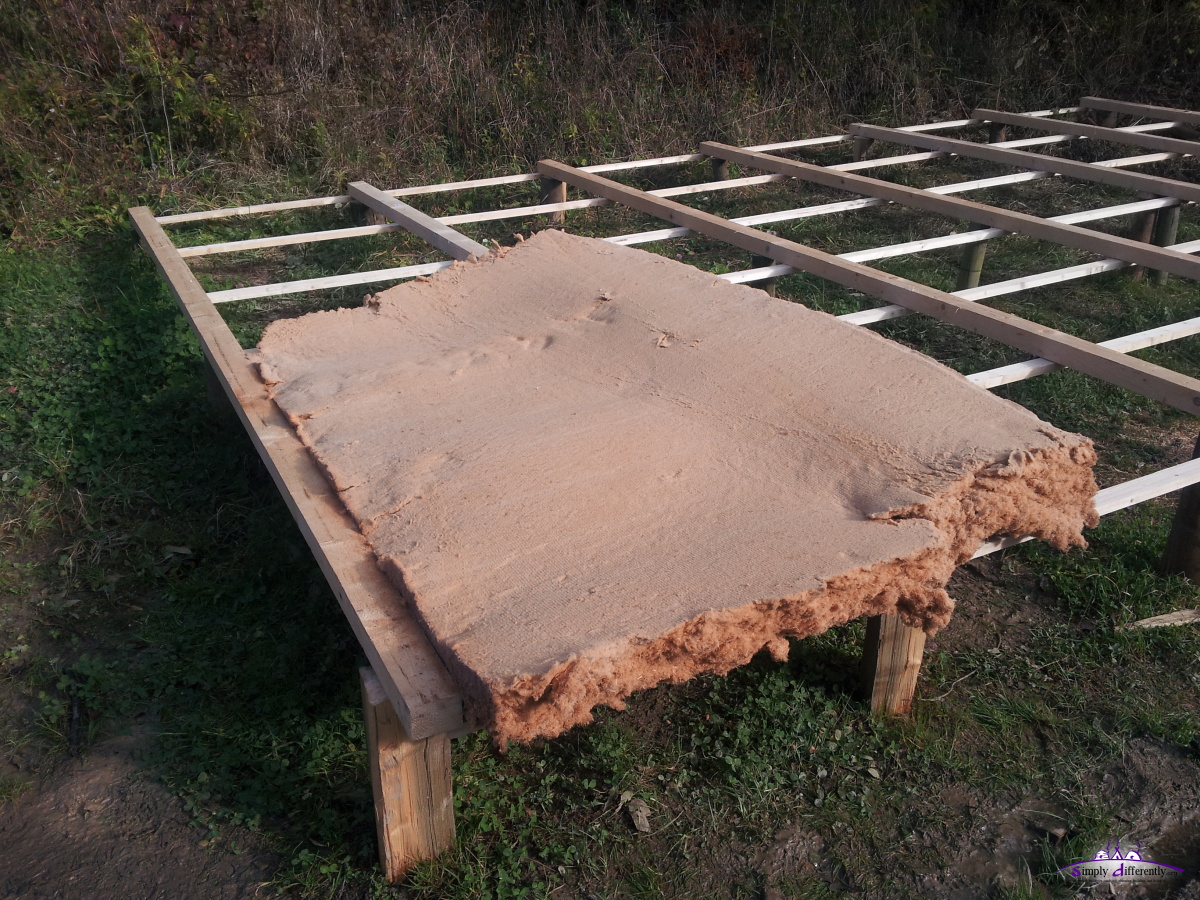 2014/10/31 14:10 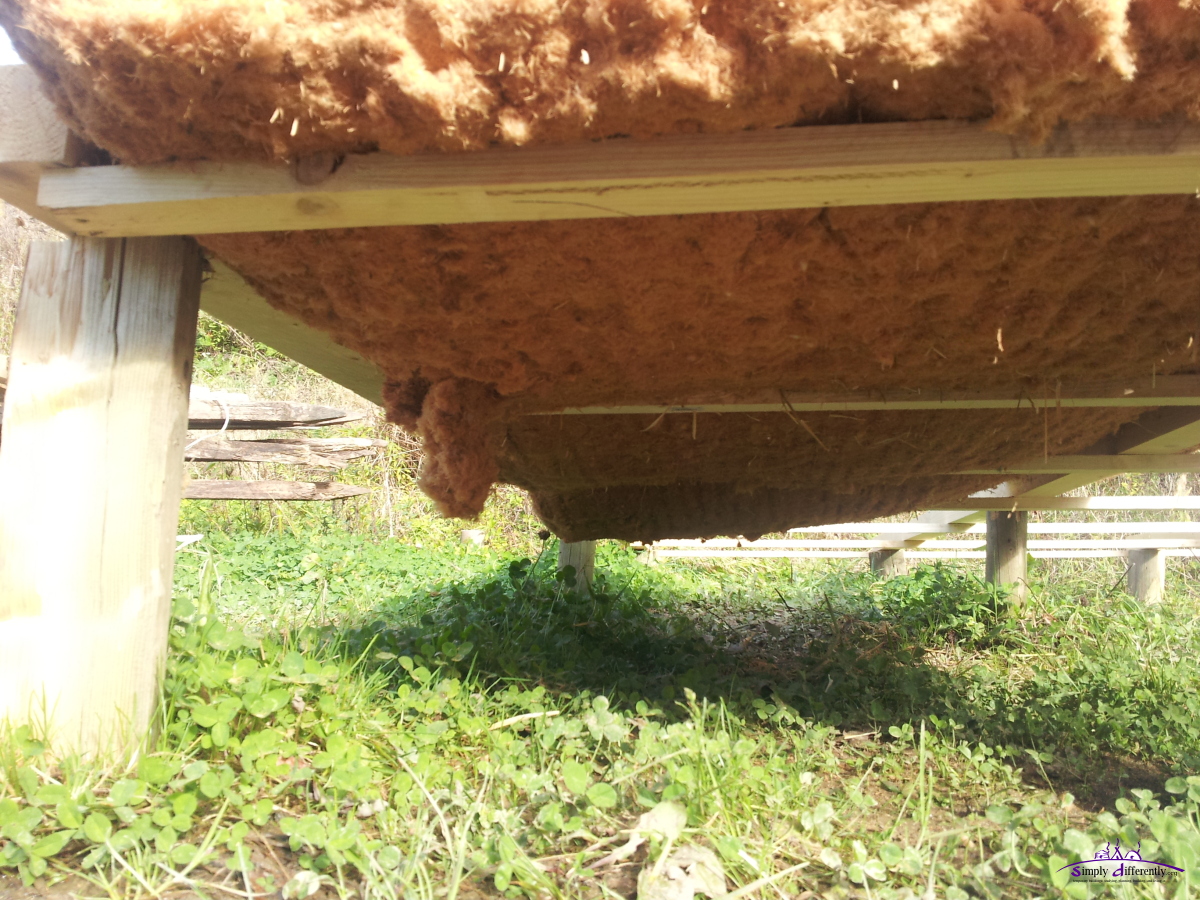 2014/10/31 14:10 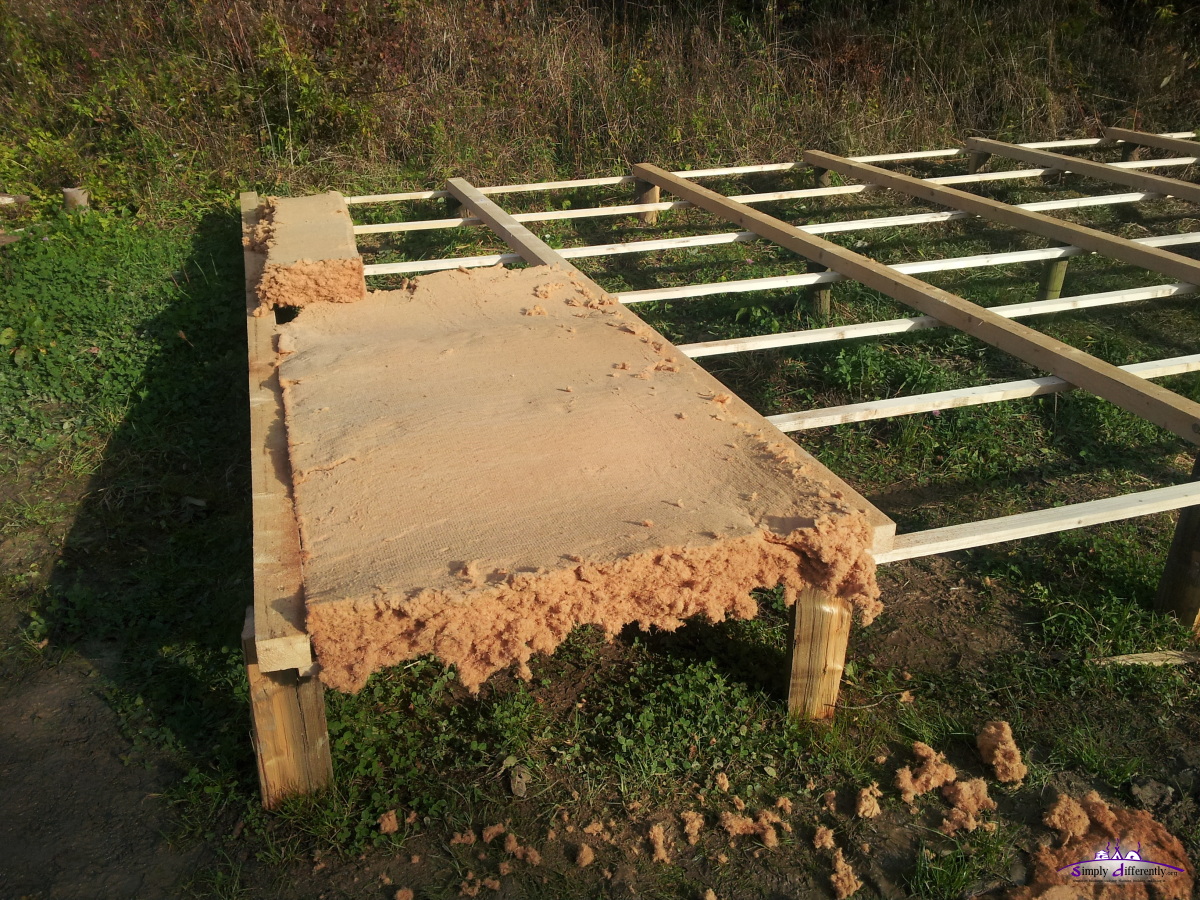 Making it fit, but it's too thick 2014/10/31 14:23 2014/10/30: Floor (Continued)I used smaller struts and attached them beneath the main floor beams, to prepare the floor insulation:
 Aligning the beams before fixating 2014/10/29 15:01 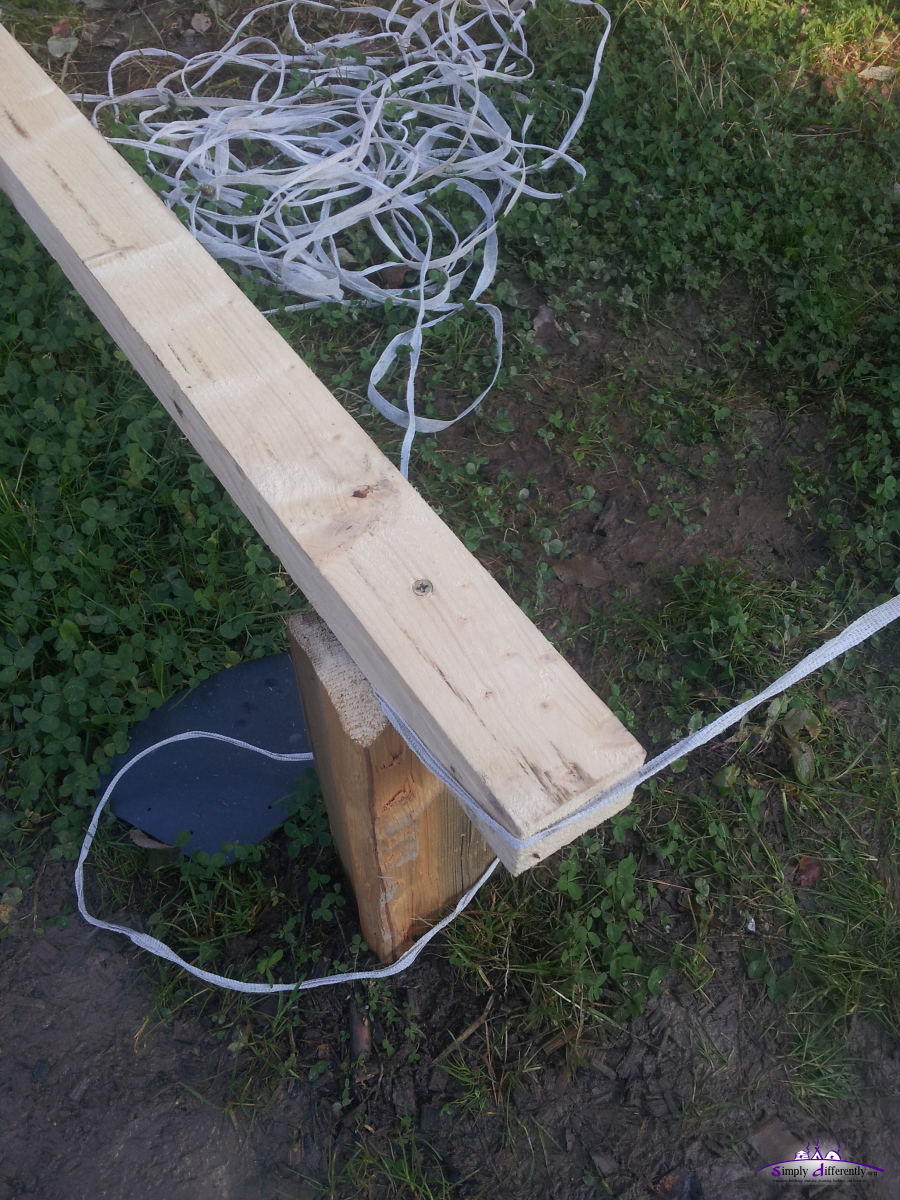 2014/10/29 15:01 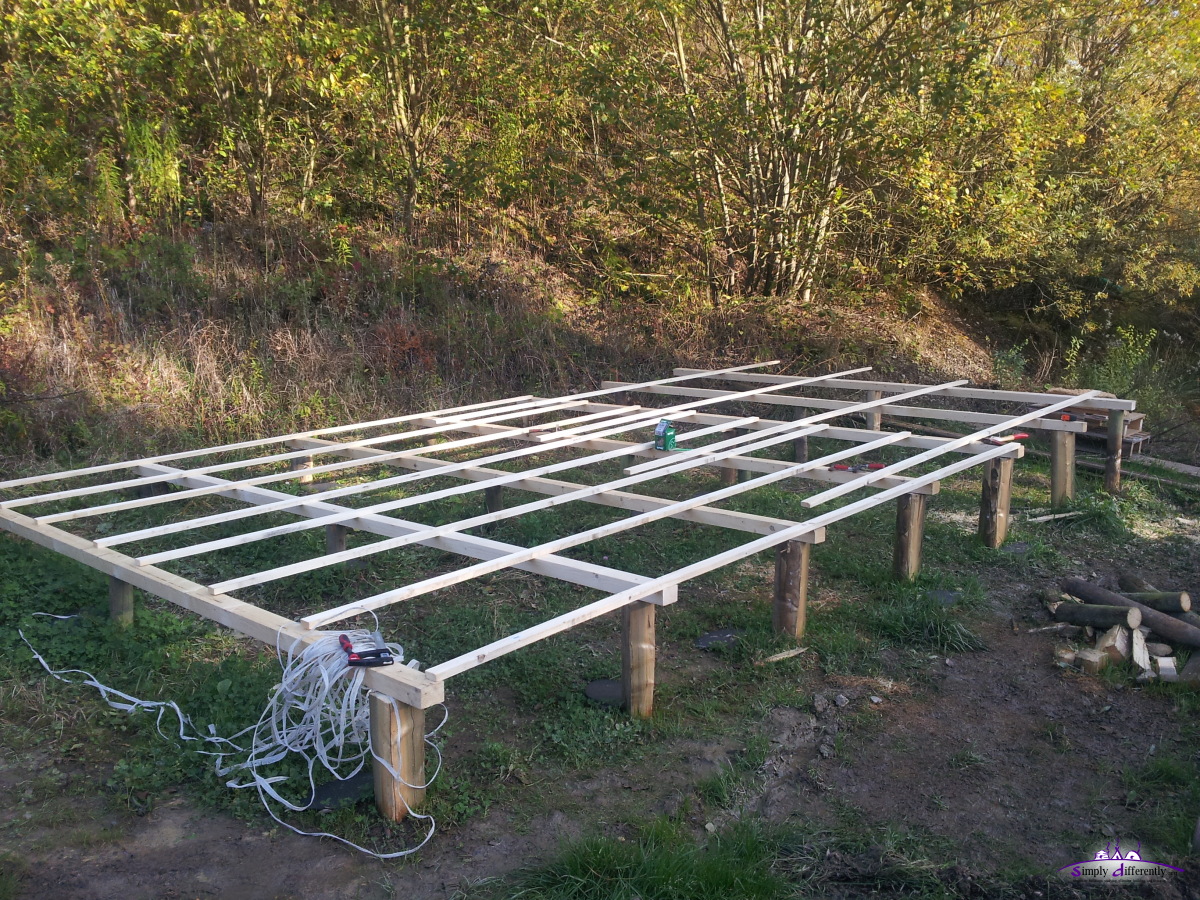 2014/10/30 15:18 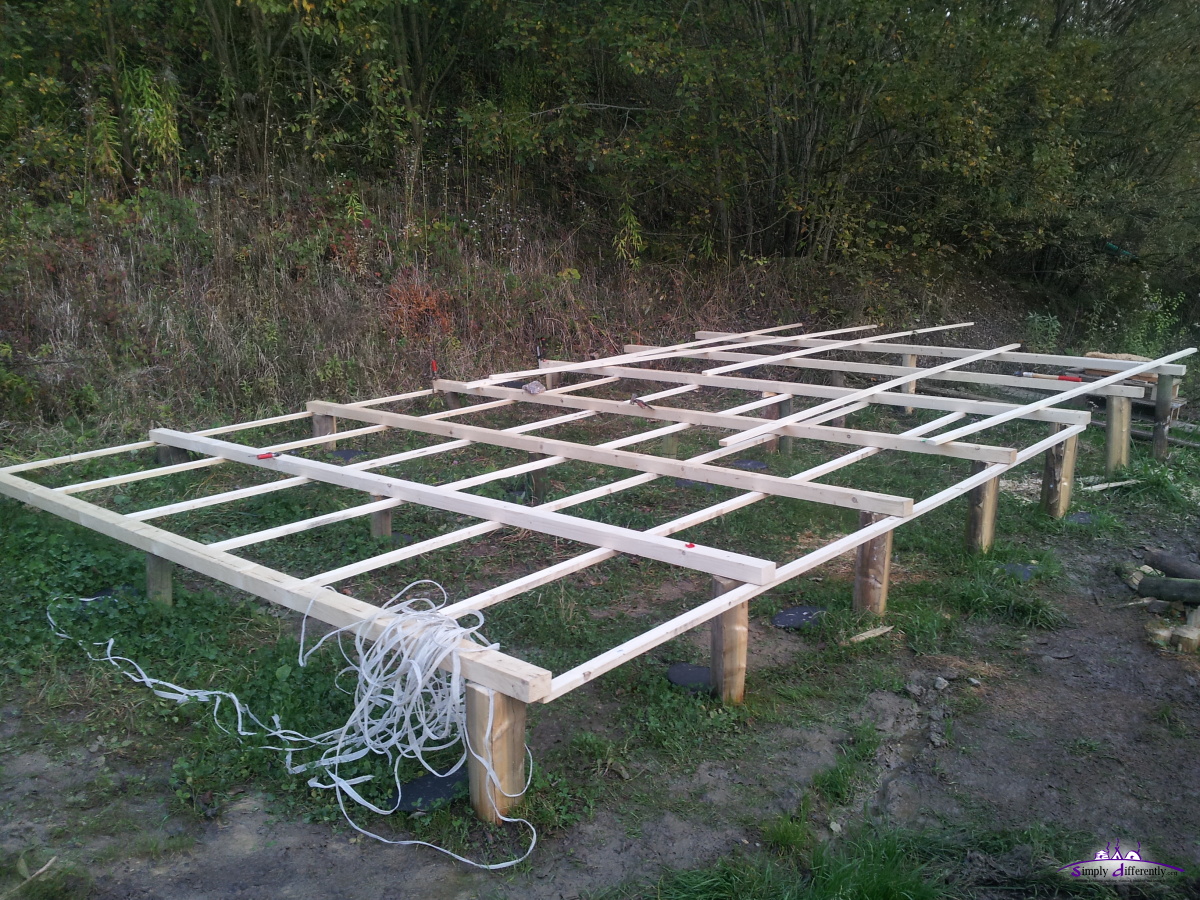 2014/10/30 16:51 The idea is to use some plastic and then put the insulation on it and then the floor 22mm thick OSB. 2014/10/24: FloorThe strawbales should arrive within the next week, so I decided to continue with the floor construction:
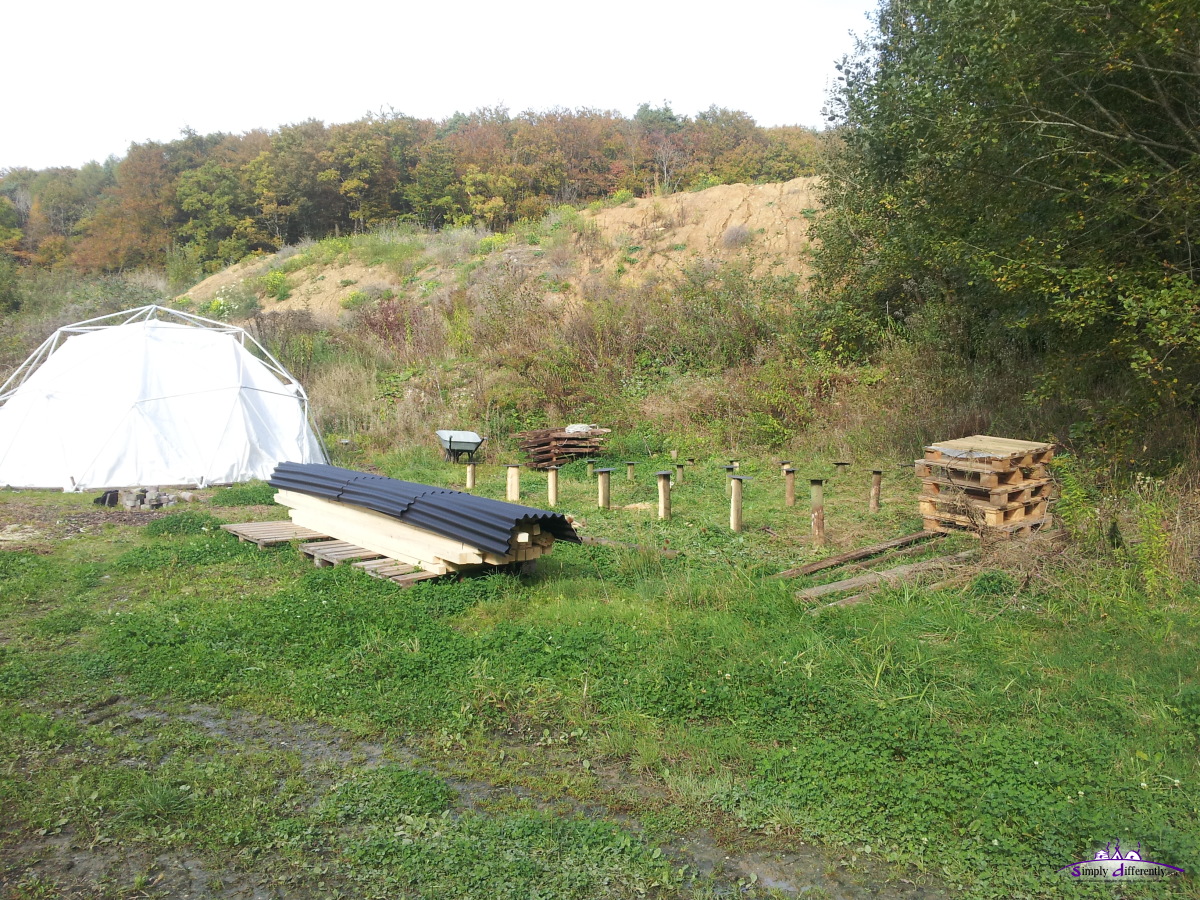
 Laying on the main floor beams (7 x 4m long) 2014/10/24 13:27 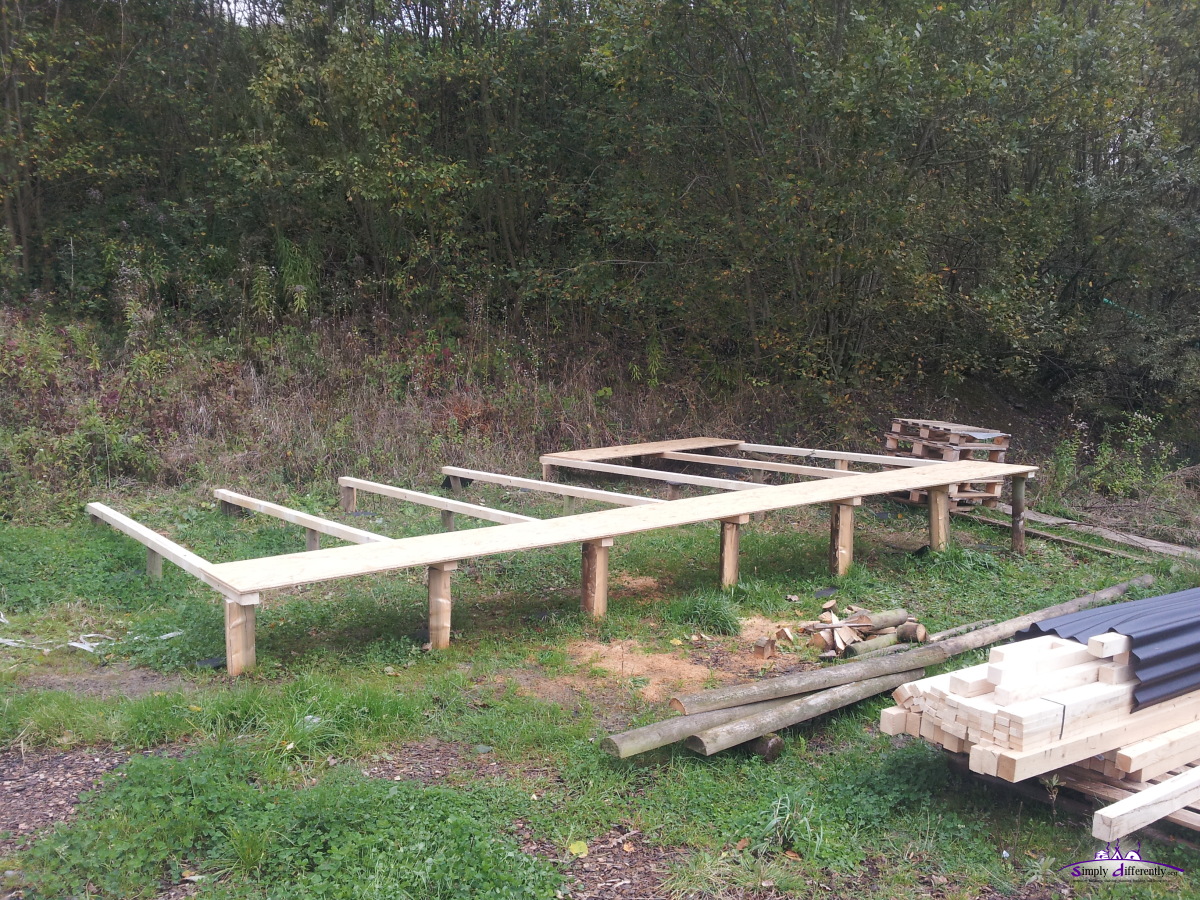 Testing with OSB 2014/10/24 13:44 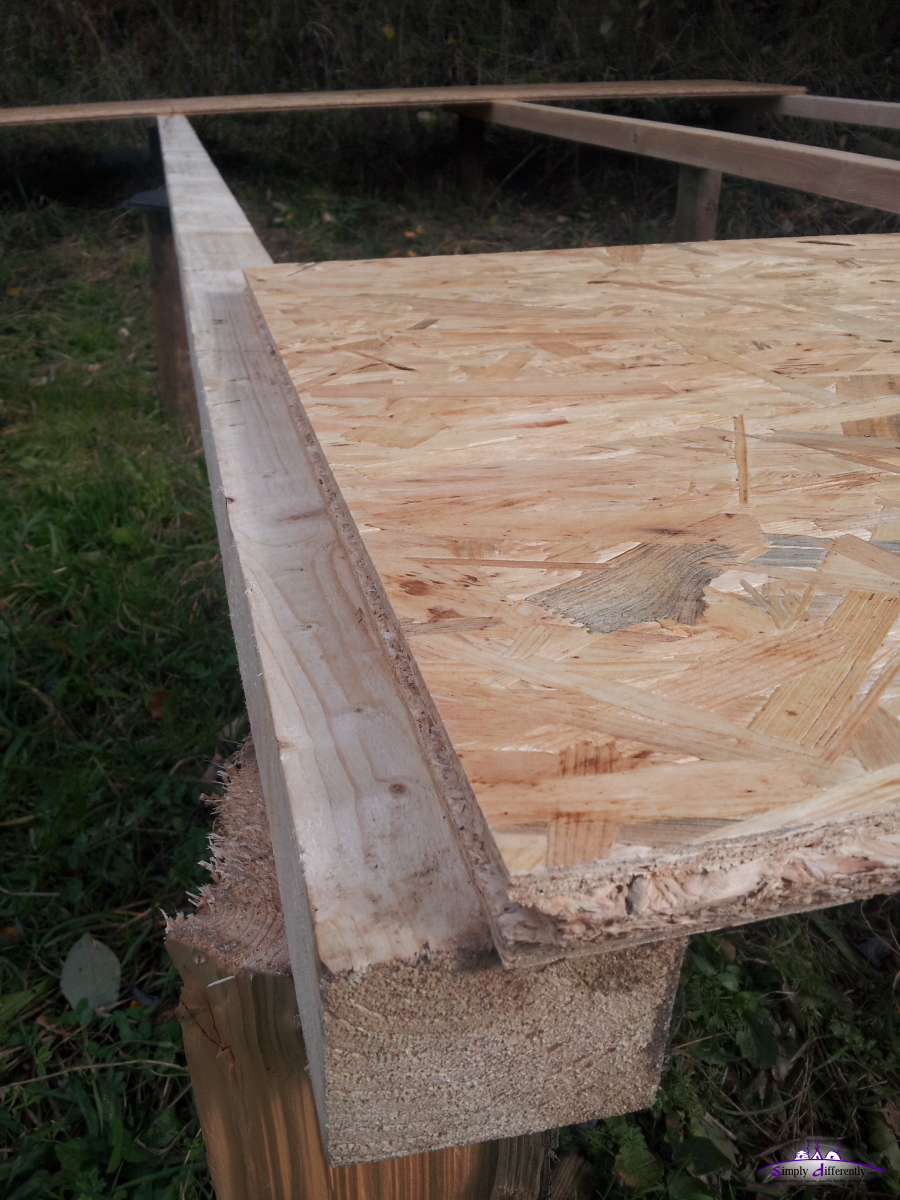 Needs to be pretty exact (+/- 0.5cm) 2014/10/24 13:57 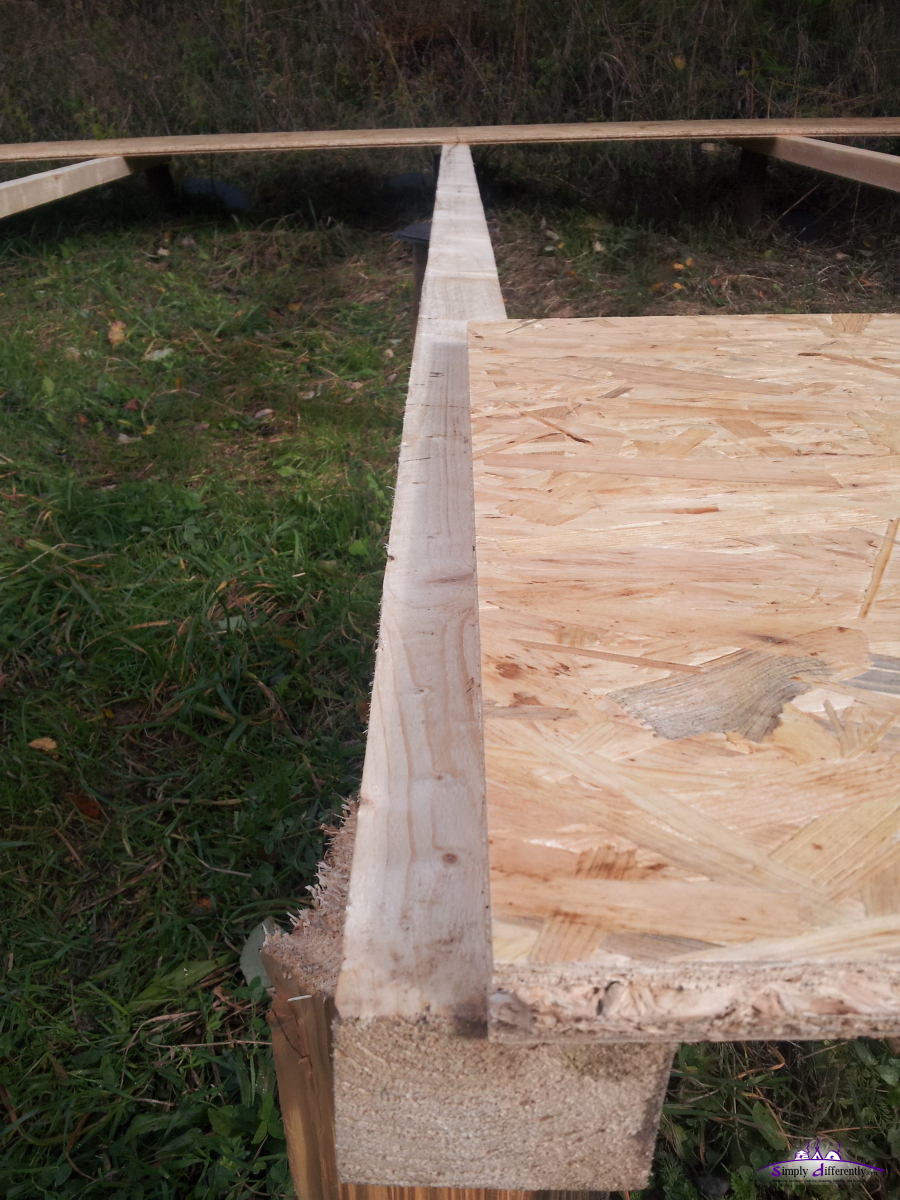 2014/10/24 13:58 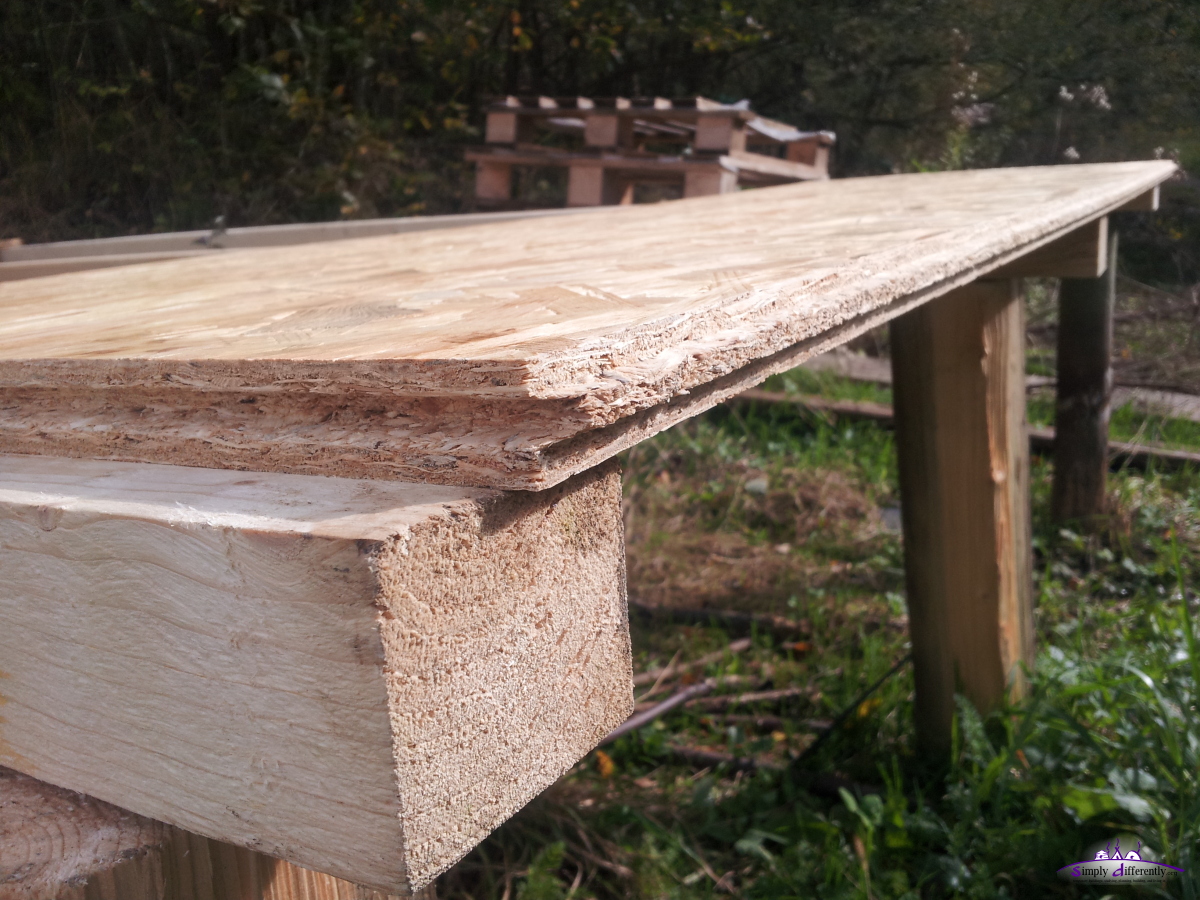 2014/10/24 13:58  2014/10/24 14:11 Where I am there are spare insulation material, apprx. 3m x 1.2m and 30cm thick and soft, when transporting they tend to "break" - I gonna try these, and if they don't work I gonna use loose straw to fill the space. 2014/10/12: Ground Poles
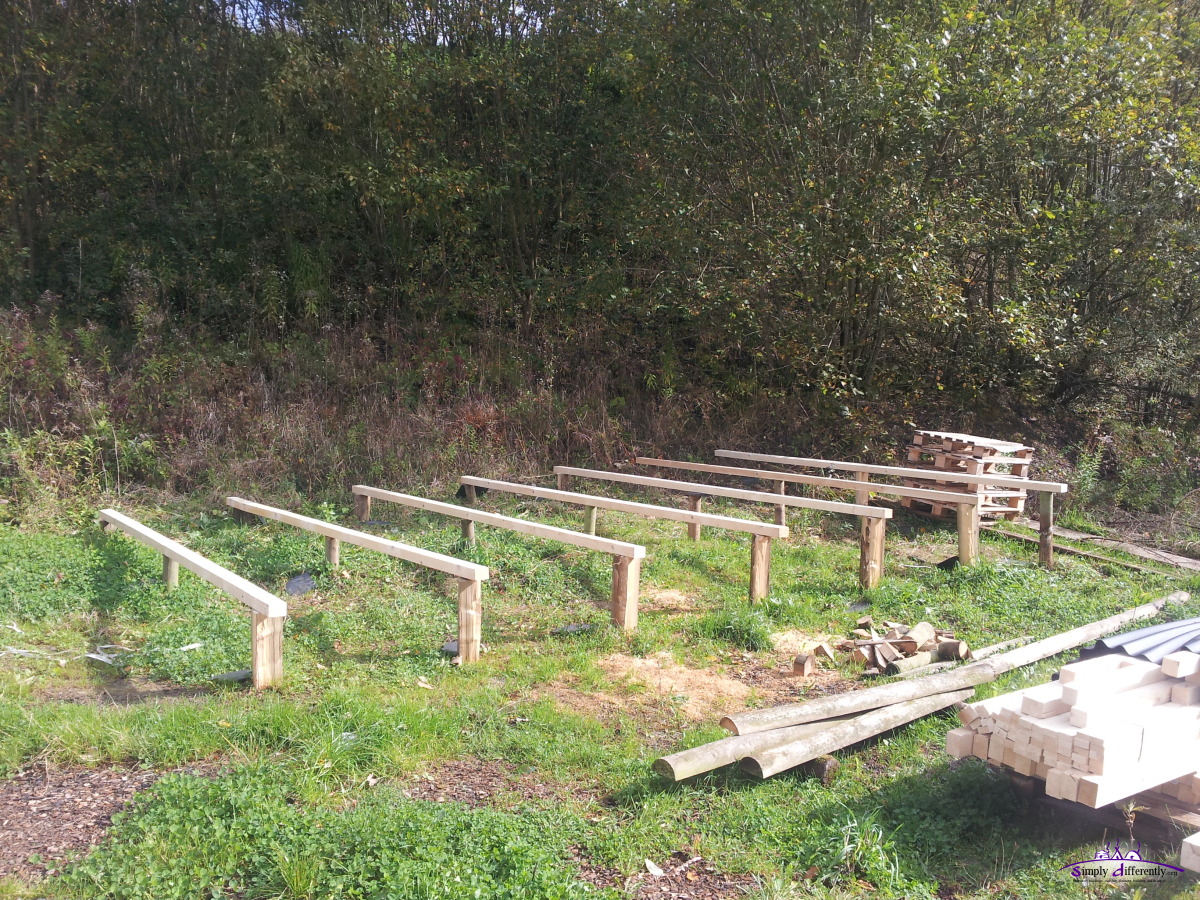
It was a bit tricky to ensure perpendicularity, but it was achieved by measuring with a cord the diagonal both ways until they were the same length. The distance between the poles were easily to measure. Once they were rammed into the ground, either hammered further or cut and then with a 4m beam leveled until it fit. It was a bit time- and physical strength consuming but forth the efforts.
The next steps I had to postpone as the strawbale delivery was delayed and I planned to build the cabin within a few days with sun and no rain, so I don't have to cover up the unfinished construction.
2014/09/24: PlanningSome notes of mine on paper (also for my own reference):  Rough sketch of cabin 2014/11/03 09:39 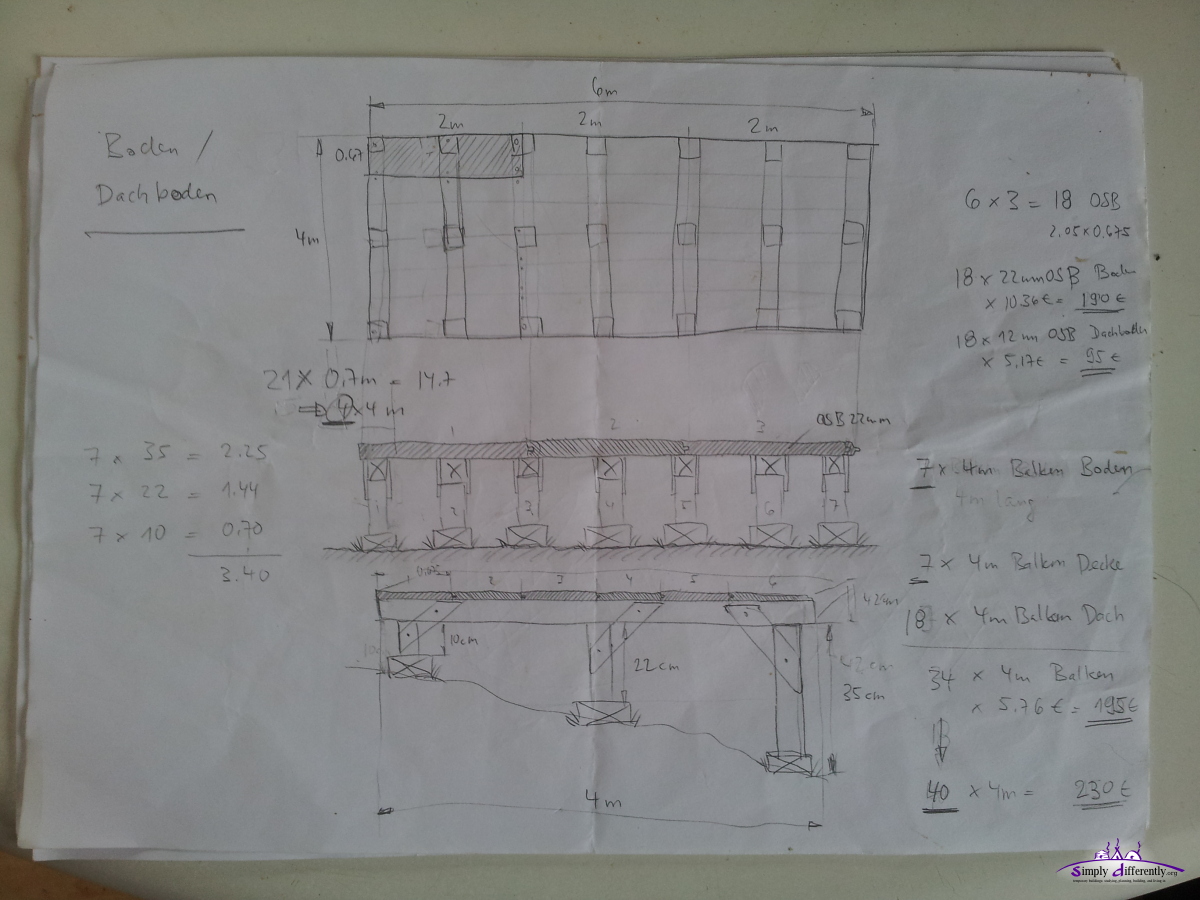 Some details of floor support 2014/11/03 09:39 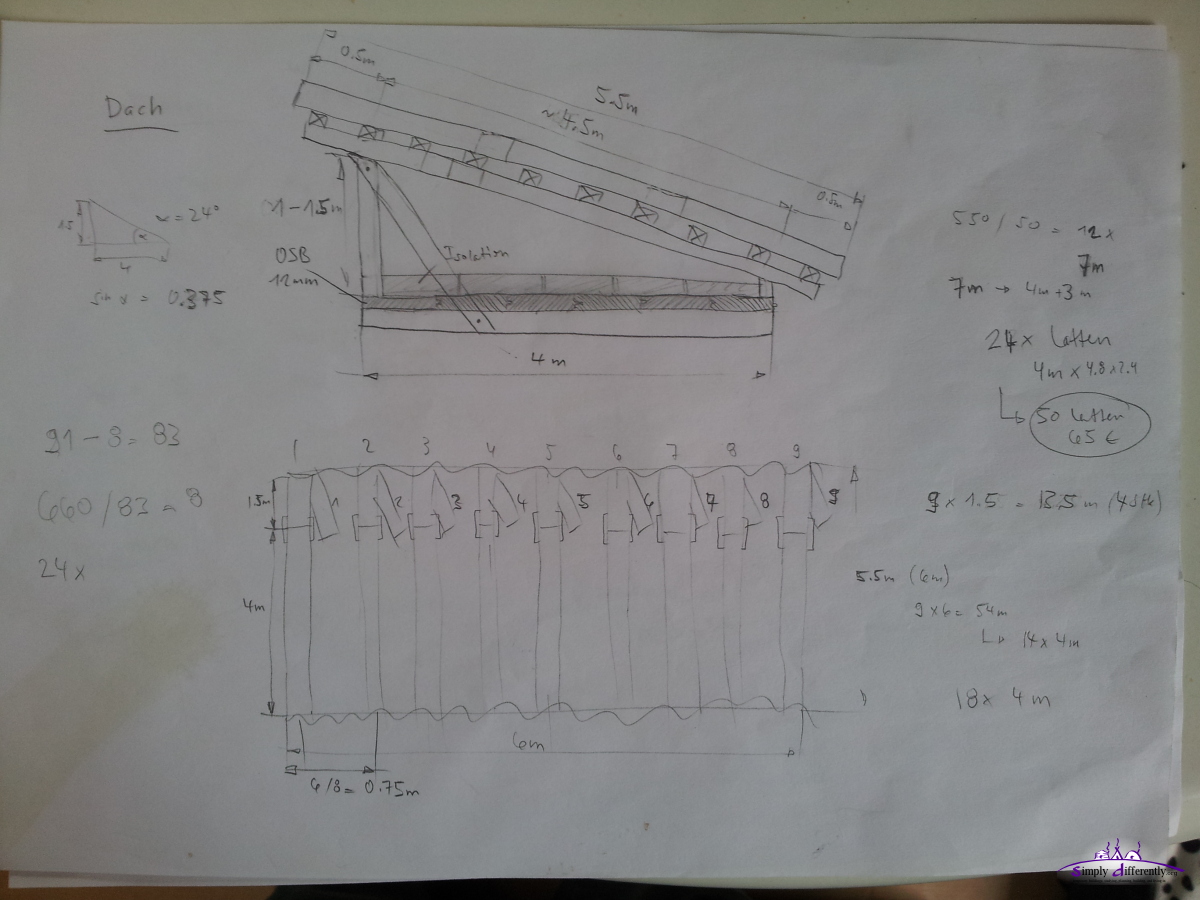 Single slide roof sketch 2014/11/03 09:40 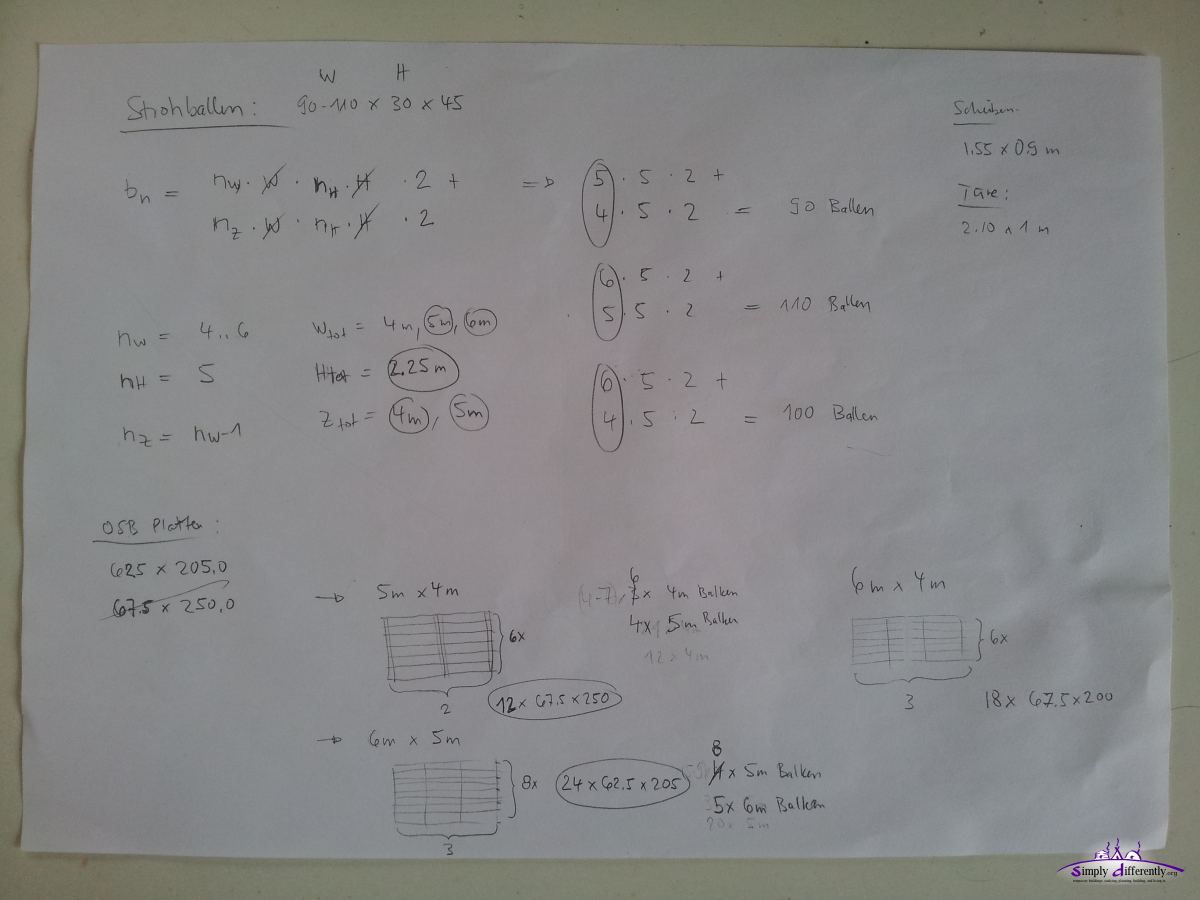 Optimizing size of cabin based on strawbale size & OSB size 2014/11/03 09:40 and electronic counterpart: 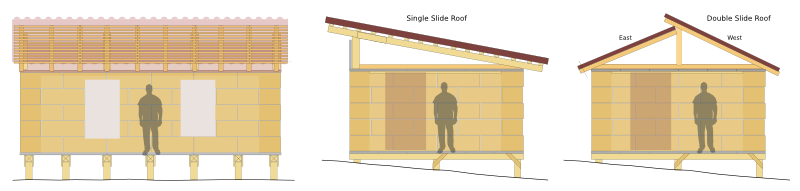 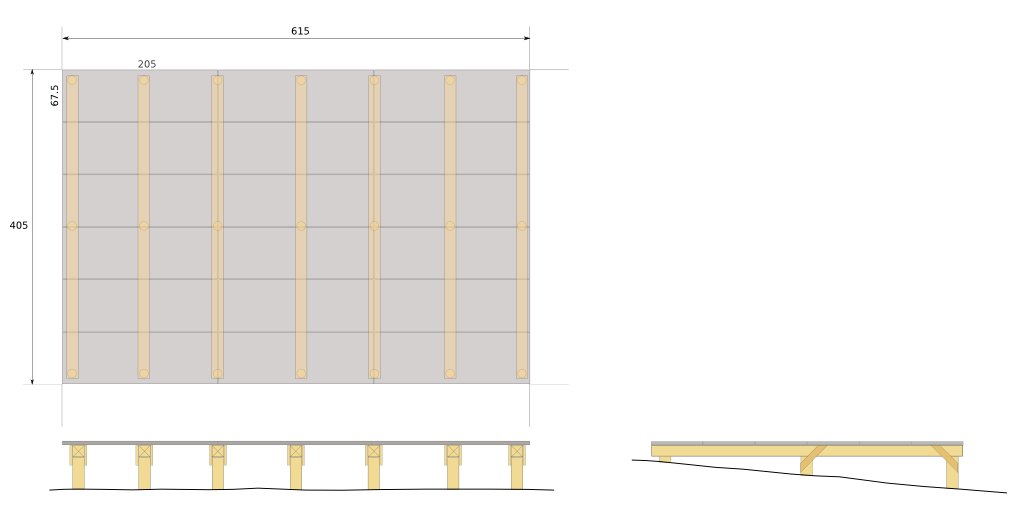 Base/Floor 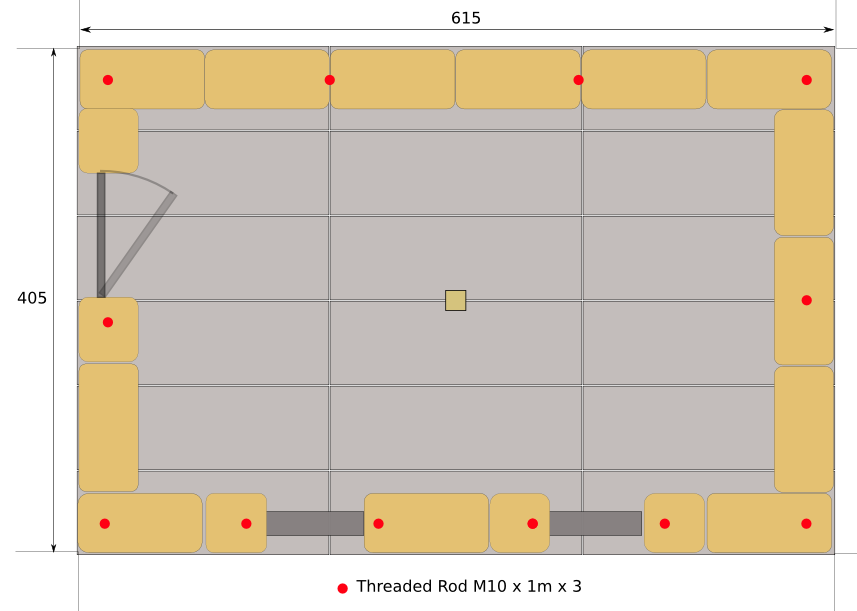 Floor 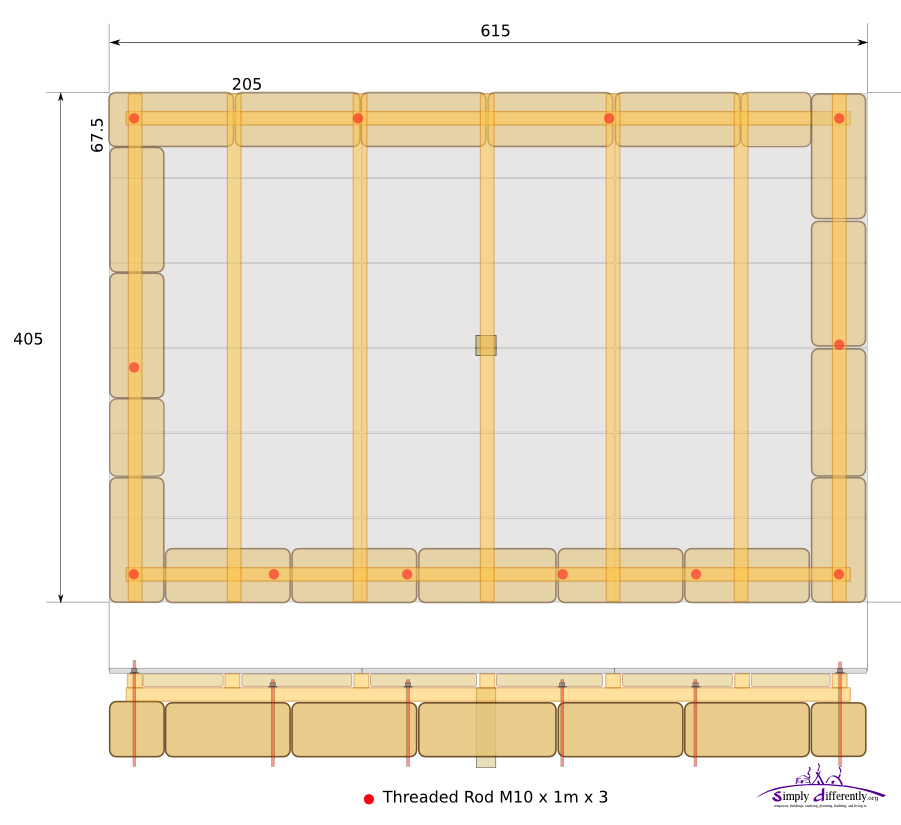 Ceiling 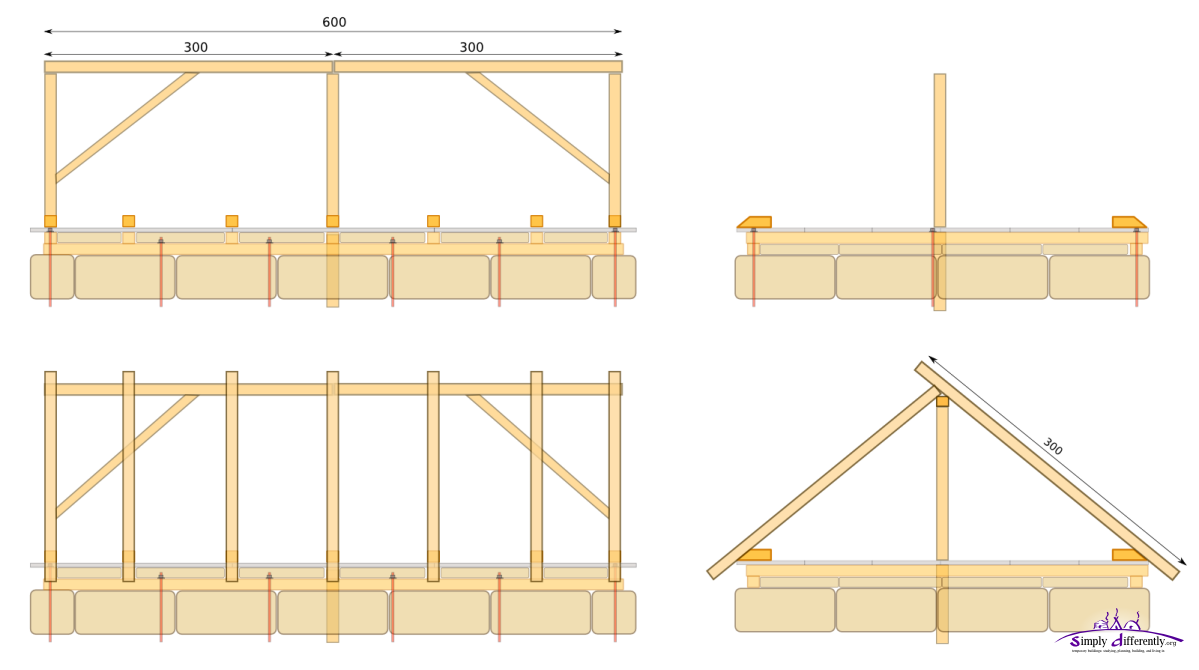 After some pondering I defined the base or floor size based on the OSB and main beams which are 4m long, which made the depth, the width I came up 3x OSB length-wise 3x 2.05m = 6.15m and 6x 0.675m = 4.05m - perfect. Content:
|


| Home | · | About | · |  Tipi | · |  Yurt | · |  Dome | · | Features | · | Gallery |


Creative Commons (CC) BY-SA-NC 2005-2017, developed, designed and written by René K. Müller
Graphics & illustrations made with Inkscape, Tgif, Gimp, PovRay, GD.pm
Web-Site powered by FreeBSD & Debian/Linux - 100% Open Source