
|
Geodesic Dome Diarywritten by Rene K. Mueller, Copyright (c) 2007, 2014, last updated Tue, January 20, 2015 20. 2. 2007: Planning Pitch Up, Take Down & Storage
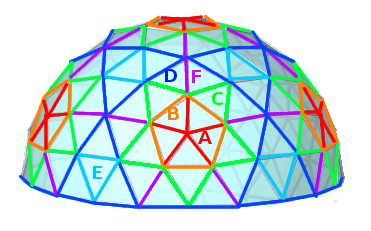
This way I need 10 + 5 + 1 = 16 screws per composition (6x 16 = 96 screws), the final dome requires only 91 screws as common edges reduce those 96. The main advantage is obvious: I only compose once 250 struts in 6 compositions, once done, I pitch up or take down only 6 compositions (which are expected easy to handle by a single person) plus 10x 3 E triangles. The estimate height of A+B+C+D+F in my case ~ 2x (F+A) = 2 * (94.5cm + 80.1cm) = ~3.00m 19. 2. 2007: Completed Struts
Now I need to wait for a few dry days, and a test to pitch the skeleton for the first time. I will then measure the diameter more exact in order to calculate the leaf-like cover I will make for it. I'm also pondering of reusing the rain cover and thermal insulation of the yurt:
so I could actually reuse the rain cover and thermal insulation of the yurt for the geodesic dome as well, terrific - yet, the rain cover won't fit as nicely as a leaf-like fitted rain cover, maybe I end up at least to compose the dedicated rain cover nevertheless. 11. 2. 2007: Adding Connectors
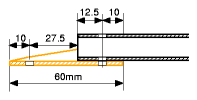
The dhole is 2.75cm, which adds to 5.5cm - hole to hole distance:
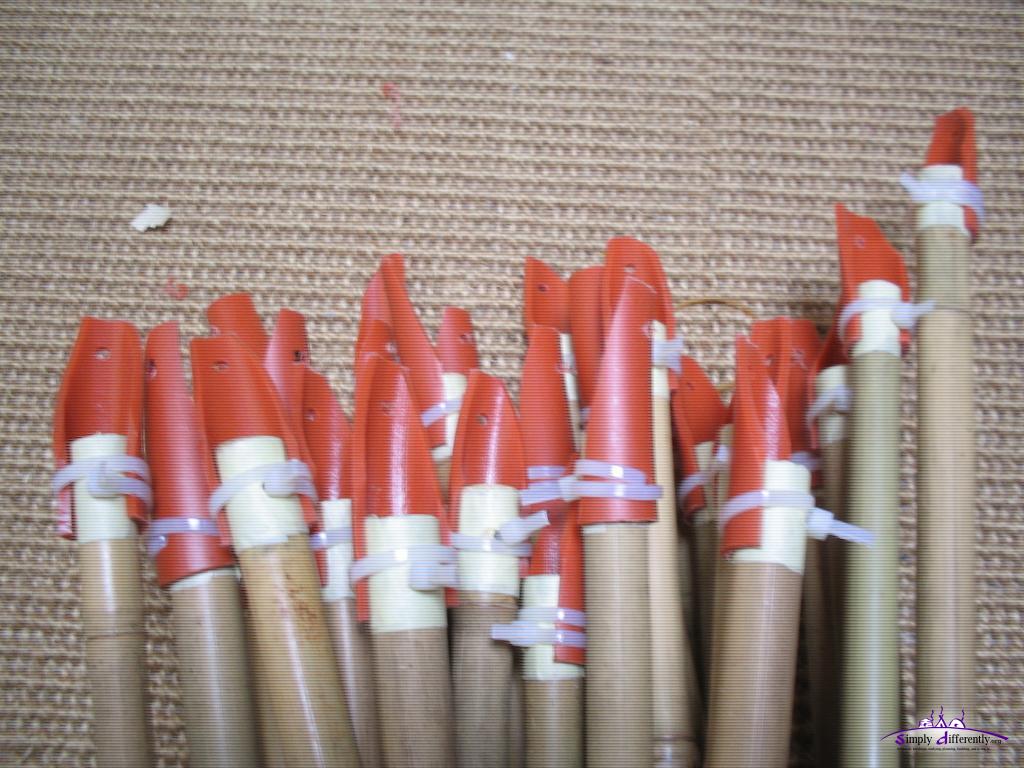
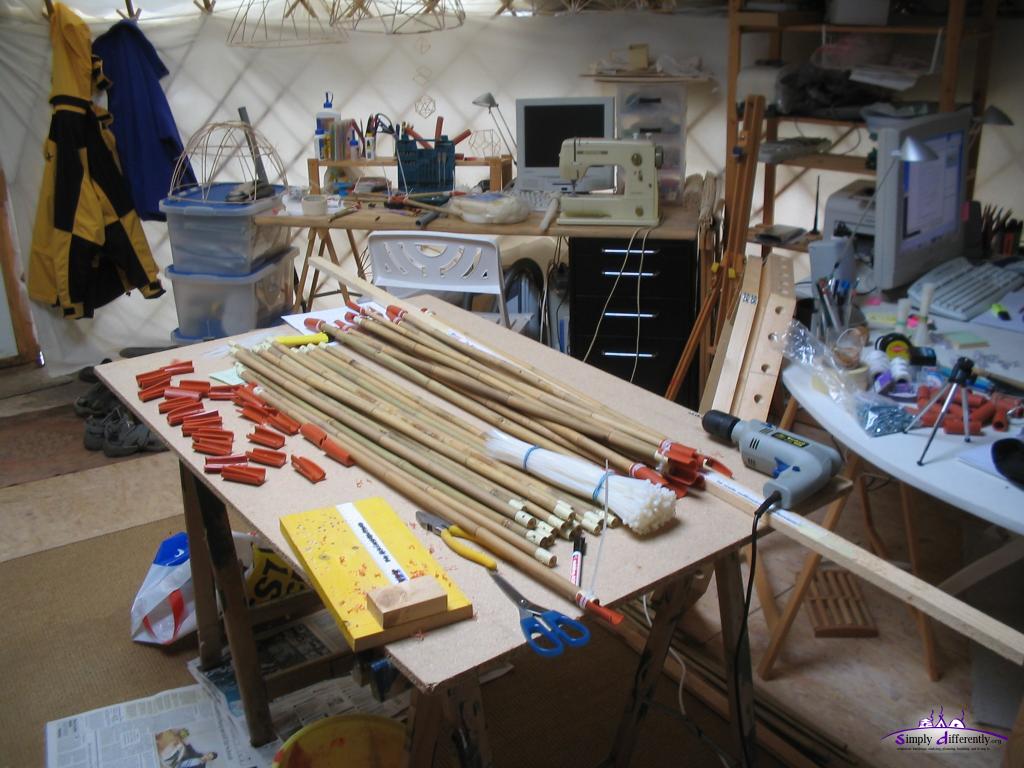
 Drilled hole into bamboo 2007/02/14 11:42 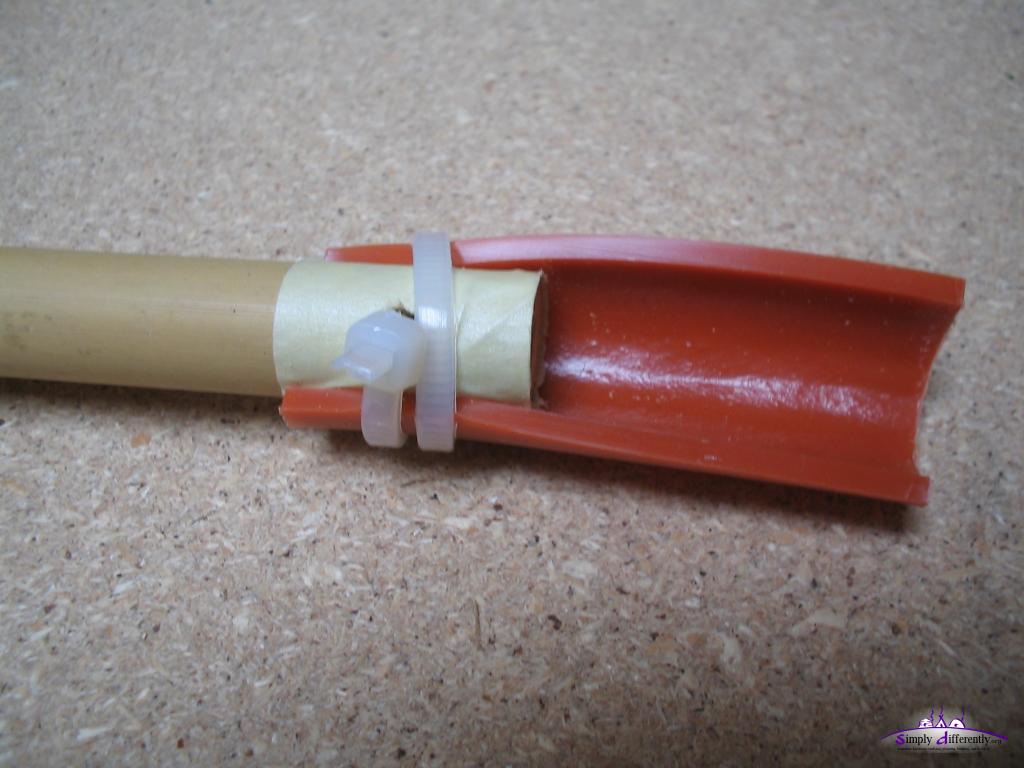 Drilled hole into connector, cable binder fixating connector with bamboo 2007/02/14 11:44 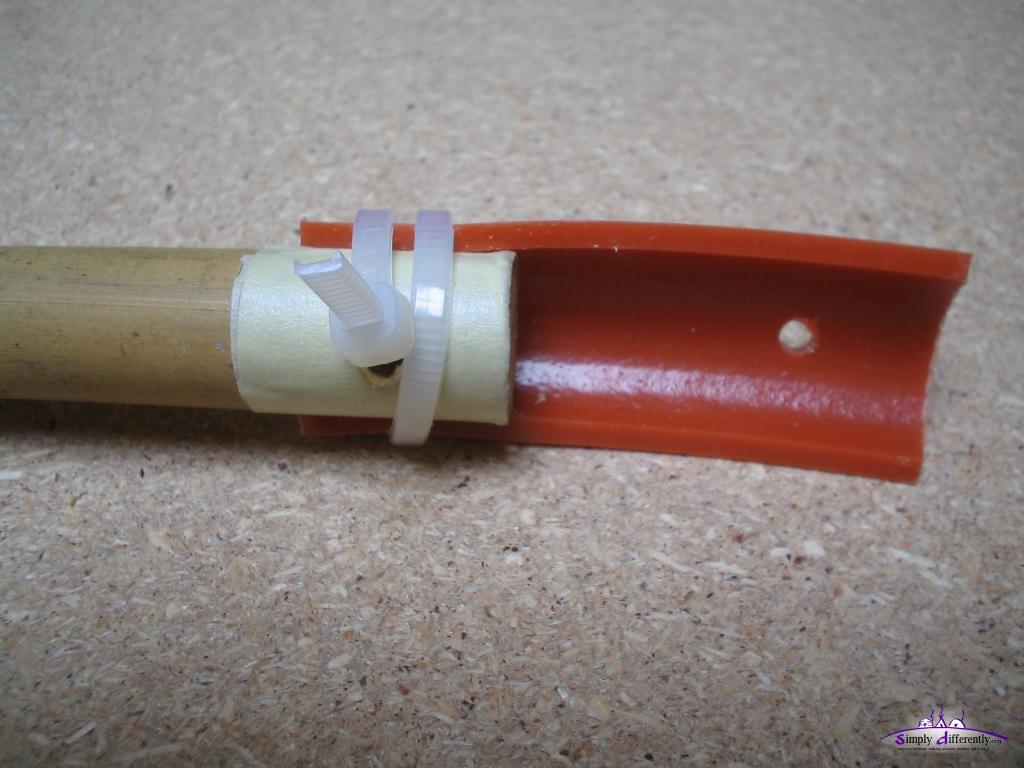 Remeasure entire strut (incl. connector), and mark hole-to-hole, and drill holes then 2007/02/14 11:46 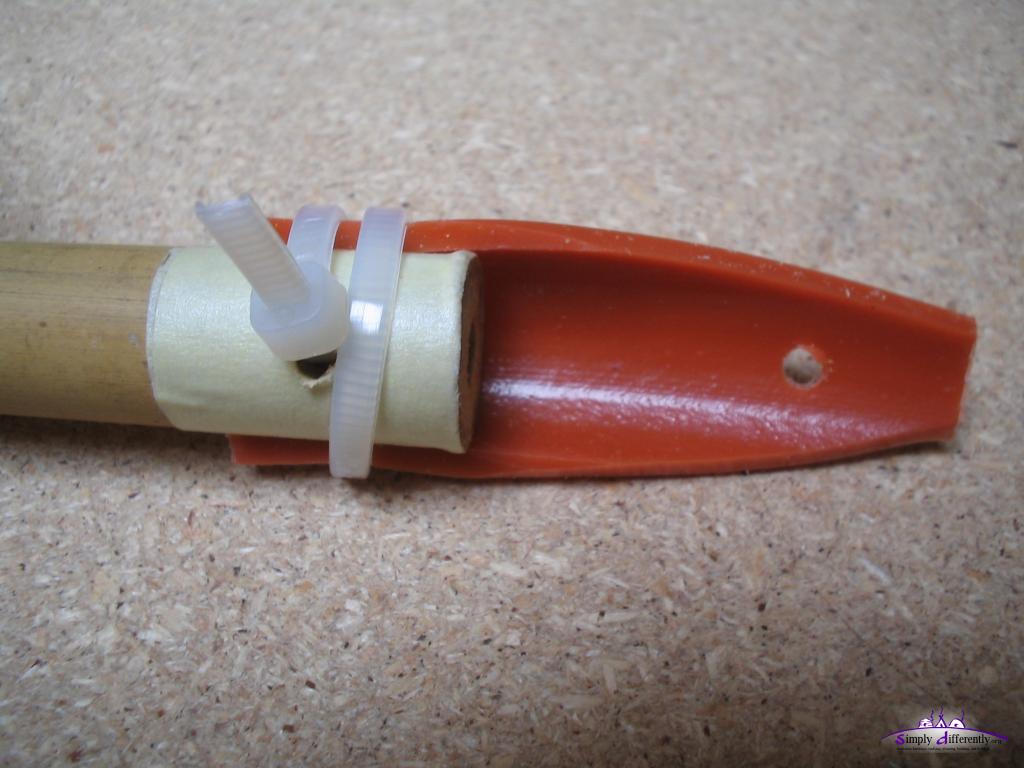 Cut pointing ends 2007/02/14 11:47 It's a bit time consuming this way (assembling 15 struts per hour), but this way I reclaim the preciseness I want to target. Even though the LDPE half pipe is 3mm thick, and most 6-way connectors add 6x 3mm = 18mm variance per 6-way connector, I don't want inpreciseness already in the struts add to the additional expected inpreciseness I cannot compensate that easy or well. 3. 2. 2007: Starting with Cutting StrutsAbout to cut 250 struts from apprx. 130 bamboo sticks. After 2-3 hours and almost no waste, 250 struts done. As next I tape the ends before drilling the holes on both ends, and then seal the cut and holes with a finish so no moisture can enter the bamboo. 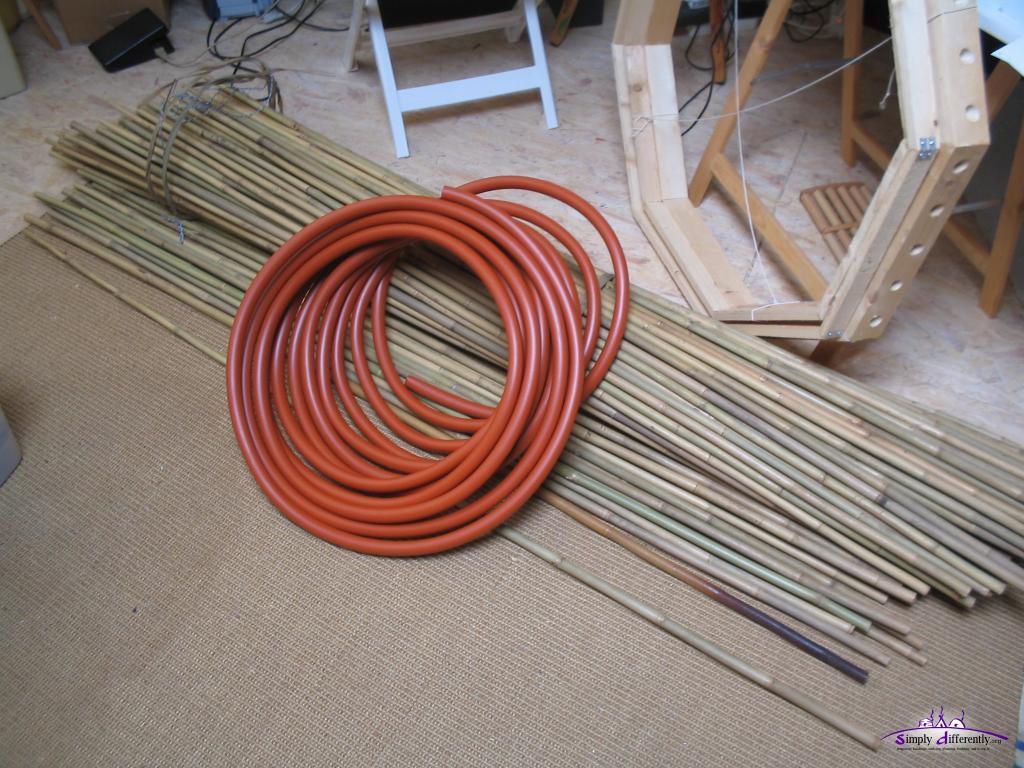 Aprx. 130 bamboo sticks (182-185cm long, 10-18mm thicker ends), and 15m LDPE pipe (18mm/25mm) 2007/02/03 11:04 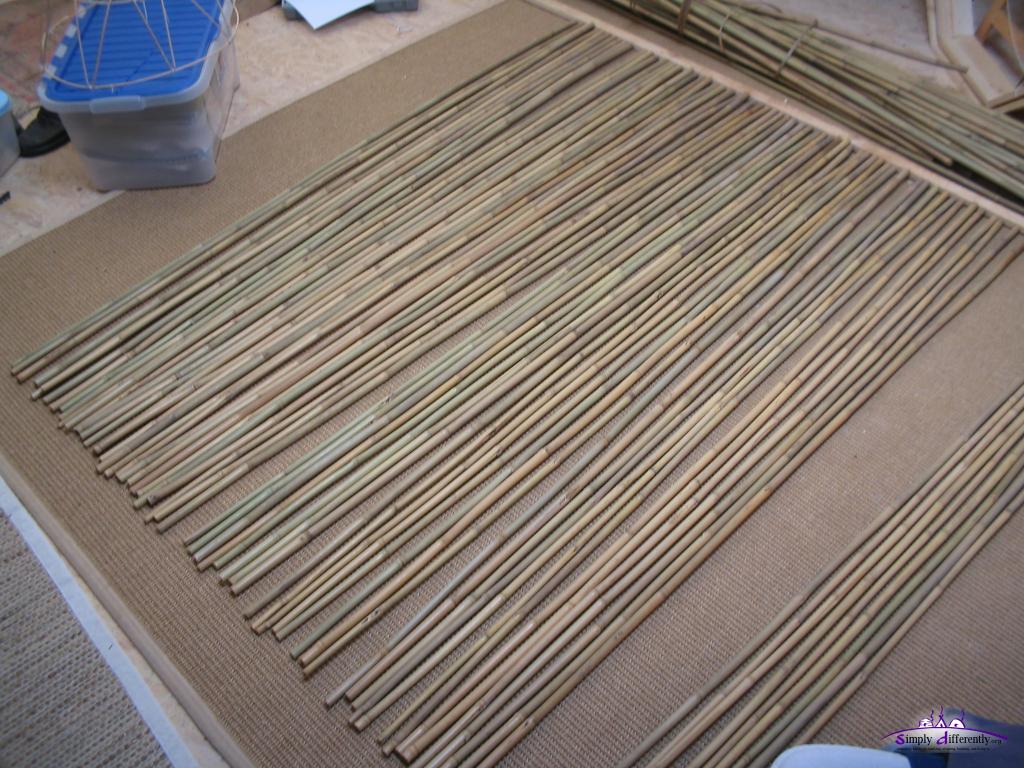 Laying out the 60 sticks, marking C+D 2007/02/03 12:08 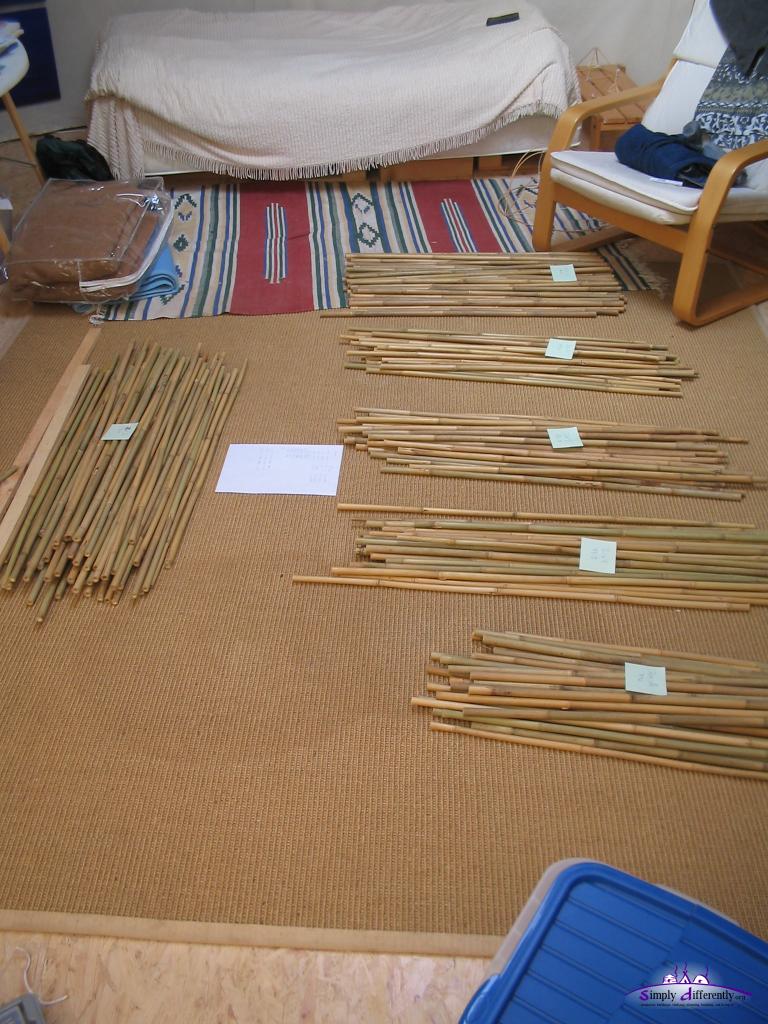 A, B, C, D, E and F struts cut 2007/02/03 14:04 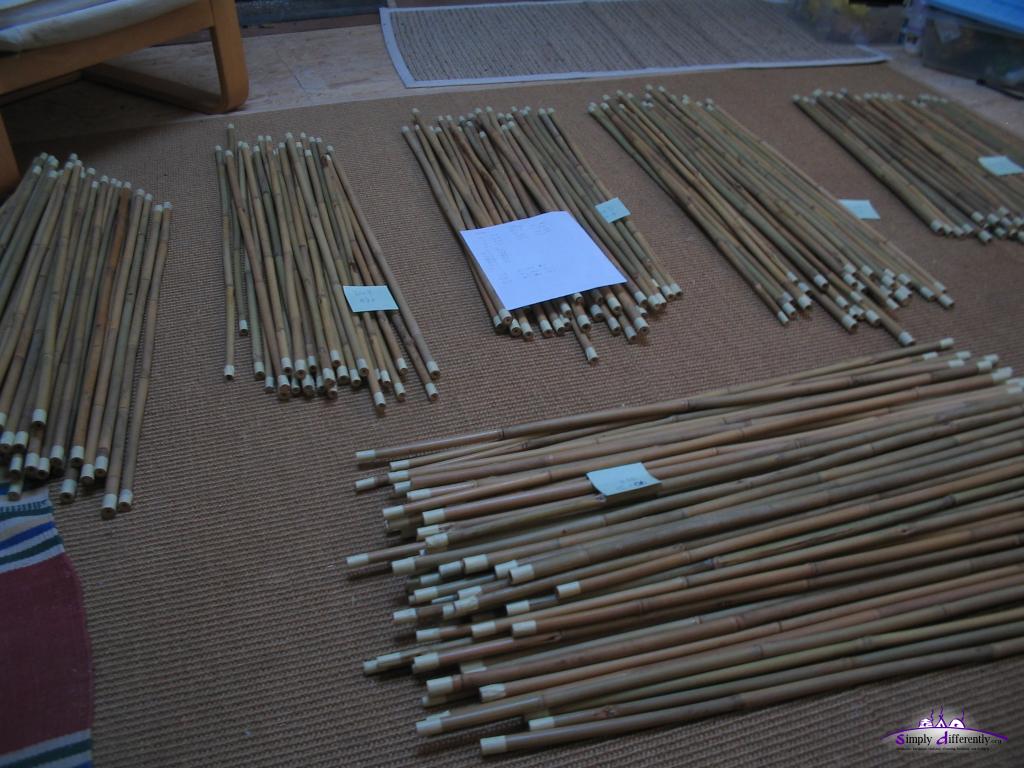 All endings taped (25mm tape) 2007/02/04 16:23 22. 1. 2007: CalculationAs I concluded in the notes on the 4V 4/8, 60x C+D, 5x D+D, 30x A+E, 30x B+F gives the least waste. Where as 2 D determines the longest. As I want to have it closely to 6.4m diameter as my yurt, and the connector tests I made, I have following:
Now, 2 D = 187cm is longer than my sticks, and I have a total of 139 bamboo sticks, all between 182-184cm, majority 182cm, a few 184cm. So, I'm making 10x D from one stick (wasting 10x 182-93.5 = 10x 88.5cm). So the final cuts (apprx. 5mm per cut away) are like this:
total 60+10+30+30 = 130 sticks (5 more than optimal), this gives me 9 sticks spare - which means I need to pay close attention when cutting and especially drilling the holes into the bamboo (only push drilling softly in order to avoid bamboo to split) and I will tape each bamboo end. The Connector The connector will be like this:
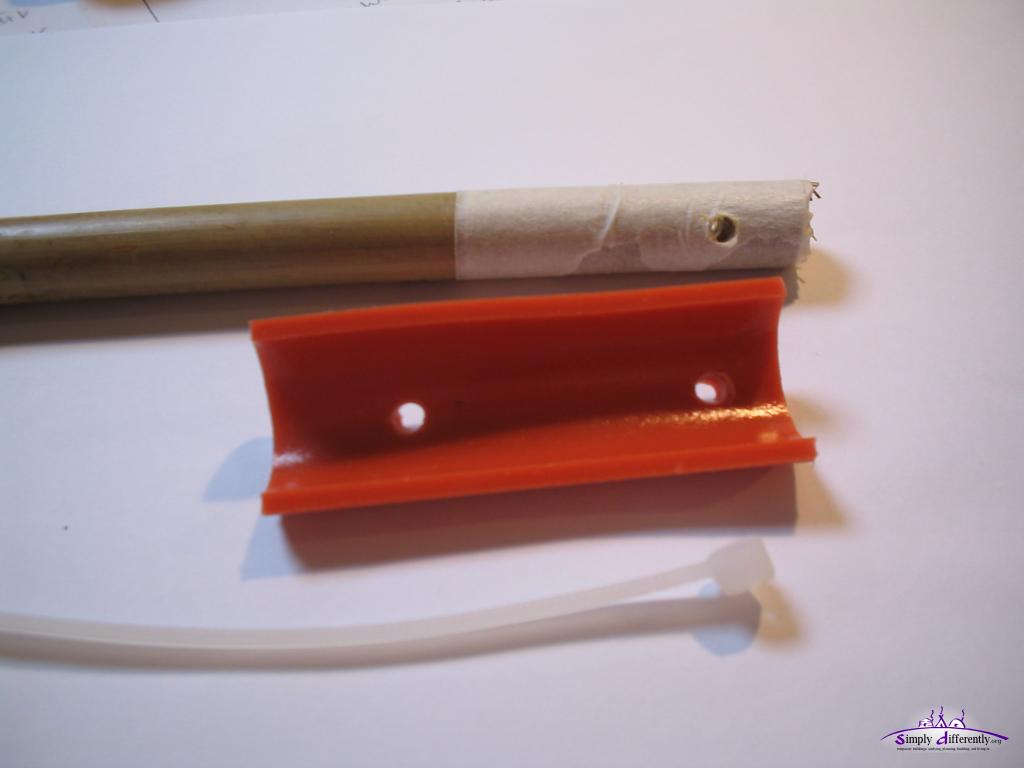 2007/02/02 10:58 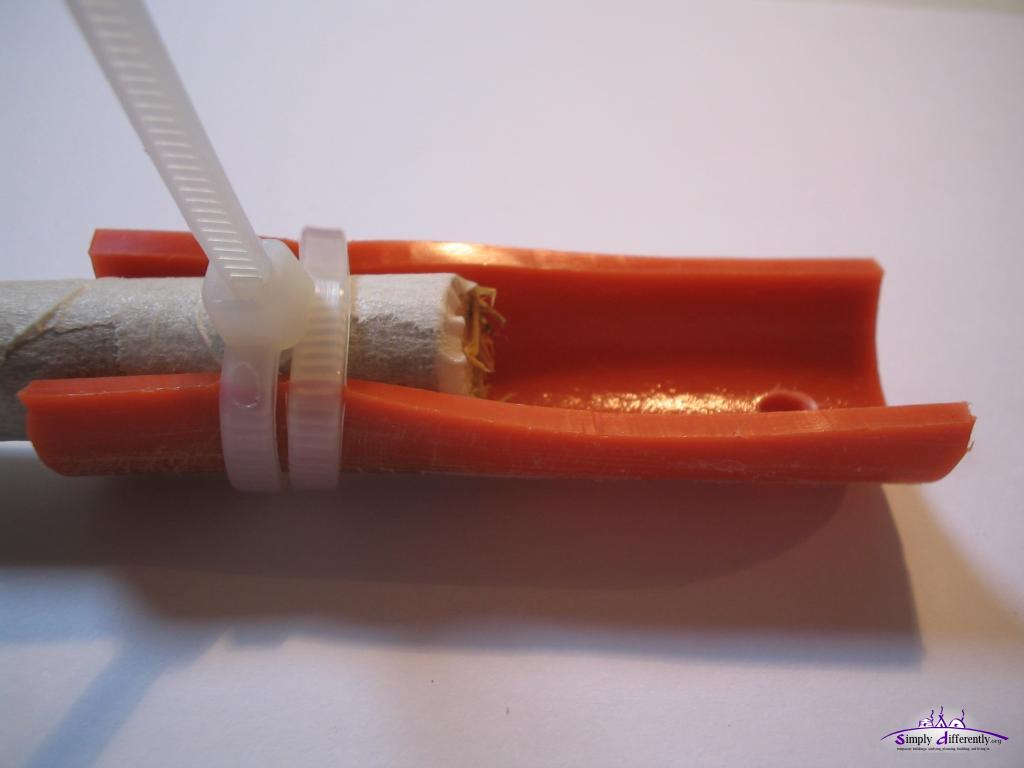 2007/02/02 11:00  2007/02/02 11:04 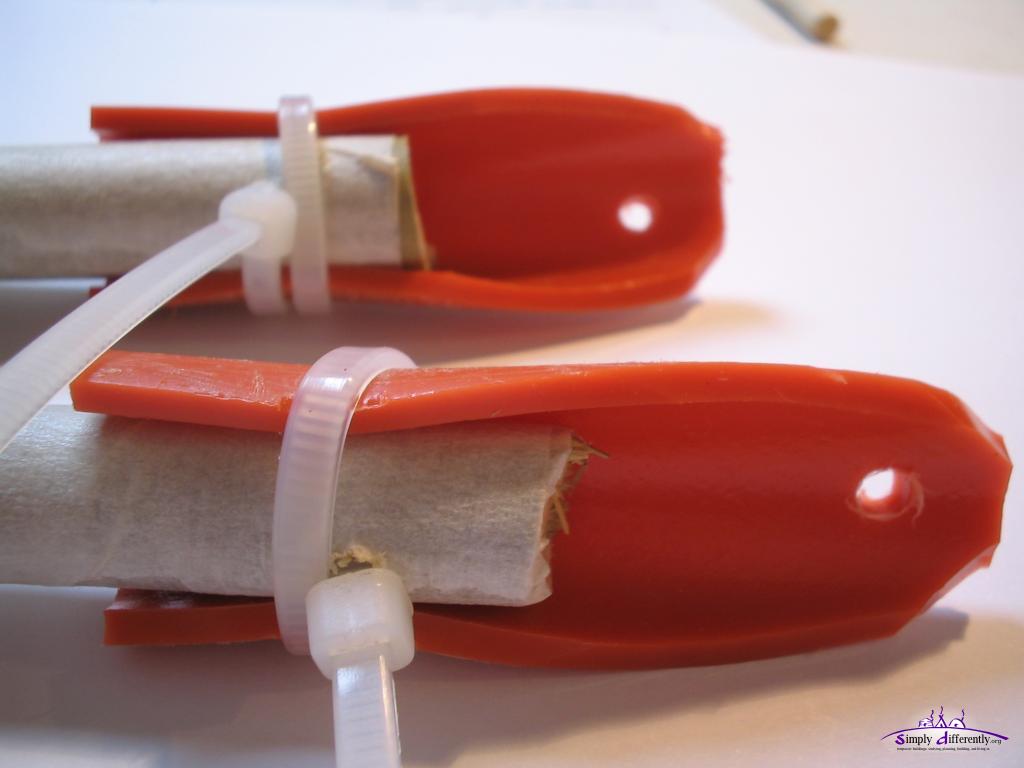 2007/02/02 11:06 Since I have 250 sticks, with 500 endings, and I use half pipe, I require 500/2 * 0.06m = 15m pipe, inner diameter 18mm, 3mm thick therefore 24-25mm outer diameter. The Door
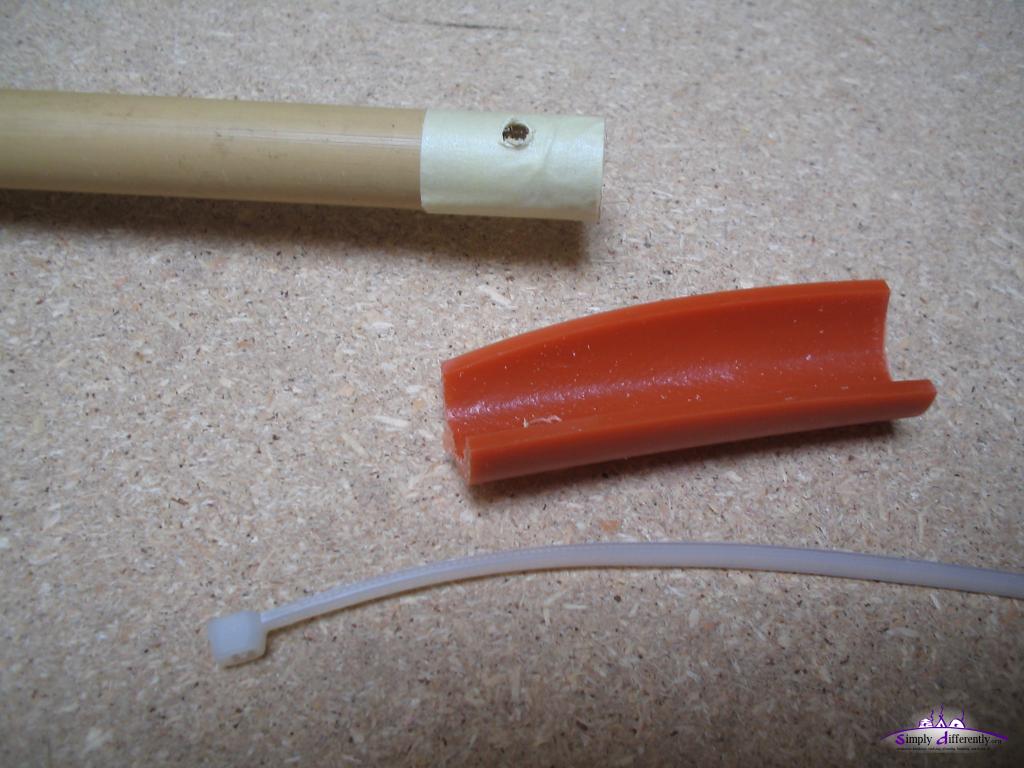
Not yet decided which door option, most likely yellow option. The pink and green option are too low. I make the final decision once I put up the skeleton and tried out which one is best. 21. 1. 2007: Tests with LDPE PipeI realized I only need a half pipe, and thereby don't need to squeeze the pipe together, but stretch open the half pipe, also this way save further material. 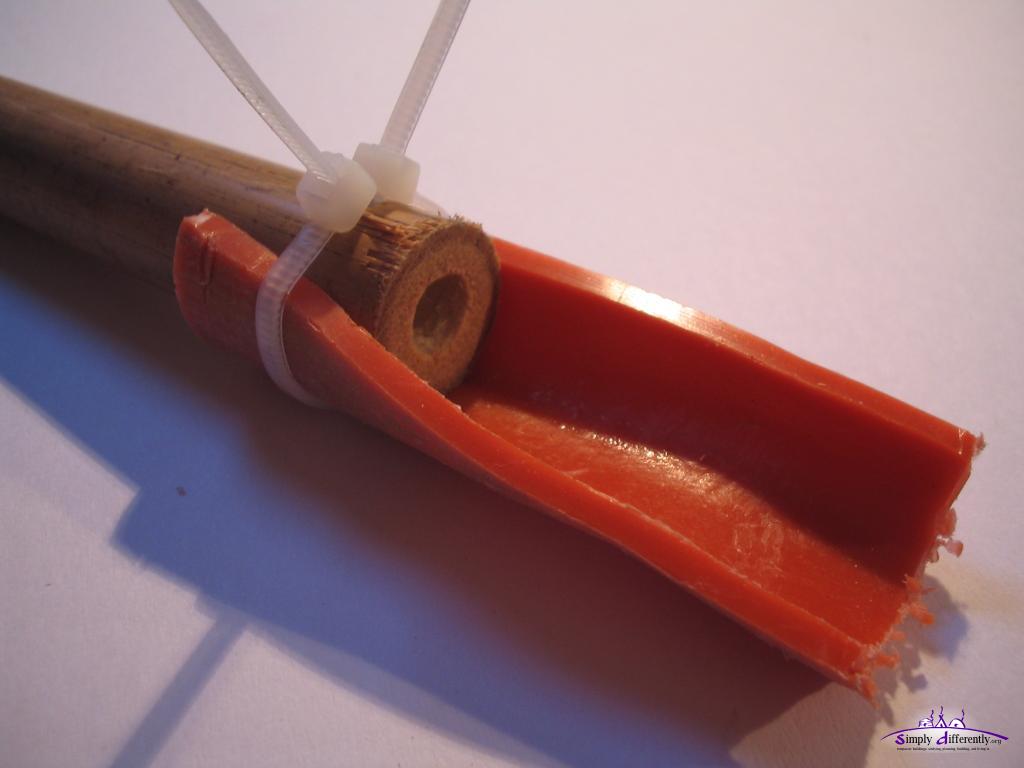 LDPE half-pipe with 2 cable binders (1) 2007/01/21 15:32 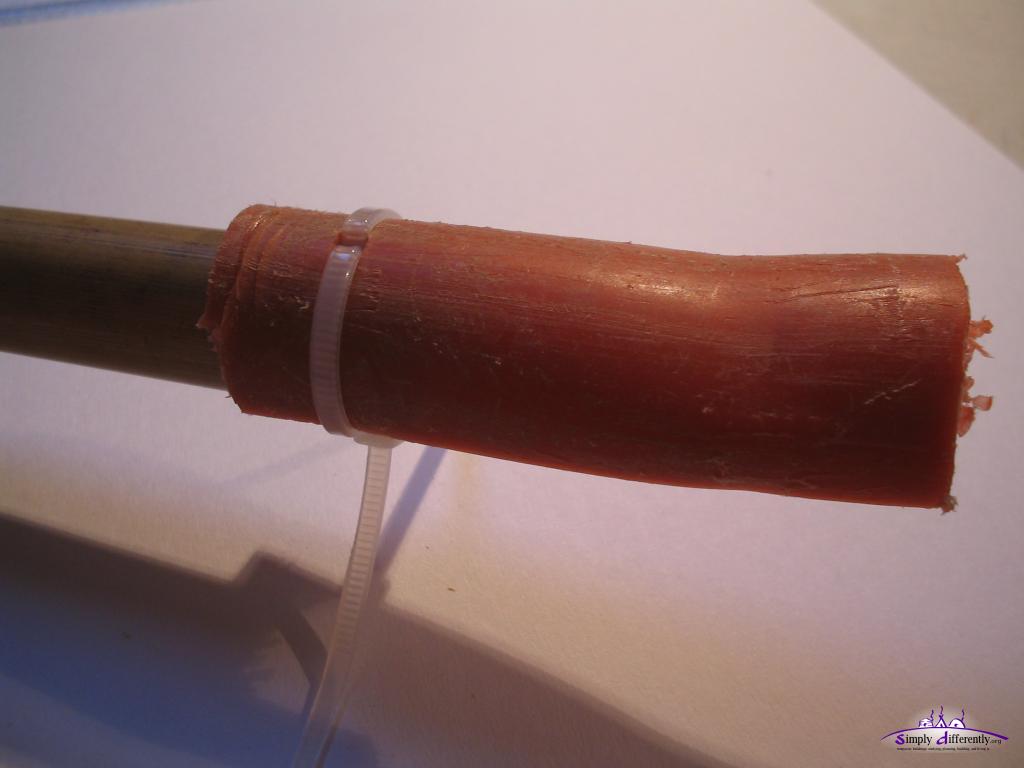 LDPE half-pipe with 2 cable binders (2) 2007/01/21 15:32 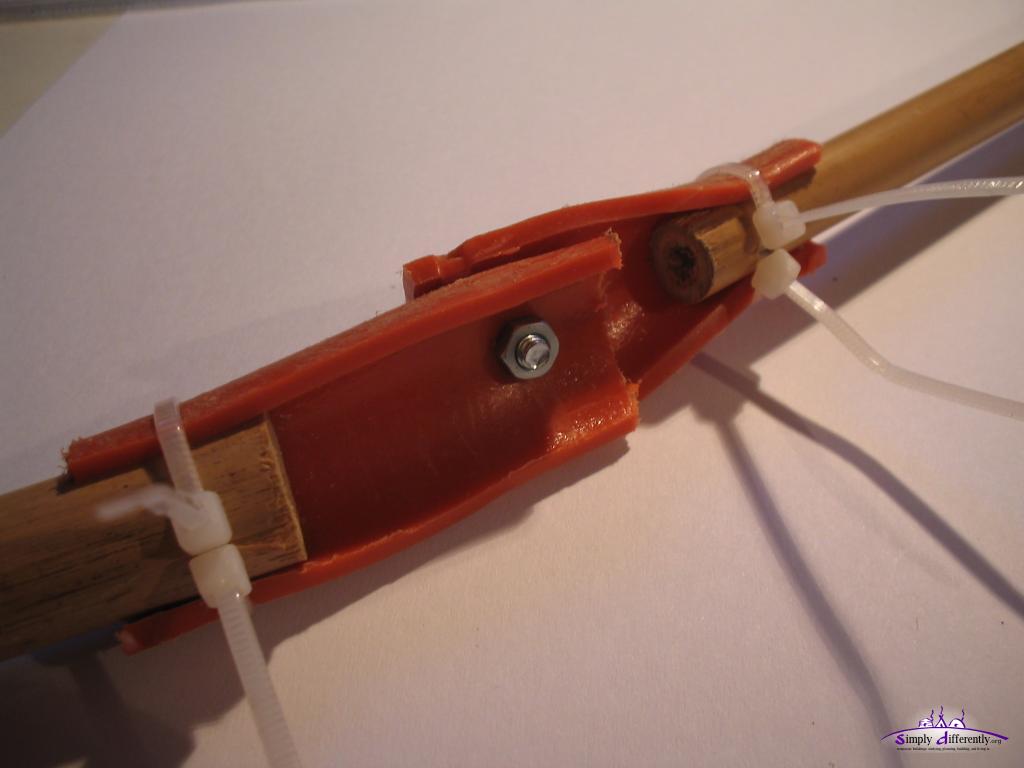 LDPE half-pipe with 2 cable binders, connecting (1) 2007/01/21 15:57 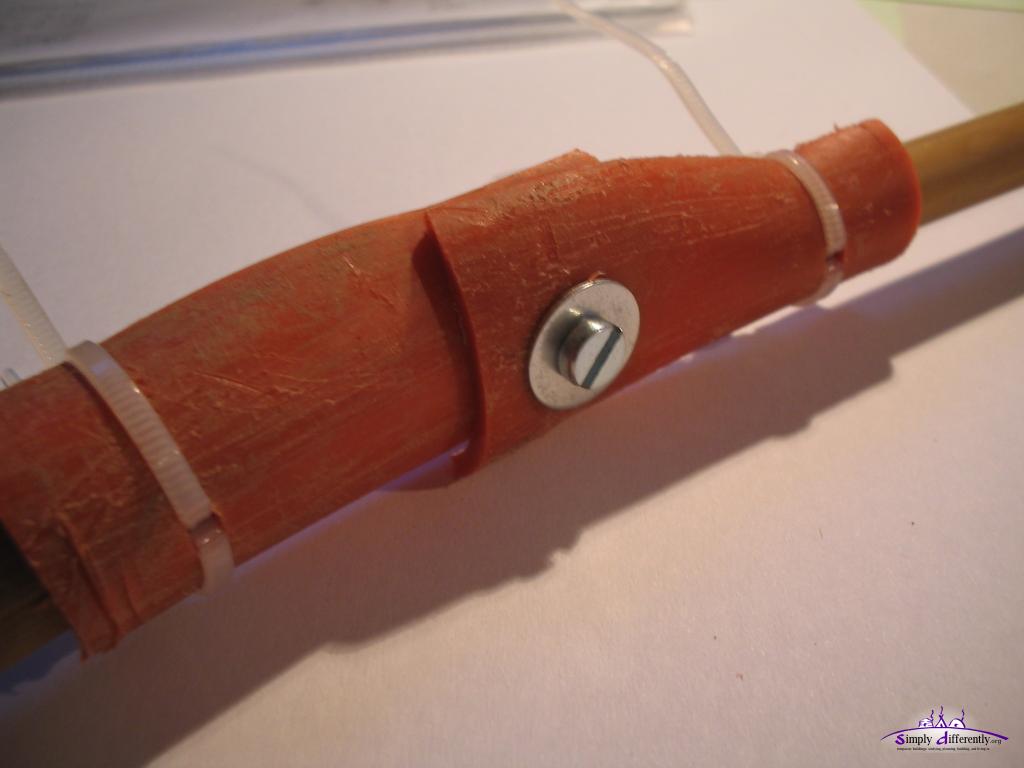 LDPE half-pipe with 2 cable binders, connecting (2) 2007/01/21 15:58 So far I made a 3mm holes through the bamboo and the half-pipe, and used two 3mm wide cable binders. Another more simple binding, with a longer cable binder 3mm wide and wind around 1 1/2 times. 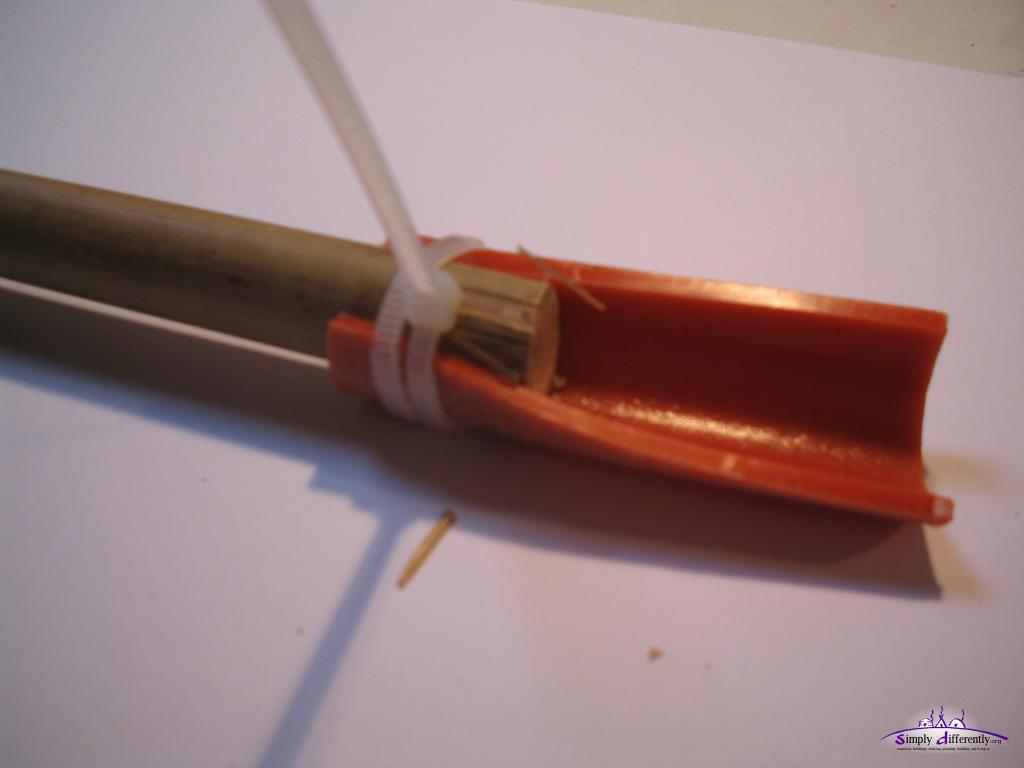 LDPE half-pipe with 1 cable binder (1) 2007/01/22 09:02 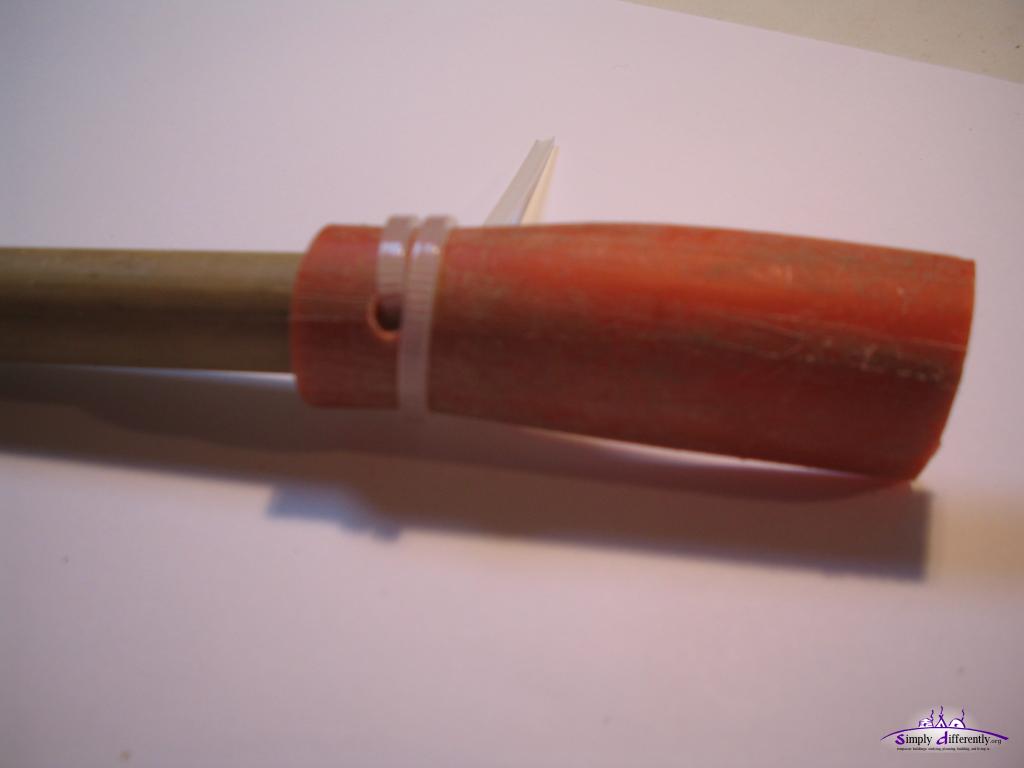 LDPE half-pipe with 1 cable binder (2) 2007/01/22 09:02 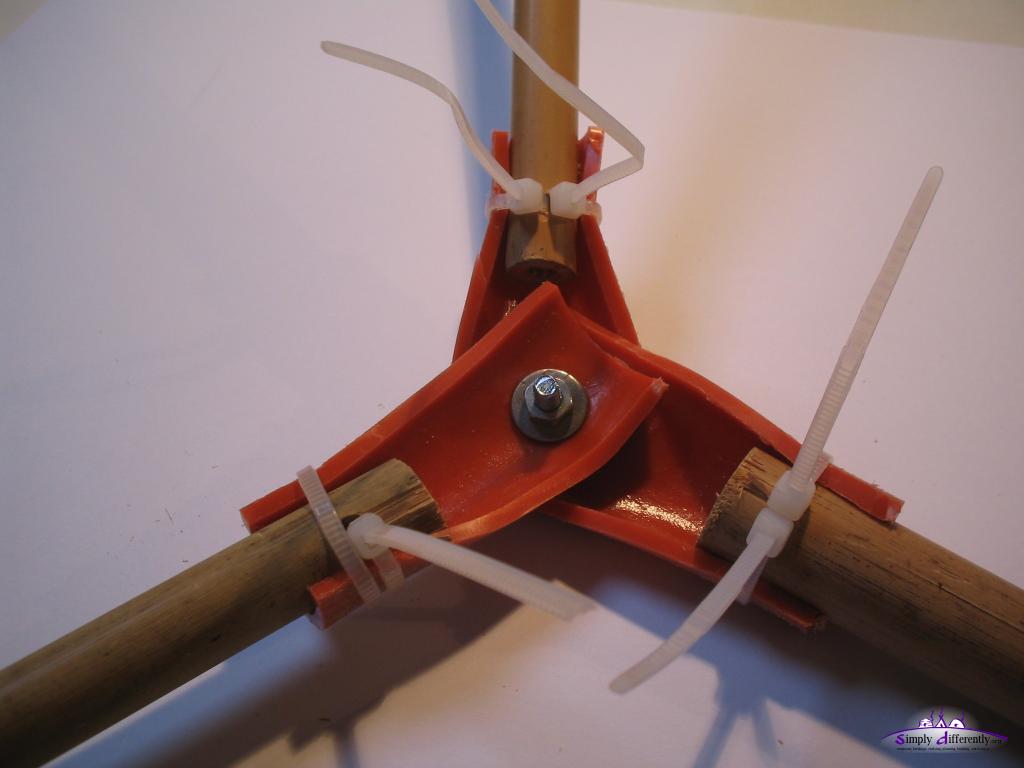 2007/01/22 09:08 With a M4 screw to connect them then.
Conclusion: using 1 cable binder approach, but with 4mm wide cable binder will do it. I will do some strength / stress tests with weights to see how much pull it can handle.
Content:
|


| Home | · | About | · |  Tipi | · |  Yurt | · |  Dome | · | Features | · | Gallery |


Creative Commons (CC) BY-SA-NC 2005-2017, developed, designed and written by René K. Müller
Graphics & illustrations made with Inkscape, Tgif, Gimp, PovRay, GD.pm
Web-Site powered by FreeBSD & Debian/Linux - 100% Open Source